8 9
www.evolutionpowertools.com www.evolutionpowertools.com
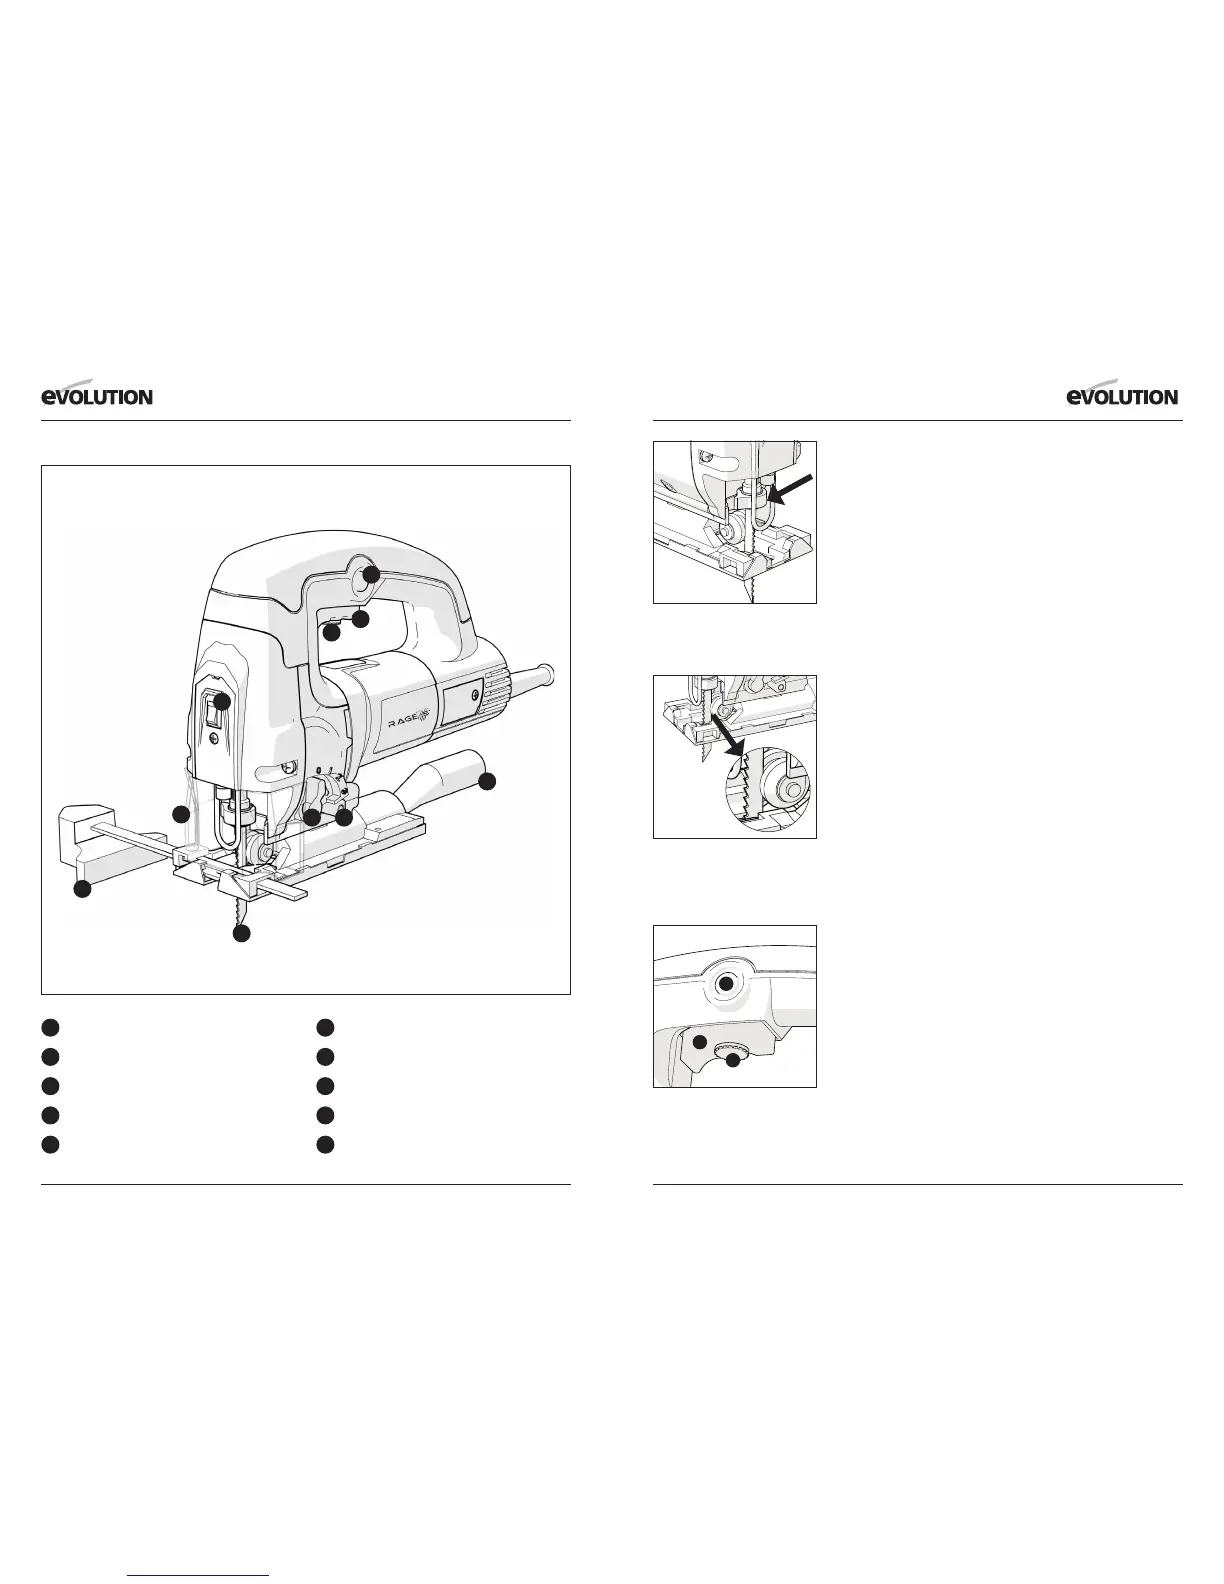
JIGSAW OVERVIEW
Cutting Blade
Trigger Switch
Locking Button
Rotary Control
Cutting Action Selection Switch
Laser Switch
Dust Extraction
Chip Guard
Parallel Edge Guide
Air Blower
OPERATION
1. INSTALLING OR REMOVING A BLADE (Fig. 1)
WARNING: The jigsaw must be disconnected from the power
supply and the blade must not be facing the operator when installing
or removing the blade.
Installation:
• Check that the jigsaw blade is of the correct type.
• Insert the blade into the chuck ensuring that the blade teeth face
forwards.
• Rotate the chuck locking collar forward and slide the jigsaw blade
fully ‘home’ into the chuck. Ensure that the ‘T’ bar of the bayonet
tting is fully engaged within the chuck. (Fig. 1)
• Release the chuck locking collar.
• Check to ensure the blade is securely gripped by the chuck.
• Check to ensure that the back of the blade has engaged into the
groove in the guide roller. (Fig. 2)
Removal:
Note: A recently used blade can be very hot. Allow such a blade to
cool down before attempting to remove it from the machine.
• Disconnect the machine from the power supply.
• Set the Cutting Action. Selection Switch to position 0.
• Rotate the chuck locking collar forwards.
The blade will automatically eject from the machine.
Note: The blade may eject from the chuck with some force. Ensure
that the ejecting blade will not strike any nearby surface, bystander
or animal. If possible eject a used blade directly into a scrap
recycling bin.
2. ON/OFF TRIGGER SWITCH (Fig. 3a)
This tool is tted with a variable speed Trigger Switch that delivers
higher speed as the trigger pressure is increased.
EXPLANATION OF Fig. 3a NUMBERS:
1 = TRIGGER SWITCH
2 = LOCKING BUTTON
3 = ROTARY CONTROL
Fig 1
Close up view of the quick t/
release chuck with the blade
inserted.
Fig 2
Close up view of the correctly
tted blade with the back of the
blade engaged into the groove
in the guide roller.
Fig 3 (a)
Close up view of Trigger
Switch, Locking Button
and Rotary Control.
1
1 6
6
2 7
7
3
3
8
8
4
4
5
9
9
5 10
10
2
3
1
2