4. Repeat steps 1-3 for the other outer rail.
For EX3000
1. Press upward on the locking tab at the rear end of the middle rail.
2. Push the middle rail back into the outer rail.
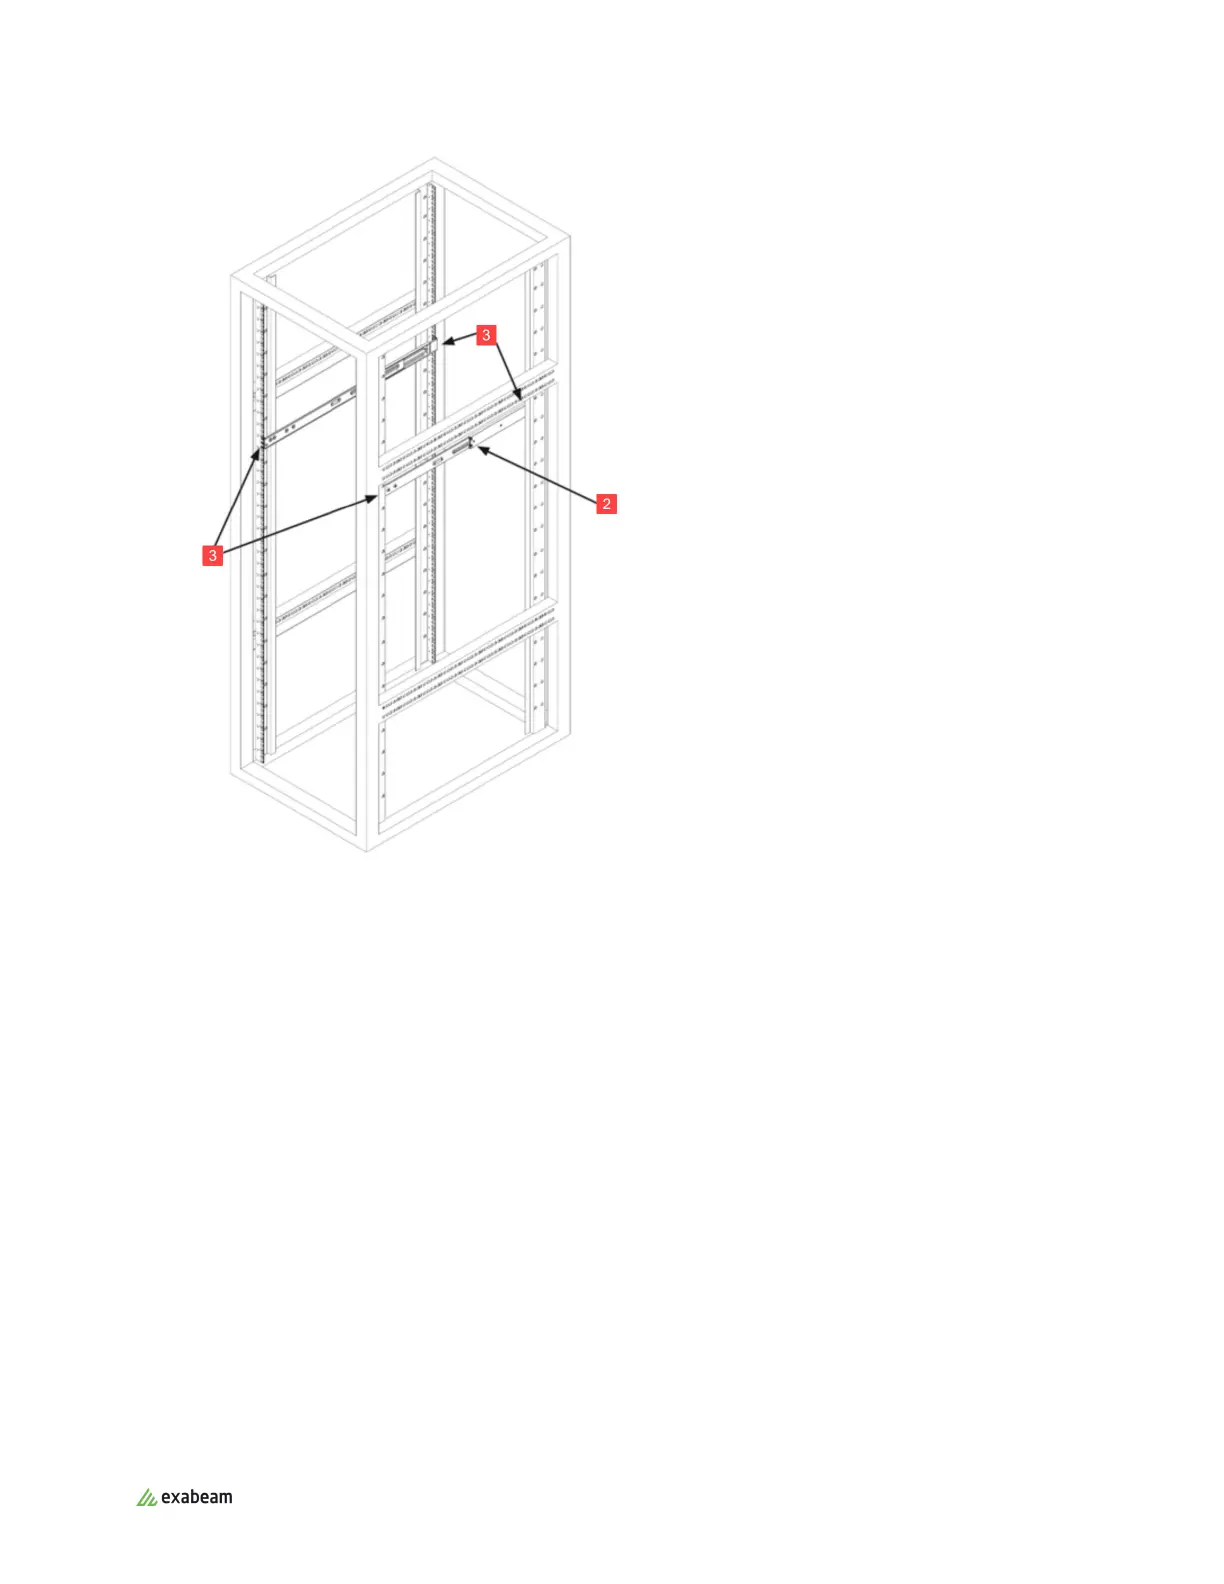
3. Hang the hooks on the front of the outer rail onto the square holes on the front of the rack. The
buttons on the top and bottom of the outer rail push against the tabs, while the hooks go through
the square holes. The outer rail takes up six tabs, starting and ending on a thin tab. If desired, use
screws to secure the front of the outer rails to the rack.
4. Pull out the rear of the outer rail, adjusting the length until it fits within the posts of the rack.
5. Hang the hooks of the rear section of the outer rail onto the square holes on the rear of the rack.
Take care that the proper holes are used so the rails are level. If desired, use screws to secure the
rear of the outer rail to the rear of the rack.
6. Repeat steps 1-5 for the other outer rail.
Rack Mounting Instructions
Exabeam Appliance Setup Guide - Version SMP 2019
Published Mar 15, 2021 10