9
4. Drill pilot holes of the appropriate diameter and depth for the
screws you will be using at all screw locations.
5. Firmly secure the Faceplate to the blank by driving screws
through all mounting holes in the Faceplate.
6. Fit the Spindle Washer onto the Headstock Spindle and then
thread the Faceplate with mounted blank onto the Spindle.
7. Release the Tailstock Lock Lever and slide the Tailstock until
the tip of the Live Center almost touches the blank. Press the
Tailstock Lock Lever to lock down the Tailstock.
8. Carefully turn the Quill Handwheel to advance the Live
Center. Once the tip of the Live Center makes contact,
continue tightening the Quill Handwheel to make sure
the Live Center is seated.
9. Loosen the Banjo Lock Lever and the Tool Rest Lock Handle.
Slide the Tool Rest Banjo into position, making sure that no
part of the workpiece will contact the Tool Rest once the lathe
is turned on. Lock the Banjo Lock Lever.
10. Adjust the Tool Rest up or down to your preferred height for
the task and engage the Tool Rest Lock Handle. Again, spin
the workpiece by hand to make sure no part of it will contact
the Tool Rest.
Maintenance
> Vacuum dust and debris from lathe regularly. Keep
Lathe Bed clean.
> If rust appears on cast iron Lathe Bed, carefully remove
with steel wool or other fine abrasive. Coat exposed iron
surface with Boeshield T-9
®
Rust and Corrosion Protection
to prevent rust from developing again.
> Before each use, check lathe components, including Drive Belt,
to ensure all are in proper working condition.
> Follow the manufacturer’s guidelines for proper use of any
rust prevention chemical. Dispose of any excess chemicals in
accordance with manufacturer’s instructions and as required
by law.
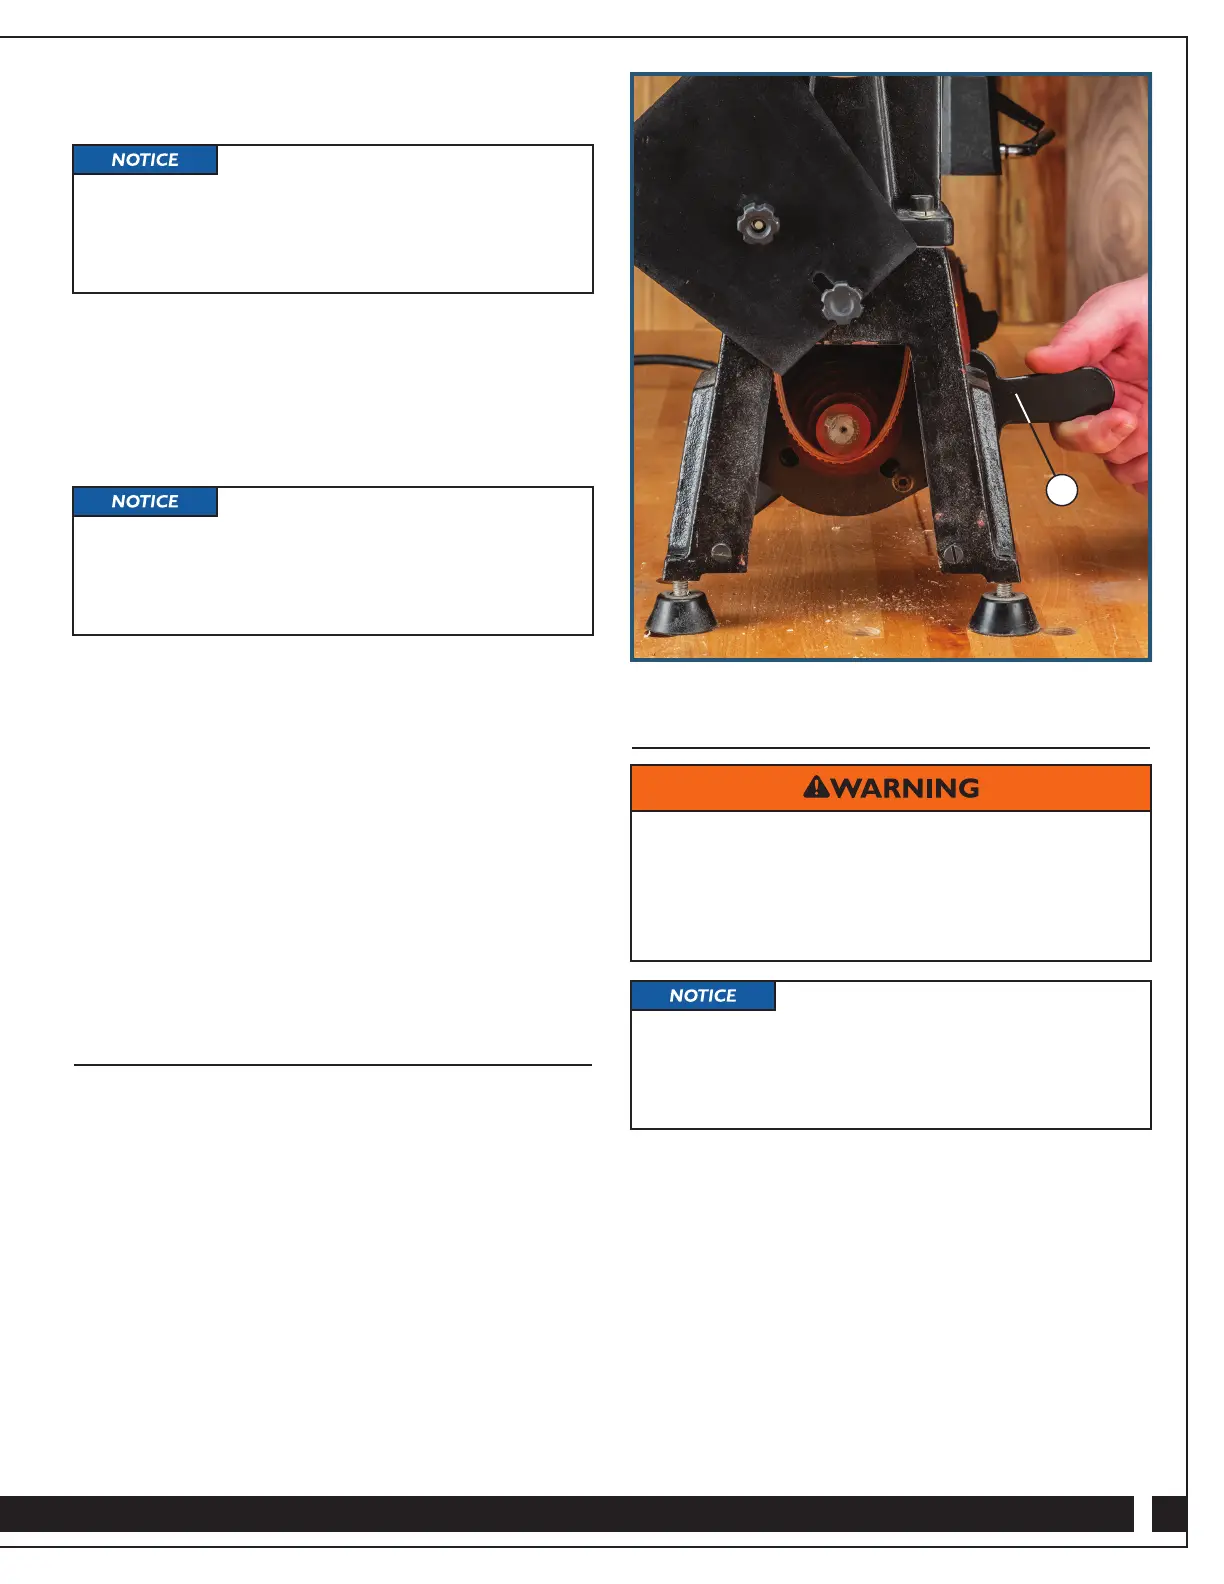
Replacing the Drive Belt
1. Loosen the Moving Knob (57), lift and swing the Side Belt
Access Cover (23) up under the Headstock Wheel (22) and
Tighten the Moving Knob to secure it there and provide
access to the Motor Pulley (29).
2. Follow the same process to swing the Rear Belt Access
Cover (20) up and secure it to obtain access to the
Drive Pulley (25).
3. Loosen the Belt Tension Lever Lock Handle (33) and lift the
Belt Tension Lever (31) to allow slack on the Drive Belt (26).
Fig. 3.
> Disconnect the tool from the power source before
servicing or before changing accessories.
> Always close and secure both the Side Belt Access
Cover and the Rear Belt Access Cover before turning
on the lathe.
Use steel pan-head or washer-head
screws to hold your blank to the Faceplate. The screws
need to be long enough to provide a strong bite on the
blank but shorter than the final depth of the recess you will
turn inside the bowl or platter. Typically, you want screws
at least 1" long.
Use the part numbers listed on the
Parts Diagram on pages 11 and 12 to identify parts
described in this section.
> Excelsior Mini Lathe Replacement Belt is available from
Rockler (29424, sold separately).
Use steel pan-head or washer-head
screws to hold your blank to the Faceplate. The screws
need to be long enough to provide a strong bite on the
blank but shorter than the final depth of the recess you will
turn inside the bowl or platter. Typically, you want screws
at least 1" long.
Fig. 3
31
 Loading...