13
G0938
G0945
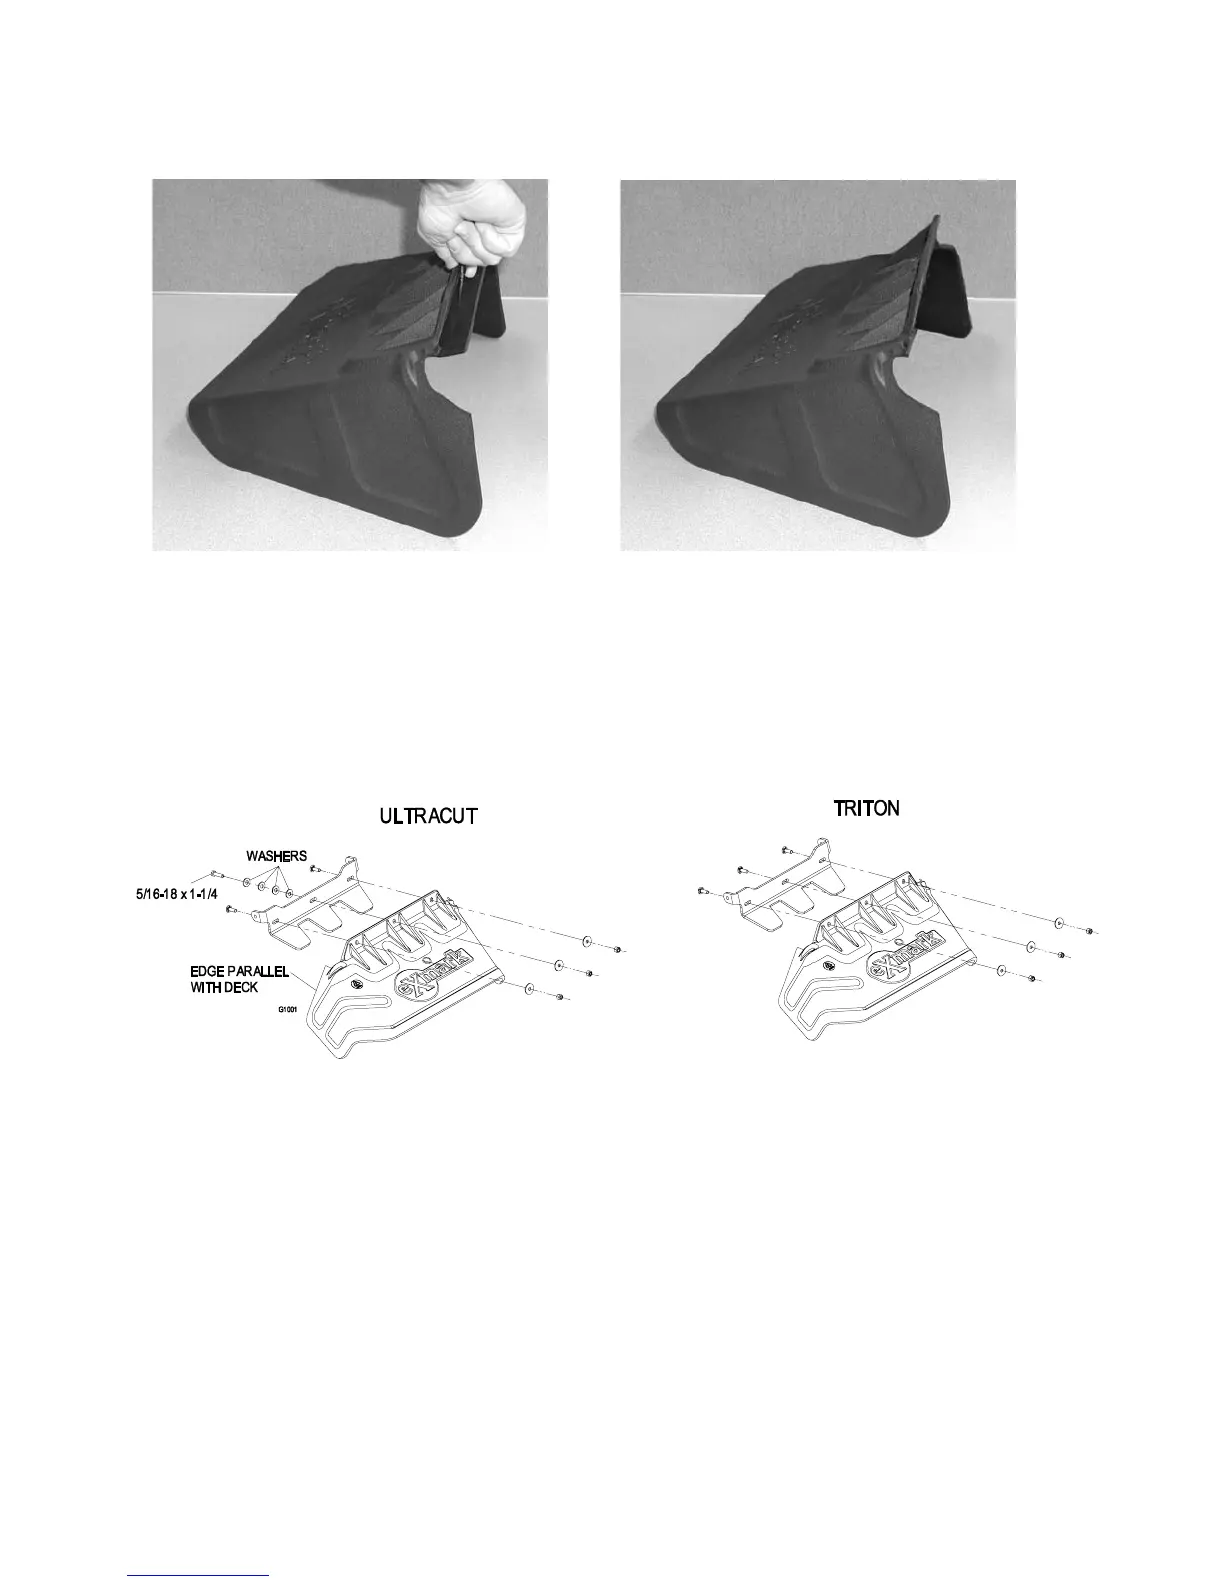
c) Remove remaining lip as shown in Figure 16C.
FIGURE 16C FIGURE 16D
CHUTE WITH LIP CHUTE WITH LIP REMOVED
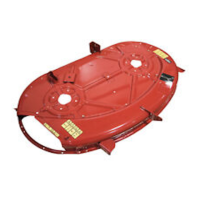
d) Using the existing hardware, reinstall the discharge chute bracket into the flexible
discharge chute as shown in Figure 17.
For UltraCut Only: Install 5/16-18 x 1-1/4 screw (item 20) and 3 or 4 washers
(item 6) in the center hole of the bracket as shown in Figure 17, so that the edge
of the chute will be parallel with the deck in the down position.
FIGURE 17
e) When installation is completed, rotate gate assembly (item 16) through its full
travel range and check clearance with discharge chute. Trim additional material
from discharge chute if necessary.
3.2.19 Reinstall the belt cover.