Werner Schnorrenberg - DC4KU www.dc4ku.darc.de 06.11.2021
3
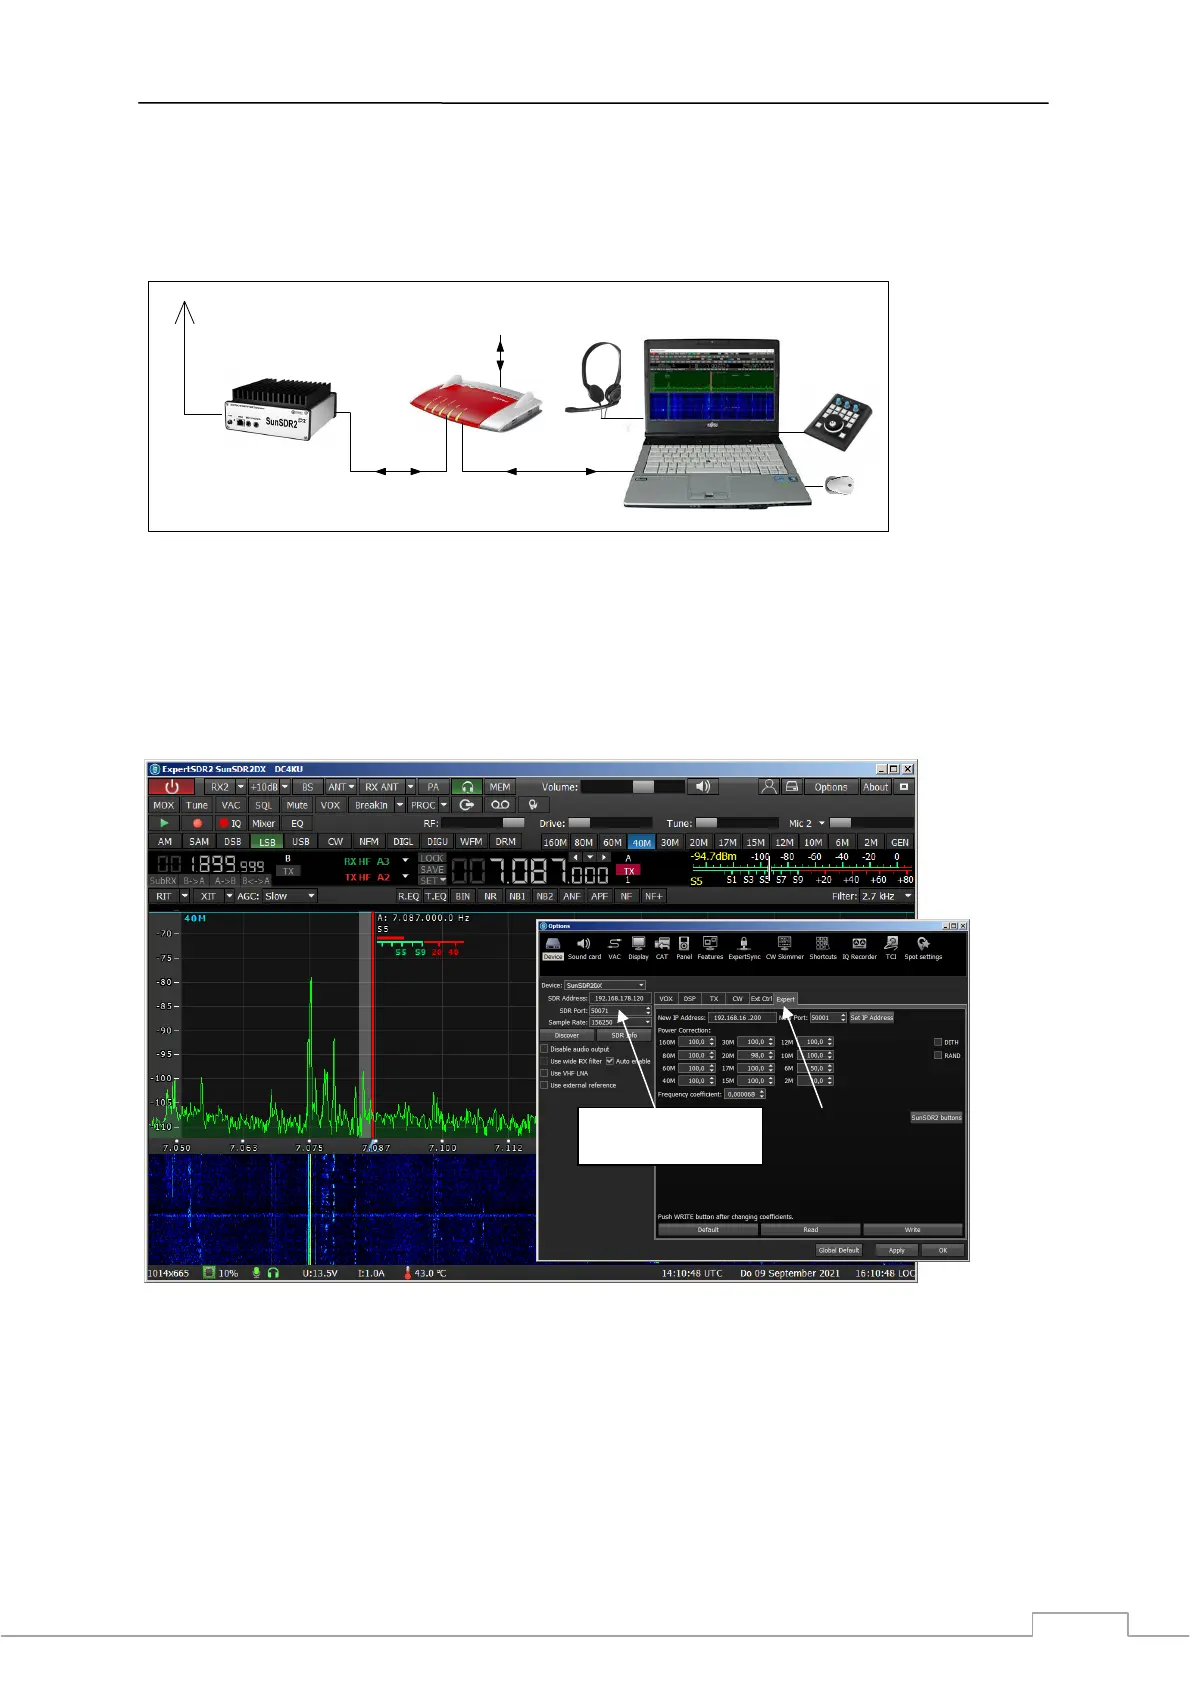
menu under Options -> Expert -> "Set IP Address", e.g. 192.168.178.120 and save this with Write ->
OK. If the preset "Port 50001" is already being used by the router for another application, enter a
free port here, e.g. Port 50071. Then switch off the SunSDR2 DX, disconnect it from the power supply
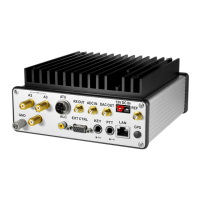
and connect the Ethernet cable to the router as shown in Fig. 4.
E-Coder
LAN oder WLAN
Audio
USB
Router
Ethernet
Mouse
Internet
LAN
DC4KU
Figure 4: SunSDR2 DX connected to the home network
After switching on the transceiver again, it automatically connects to the router within a few seconds
(Fig. 5). After restarting the software, the new SDR address and the new SDR port of the SunSDR2 DX
can be seen under Options: 192.168.178.120:50071. The SunSDR2 DX is now connected to the home
network and can be reached from all PCs on which the ExpertSDR2_SunSDR2DX software has been
installed.
Figure 5: SunSDR2 DX started with its correct IP- and port-settings
Remote control via internet
For remote control via the Internet, a server/client connection is required (Fig. 6). Any PC in the
home network can act as a server PC. Download the software ExpertRS (Remote Server) and
ExpertRC (Remote Client) from https://eesdr.com/en/software-en/expertremote-en and install them
on the Server- and Client-PC (Fig. 6). Open "ExpertRS" on the Server-PC (Fig. 7) and enter 50071
under SDR Port and click on Search. The server of the SunSDR2 DX is now activated and on stand-by
for a connection. The program can then be closed again, but the server remains open in the
SDR Address and Port
192.168.178.120:50071
 Loading...