13. $: Calculates the power rate. Type the power rate first, then press $ to confirm. When the unit
is in OPER mode, the power rate per day/month/year will be displayed.
14. OCP: Preset value of the Over Current Protection. Type the value for over-current protection
and then press OCP to confirm.
15. Hz: Press to enter the frequency programming mode for the front output. Type the desired
frequency and then press Hz to confirm.
16. FUNC: Press to view THD (total harmonic distortion), voltage, current, and harmonics (1st to
50th) for the output power.
17. STORE: Press to save the currently programmed voltage and frequency to one of the memory
locations (1 to 99) and press V.ENTER to confirm. The currently selected voltage and
frequency will be stored in the selected memory location.
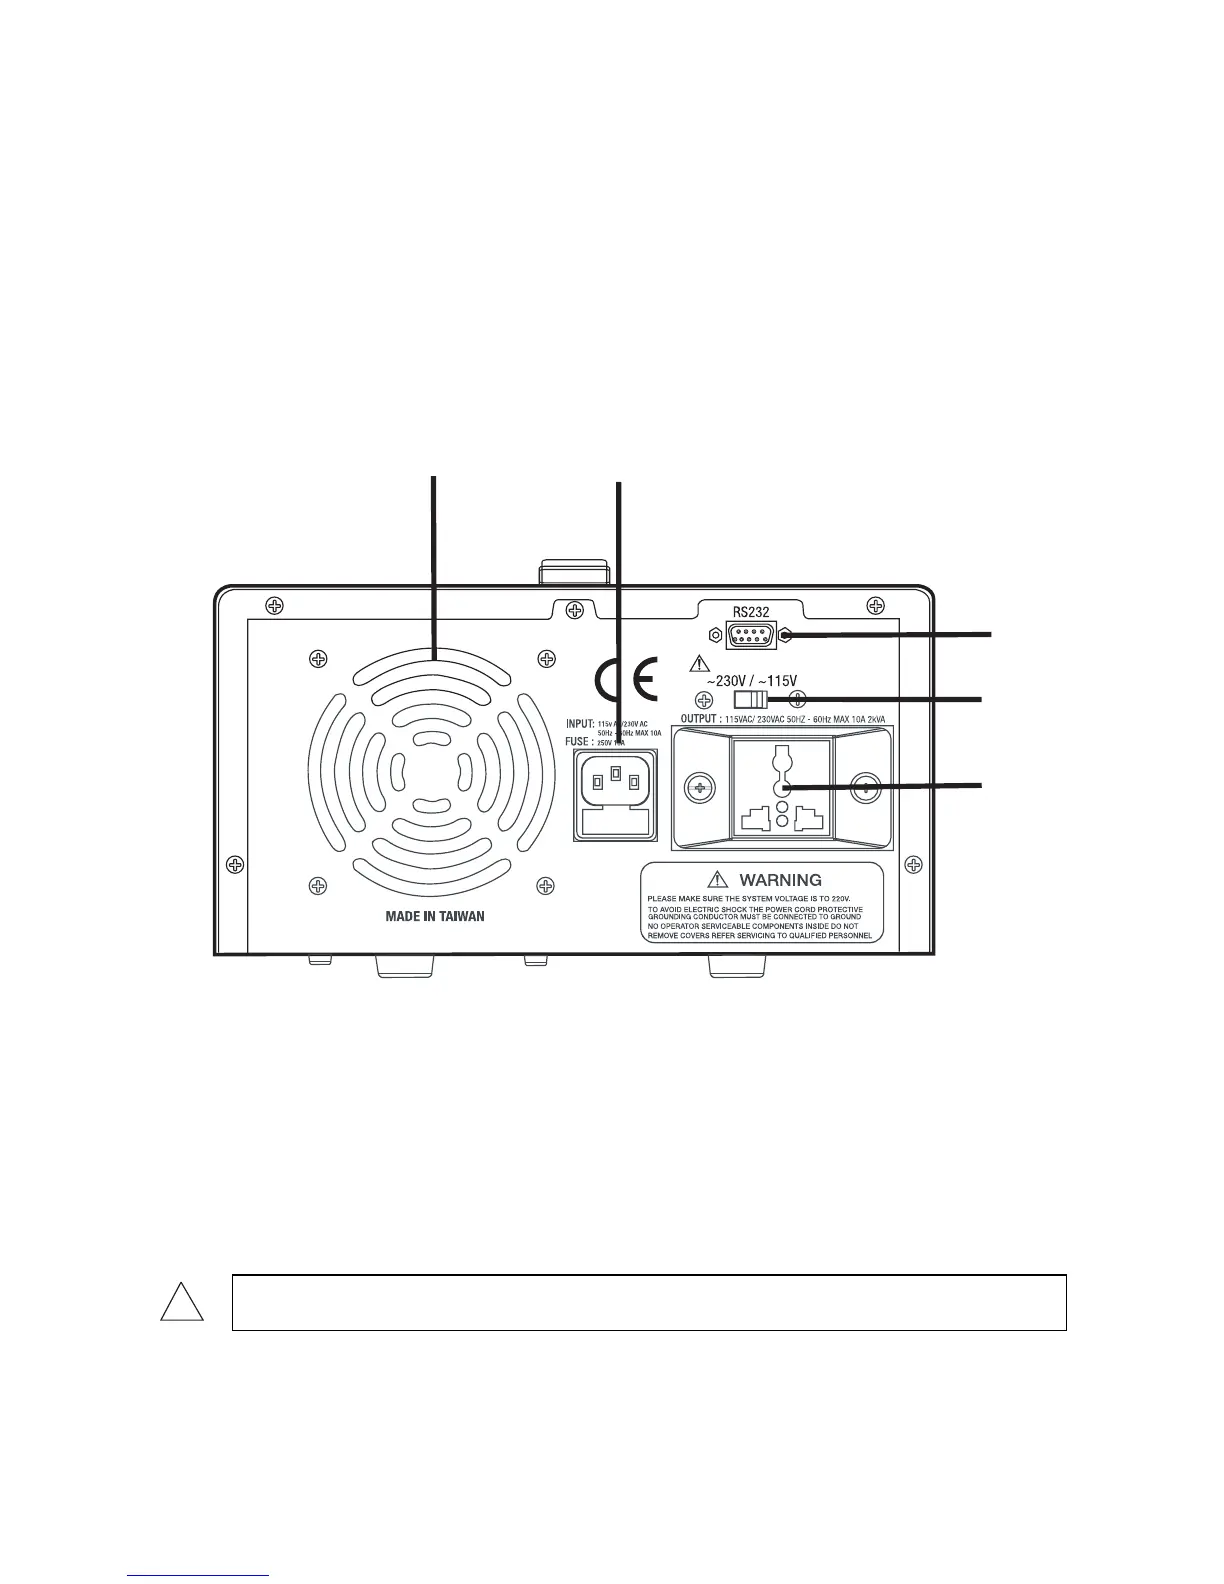
1. Ventilation: Please keep these openings clean and always leave room for ventilation at the
rear of the unit.
2. POWER INPUT: Socket for external power input (contains a 10A fuse). The input is selectable
(110V or 220V) and must match the voltage selected by the Voltage Switch.
3. RS232 Connector: For connection to a PC serial port.
4. Voltage Switch: Selects the voltage (110 or 220V) of the input power.
5. Rear Output Socket
CAUTION! The rear output socket is “LIVE” whenever the instrument power
cord is plugged in even when the power supply is shut off.
1
2
3
4
5
!