NORTH AMERICAN VERSION 10 WTH600-en-US_v1.0 12/17
2. Always place the unit away from interfering sources such as TV monitors, computers, etc.
3. Avoid placing the unit on or next to metal plates.
4. Enclosed areas such as airports, basements, or factories are not recommended.
Setting the Date and Time
The unit automatically sets itself accordingly to the Radio Controlled Clock signal it receives. To set
the clock/calendar manually, first disable the reception by holding the RCC button for 8 seconds.
Manually Setting the Clock and Time Zone
1. Press and hold [CLOCK] button for 2 seconds until “12 or 24Hr” flashes.
2. Use [UP]/[DOWN] buttons to adjust, and press [CLOCK] button to continue.
3. Repeat step 2 above for TIME ZONE, HOUR, MINUTE, SECOND, YEAR, MONTH, DATE, and
HOUR OFFSET.
Language and DST (Daylight Savings Time) settings
Note:
1. If no buttons are pressed within 60 seconds, the unit will automatically exit this setting mode.
2. The time zone setting applies only to the North American version where the unit is set to receive
the WWVB signal. User can select PST, MST, CST, EST, AST or NST.
3. The language options are English (EN), French (FR), German (DE), Spanish (ES), and Italian (IT).
4. DST (Daylight Saving Time) feature defaults to Auto. The clock is programmed to automatically
switch when the daylight saving time is in effect. User can set the DST to OFF to disable the
feature.
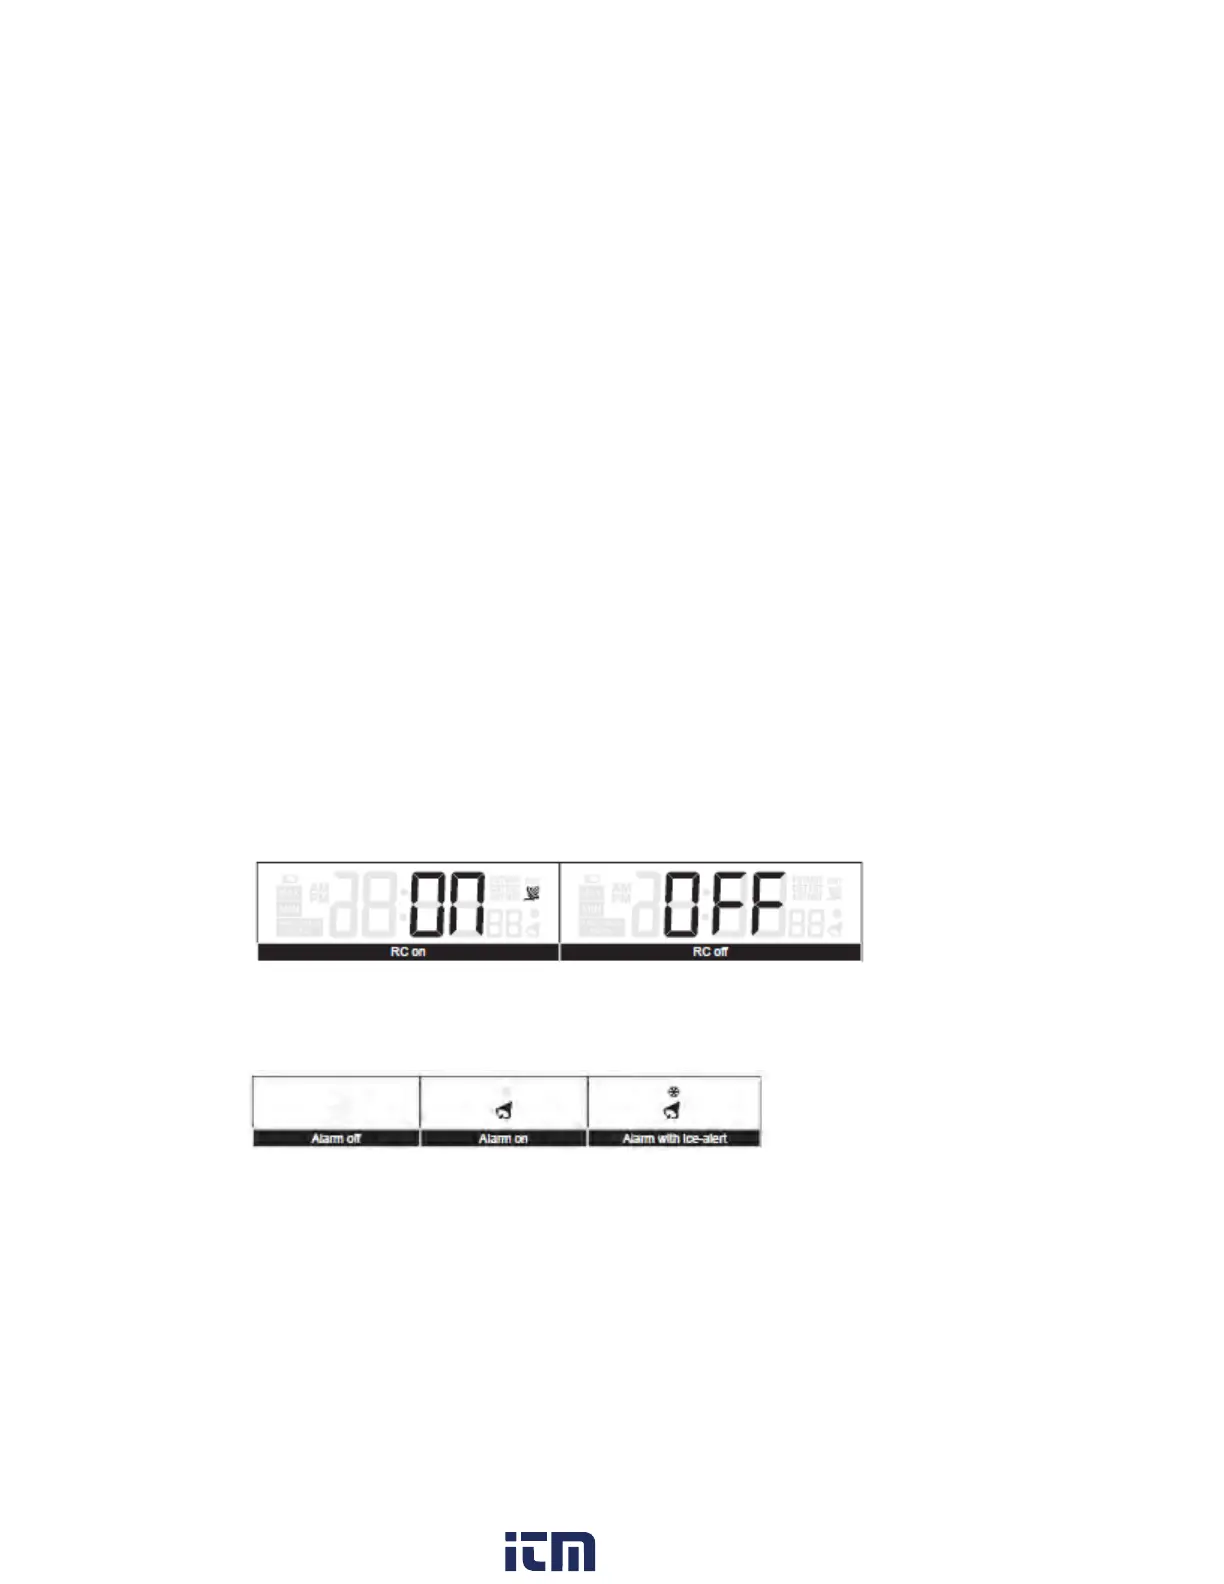
Disable / Enable RCC Signal Reception
1. Press and hold [RCC] button for 8 seconds to disable the reception.
2. Press and hold [RCC] button for 8 seconds to enable automatic RCC reception.
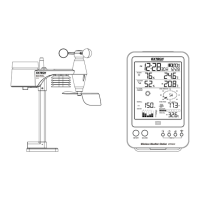
Turn Alarm Clock On/Off (with ice-alert function)
1. Press the [ALARM] button anytime to show the alarm time.
2. Press [ALARM] button to activate the alarm.
3. Press again to activate alarm with ice-alert function.
4. To disable the alarm, press until the alarm icon disappears.