Max300-LG : Description - Specifications - Installation Guide
Extrel
Core Mass Spectrometers
Page 31
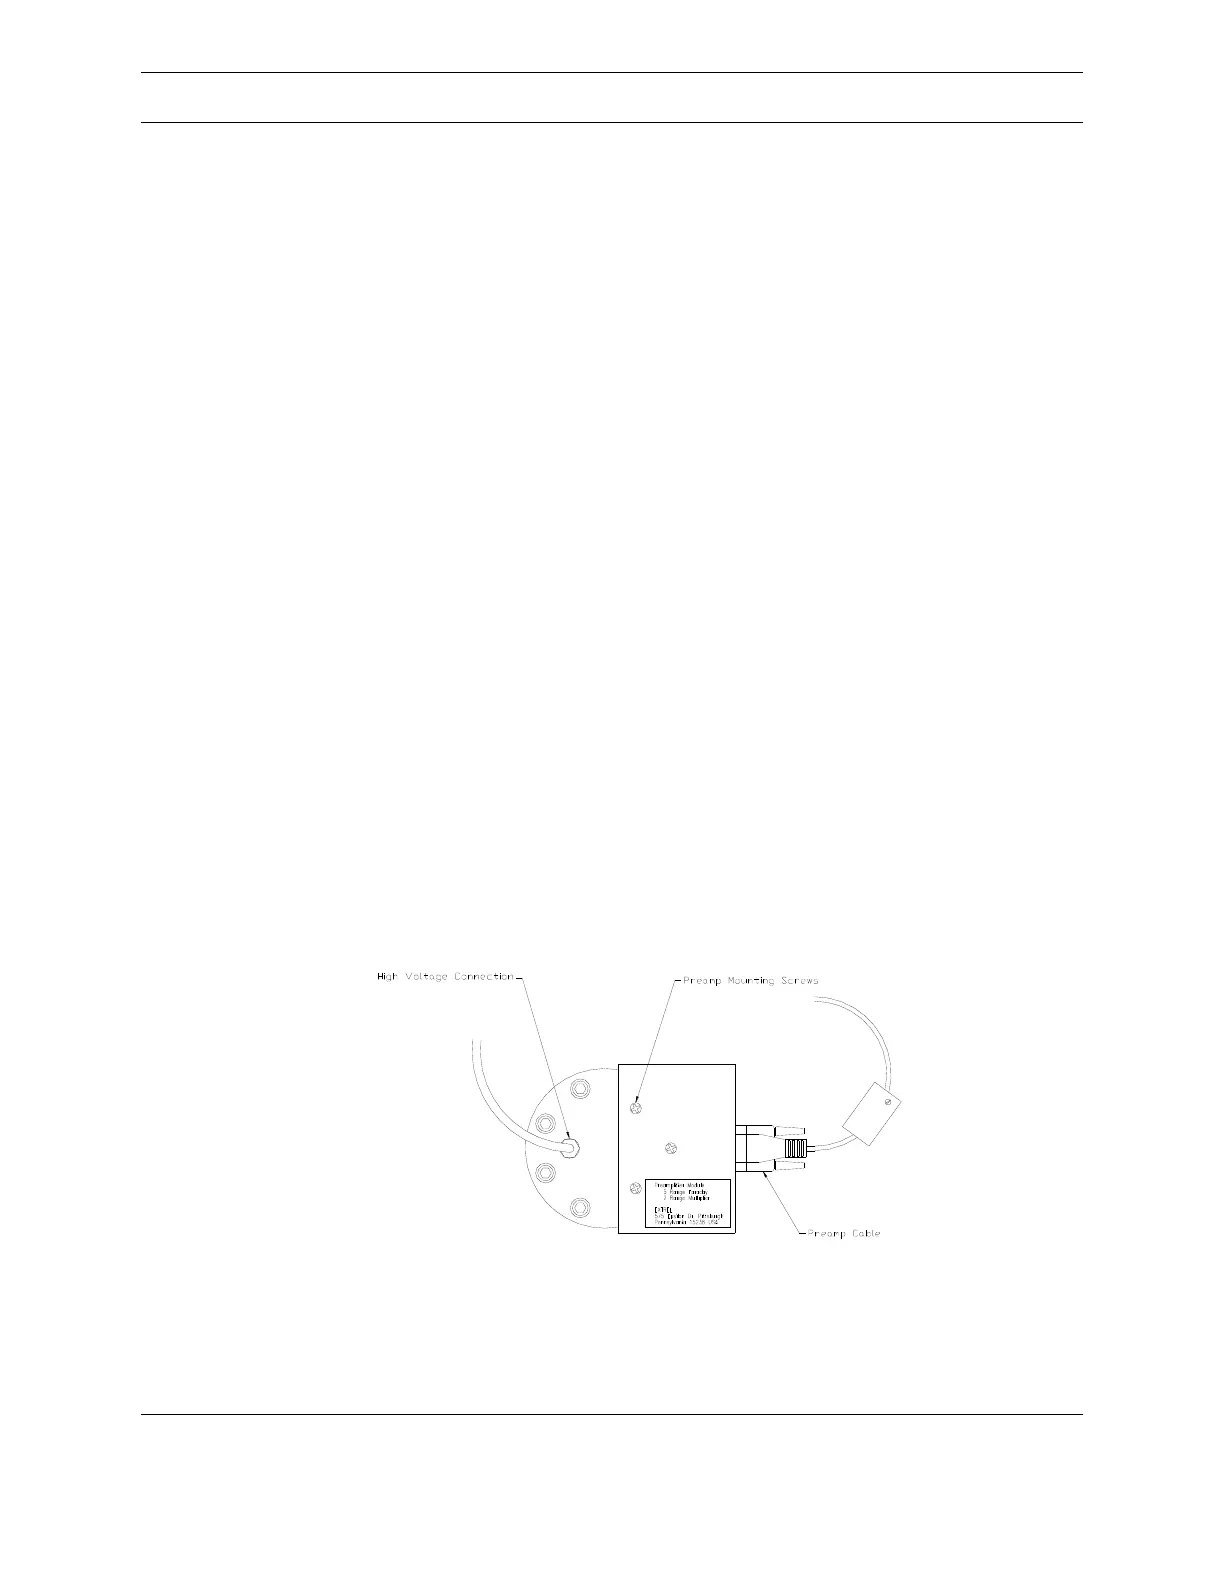
After the system has been properly vented remove the cables on the detector flange (the
multiplier HV cable, and the preamp cable). The preamp assembly is detached using the
Phillips screwdriver to remove the two preamp securing screws.
Electron Multiplier Removal and Replacement
Required Tools
• 1/4" Hex Key
• 3/32" Hex Key
Note: a “ball end” type is most convenient.
• (1) 4-1/2" Copper Gasket
• Pair Lint Free or Nylon Gloves
• #2 Phillips Screwdriver
Instruments equipped with the optional electron multiplier detector will require
replacement of this component after the required gain can no longer be achieved. When
this occurs, the vacuum system must first be vented. After venting, disconnect the inlet
line from the enclosure wall and release the slide latch on the left slide of the VacTrac
assembly and extend the VacTrac out of the enclosure. Remove the connection cables on
the detector flange (the multiplier HV cable, and the preamp cable). The preamp
assembly is detached using the Phillips screwdriver to remove the two preamp securing
screws. Figure 23 shows the preamp assembly.
Figure 23: Preamp Assembly
 Loading...