16
ENGLISH
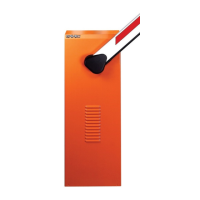
4.4. ADJUSTING THE BALANCE SPRING
IMPORTANT!: The barrier is supplied already balanced for
the exact beam length specified in the order (see the
Barrier Order Specifications, in the price list, and TAB. 2 - 3)
Should a fine adjustment of the beam balance be needed,
proceed as follows:
1) Unlock the operator, as indicated in paragraph 6 .
ACCESSORY NOMINAL CONSUMPTION
R 31 50 mA
PLUS 433 E 20 mA
MINIDEC SL / DS 6 mA
DECODER SL / DS 20 mA / 55 mA
RP 433 ESL / EDS 12 mA / 6 mA
DIGICARD 15 mA
METALDIGIKEY 15 mA
FOTOSWITCH 90 mA
DETECTOR F4 / PS6 50 mA
MINIBEAM 70 mA
BALANCE SPRING FOR RIGID BEAMS
BARRIER
MODEL
620 STANDARD
620 RAPID
640 STANDARD
BEAM
LENGTH
(m)
1.50 - 2.24
2.25 - 2.74
2.75 - 3.24
3.25 - 4.00
3.75 - 4.24
4.25 - 5.24
5.25 - 6.74
6.75 - 7.00
SPRING
LENGTH
(mm)
400
400
400
400
400
400
400
460
SPRING
CODE
721085
721069
721070
721072
721073
721074
721075
721080
DIAMETER OF
SPRING WIRE
(mm)
4.50
5.50
6.00
7.30
7.00
8.00
9.00
10.50
TAB. 2
BALANCE SPRING FOR BEAMS WITH SKIRT
BARRIER
MODEL
620 STANDARD
640 STANDARD
BEAM
LENGTH
(m)
2.00 - 2.99
3.00 - 3.74
3.75 - 4.00
3.75 - 4.74
4.75 - 5.24
5.25 - 5.74
5.75 - 6.74
6.75 - 7.00
SPRING
LENGTH
(mm)
400
400
400
400
460
460
460
460
SPRING
CODE
721069
721071
721073
721074
721079
721080
721081
721082
DIAMETER OF
SPRING WIRE
(mm)
5.50
6.50
7.00
8.00
10.00
10.50
11,00
12.00
TAB. 3
Fig. 11
Fig. 12
(*) P logic operation
(**) A / E logic operation
TAB 6 CURRENT DRAWN BY ACCESSORIES
LED ON (contact closed) OFF (contact open)
FCC closing limit switchnot engaged closing limit switch engaged
FCA opening limit switchnot engaged opening limit switch engaged
OPEN activated deactivated
CLOSED/FSW activated (*)/saf. disengaged(**) deactivated (*)/saf. engaged (**)
STOP deactivated activated
ALARM beam moving beam stationary
WARN. LIGHT see warn. light operation see warn. lightoperation
POWER motor power on motor power off
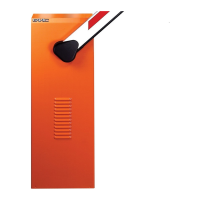
2) Adjust the pre-loading ring nut, using the spanner
supplied, as shown in Figure 12.
The beam is correctly balanced when it remains steady
in the 0° e 90° positions.
If the beam tends to close, turn the ring nut clockwise.
If it tends to open, turn the ring nut counterclockwise.
5. START-UP
5.1. CONNECTING THE ELECTRONIC UNIT
Important! Disconnect the power supply before you perform
any type of operation (connections, programming or
maintenance) on the electronic unit.
Warning: When terminal strip J2 is disconnected, the power
supply outputs of the motor, fan and flashing lamp are still
connected to electric power.
Follow points 10, 11, 12, 13 and 14 of the GENERAL SAFETY
REGULATIONS.
Position the pipes, as shown in Figure 3, and connect the
624 MPS electronic unit to the accessories.
Keep the power supply cables separate from the control
and safety signal ones (photocells, receiver, pushbutton,
etc.). To prevent electric interference, use separate pipes.
TAB. 4 TECHNICAL CHARACTERISTICS OF 624 MPS
TAB. 5 OPERATION OF STATUS LEDS
POWER SUPPLY 230 V (+6 -10 %) 50 Hz
MAX. MOTOR LOAD 300 W
MAX. ACCESSORY LOAD 500 mA
MAX. WARNING LIGHT POWER 5 W (24 Vac)
TEMPERATURE RANGE - 20°C to 55°C