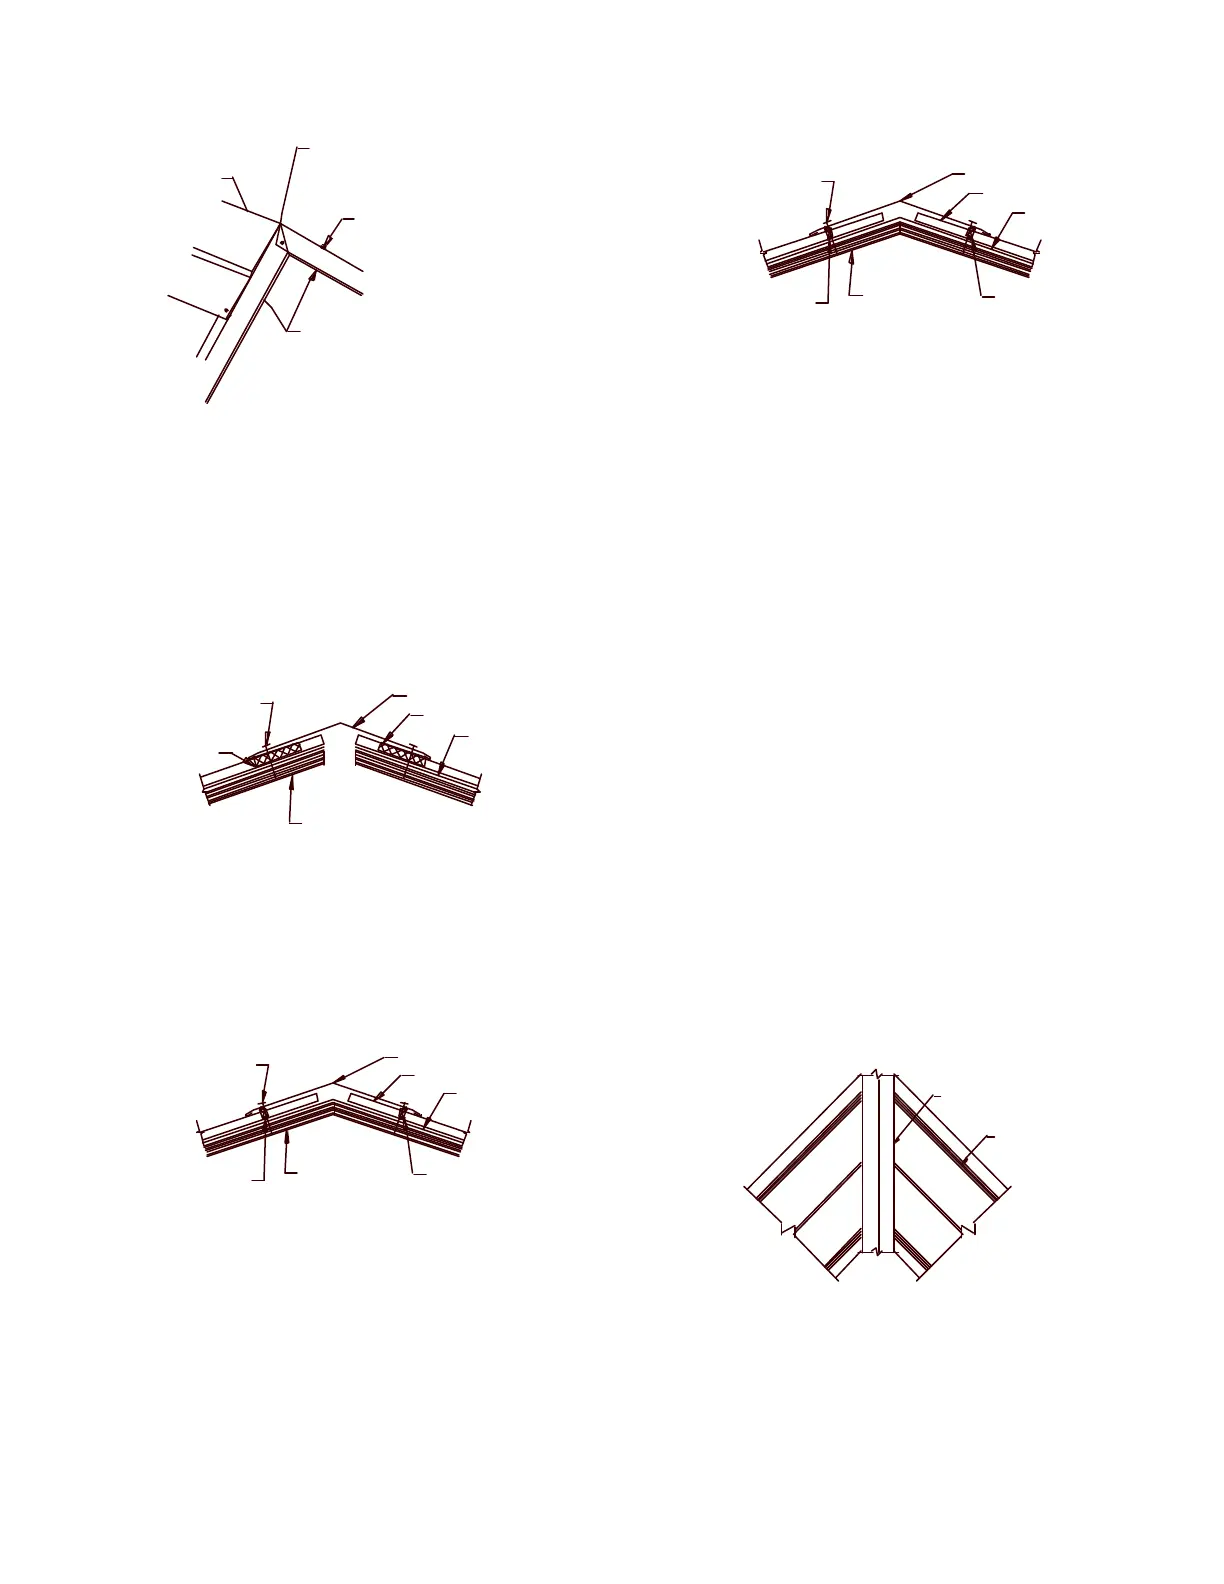
RIDGE & GABLE DETAILS
GABLE TRIM
SEALANT IS USED BETWEEN
RIDGE & GABLE AND
UNDER GABLE LAP
FASTENER
RIDGE
RIDGE DETAIL
#14 x 1 1/2" LONG FASTENER
AT EVERY RIB
(12" O.C.)
SEALANT TAPE
TOP & BOTTOM OF
CLOSURE OR SEALER STRIP
5V ROOF PANEL
ROOF STRUCTURE
30# ROOFING FELT
OUTSIDE CLOSURE
(ON HIP ROOFS, USE
1"X1"X13' SEALER STRIP
& RR-1 FLASHING)
RIDGE CAP, RR-1
Notes:
1. Allow 1” gap between panel and centerline of
ridge.
2. Mark edge of ridge cap on both sides of peak.
3. Install sealant tape about ½” upslope mark.
4. Position closures & press into sealant.
5. Install a second bead of sealant on top of
closures.
6. Install ridge cap & fasten with #14 x 1½”
screws @ 12” o.c. max. as shown above.
VENTED RIDGE
#14 x 1 1/2" LONG FASTENER
AT EVERY RIB
(12" O.C.)
5V ROOF PANEL
ROOF STRUCTURE
30# ROOFING FELT
RIDGE CAP, RR-1
PROFILE VENT
Notes:
1. Plywood should be held back or cut back 1½”
from each side of the ridge.
2. Attach the panels checking the 1” minimum
overhang at the eave.
3. The gable flashing must be installed prior to the
ridge installation.
4. Mark edge of Ridge Cap on both sides of the
peak. Unroll Profile Vent and press into place
about 1” upslope of mark.
5. Fasten the ridge cap using #14 x 1½” MP
screws on each panel rib 1” back from the edge
of the Profile Vent.
HIP DETAIL
#14 x 1 1/2" LONG FASTENER
AT EVERY RIB
(12" O.C.)
SEALANT TAPE
TOP & BOTTOM OF
CLOSURE OR SEALER STRIP
5V ROOF PANEL
ROOF STRUCTURE
30# ROOFING FELT
OUTSIDE CLOSURE
(ON HIP ROOFS, USE
1"X1"X13' SEALER STRIP
& RR-1 FLASHING)
RIDGE CAP, RR-1
HIP ROOF—PLAN VIEW
5V PANEL
HIP CAP
Note:
Hip flashing attachment is the same as for ridge flashing.
 Loading...