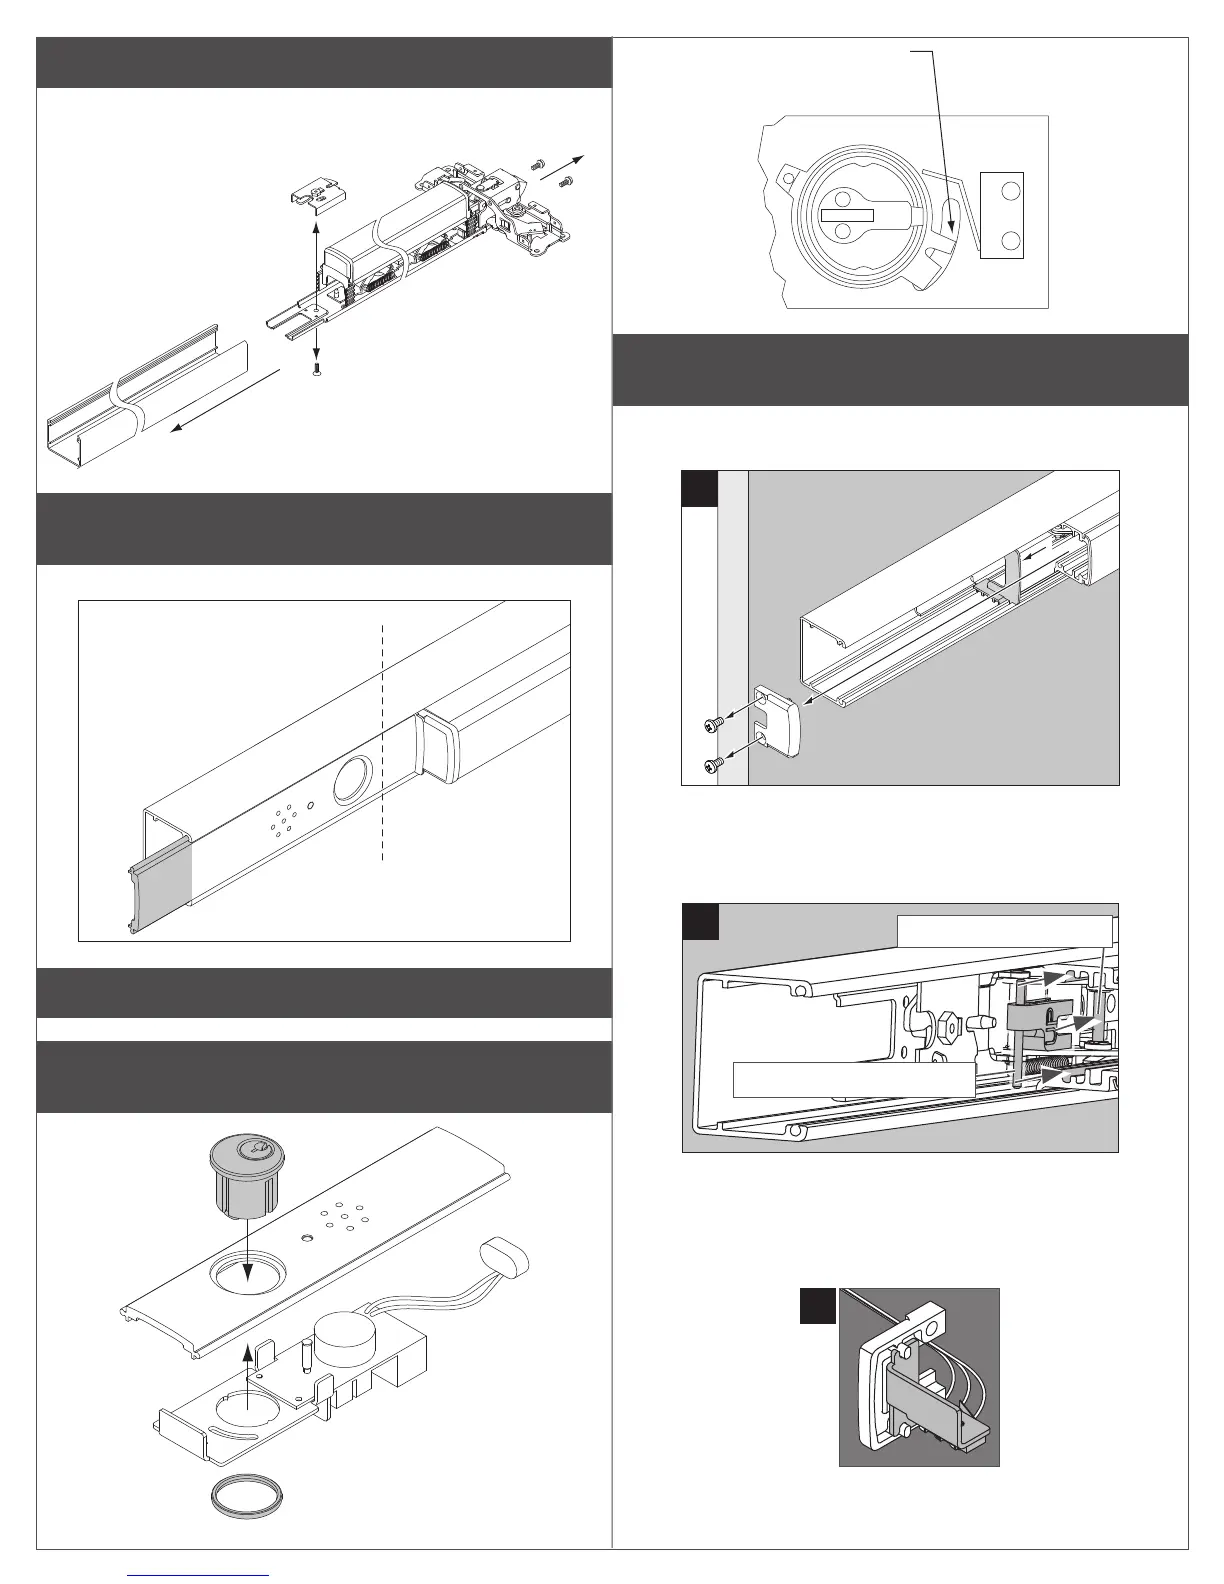
3 Remove and discard dogging assembly.
Dogging assemblies are shown below.
a
b
c
4 Cut new cover plate as needed to match exit device
length.
Important: Cut end of cover plate nearest the pushbar.
Cover plate should
be flush with end of
mechanism case.
ASSEMBLE AND INSTALL
5 Assemble the exit alarm unit with the parts in order as
shown below.
Cam should be in
OFF position before
battery is installed
6 If exit device does not have LX or RX switch, install
switch before proceeding.
a. Remove pushbar endcap.
a
c
b
b. Install the clip and pin.
• Push clip onto the axle linkage pin until it snaps into place.
Pin slides into bottom slots.
Clip snaps onto top axle.
c. Install switch into pushbar endcap.
• Place assembled switch mounting bracket and switch assembly
into the pushbar endcap.
 Loading...