Do you have a question about the fantastic furniture REED Series and is the answer not in the manual?
| Brand | fantastic furniture |
|---|---|
| Model | REED Series |
| Category | Indoor Furnishing |
| Language | English |
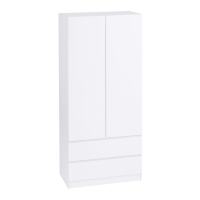
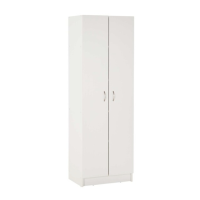
Identifies the product as REED PANTRY 2 DOOR NARROW, Version 2.0.
Crucial warning to attach the wall strap to prevent serious injury from toppling.
Guidance on reading instructions, checking tools, and identifying components before assembly.
General tips including tool usage, soft surfaces, and checking fasteners periodically.
Lists required tools like screwdrivers and hammers, and advises against power tools unless instructed.
Details all components (panels P1-P9) and hardware (H1-H14) with quantities for assembly.
Instructions for fixing hinges (H4) and metal handles (H7) to door panels (P9) using screws (H5, H8).
Guides on inserting plastic dowels (H3) into panels (P3, P4, P5, P7) before assembly.
Connects side panels (P1, P2) with top/bottom panels (P3, P4) and fixed shelves (P5) using screws (H1).
Fixes back panels (P8) using nails (H9) and screws (H10) to the assembled unit and fixed shelves.
Attaches leg studs (H13) to the bottom of panels (P1, P2, P7) using a hammer.
Installs shelf supports (H6) into side panels (P1, P2) and places adjustable panels (P6).
Fixes the two door panels (P9) to the side panels (P1, P2) using screws (H5).
Explains lateral, front-to-back, and vertical adjustments for door alignment.
Uses plastic caps (H2) to cover all exposed screws for a clean, finished appearance.
Connects the wall strap (H11) to the top panel (P3) using a screw (H12) and washer (H14).
Provides instructions and advice for securely attaching the wall strap to the wall.
Indicates the assembly is finished and offers advice on responsible packaging disposal.