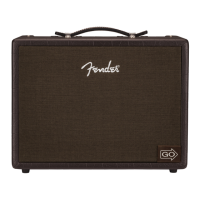
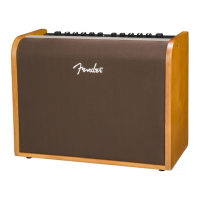
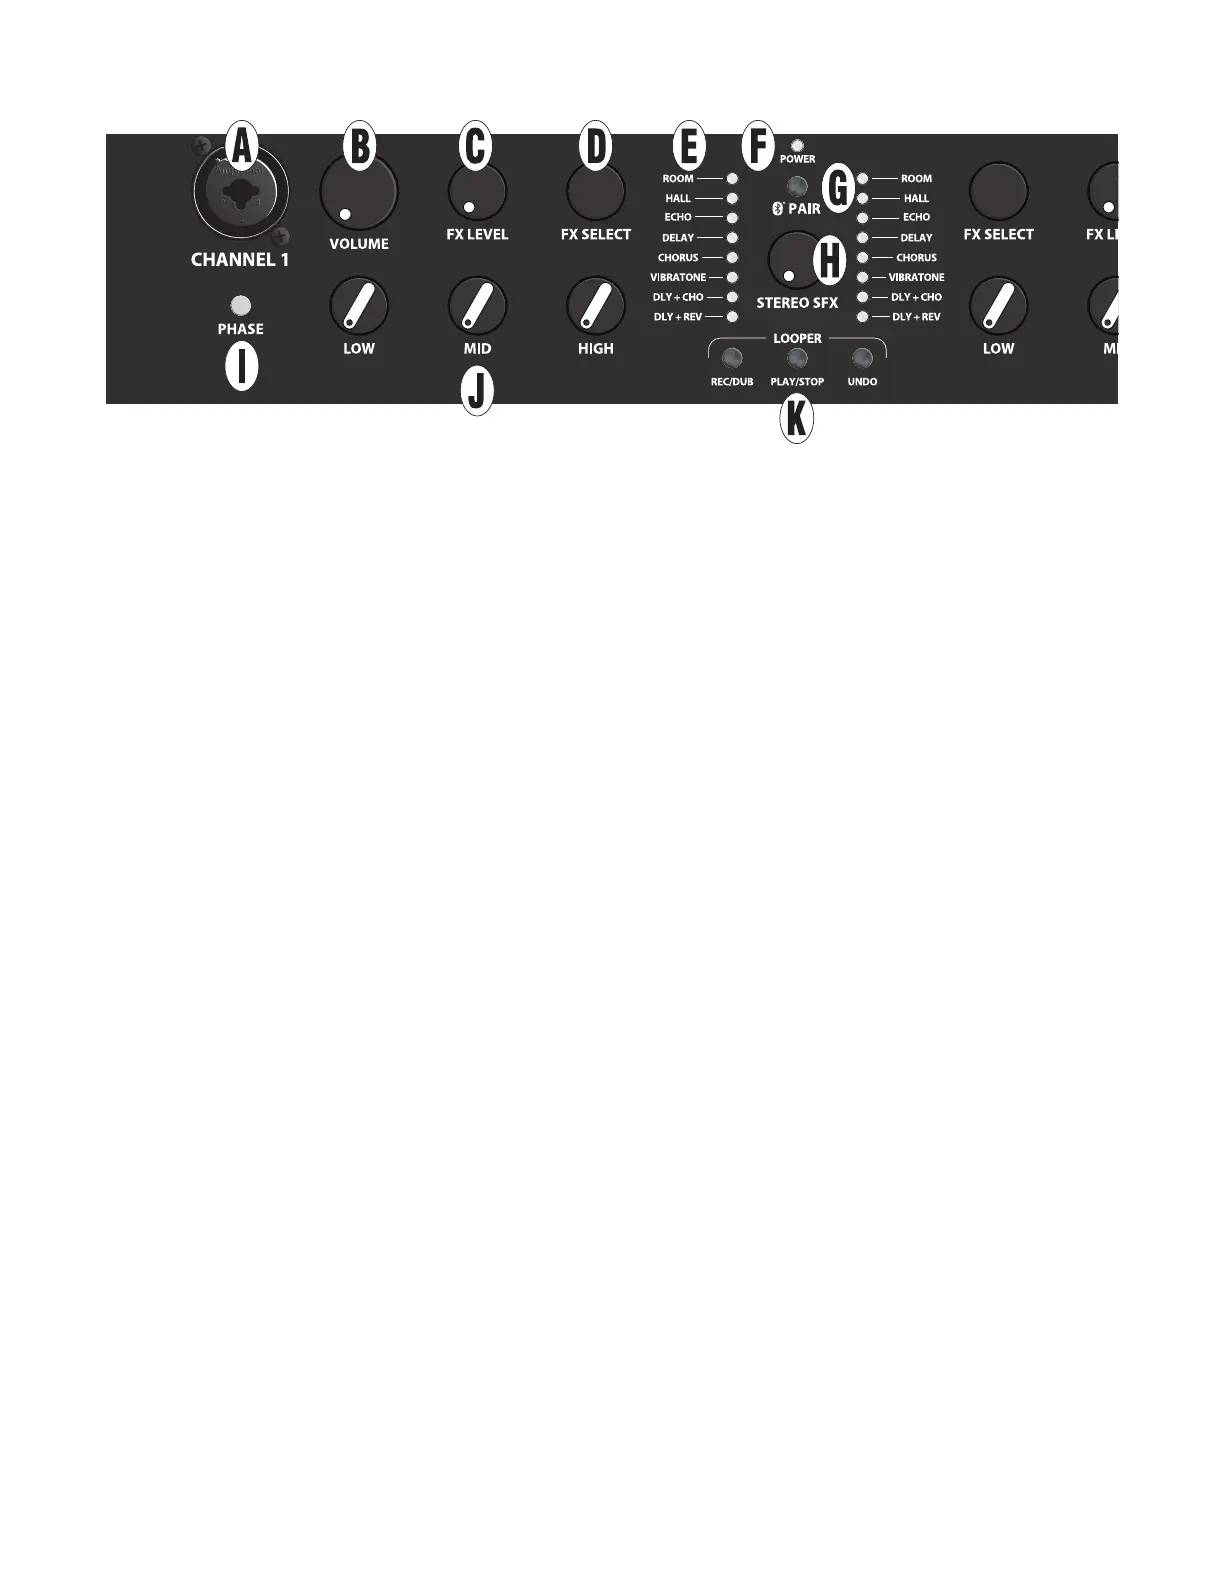
A. CHANNEL INPUT: Combination jack accepts XLR and high-impedance ¼” inputs. Plug in instrument or microphone
here; XLR input provides phantom power for mics that require it (do not use ribbon mics, which can be damaged by phan-
tom power).*
B. VOLUME: Adjusts overall volume level (including headphones and USB/line outputs).*
C. FX LEVEL: Determines intensity of eect chosen using FX SELECT control.*
D. FX SELECT: Choose among eects including room and hall reverb, echo, delay, chorus, Vibratone, delay plus chorus,
and delay plus reverb, as indicated by EFFECTS DISPLAY.* No eect is selected in fully clockwise and fully counterclock-
wise positions. Optional footswitch enables tap-tempo delay time control for echo, delay, delay plus chorus and delay
plus reverb eects.
E. EFFECTS DISPLAY: LEDs illuminate to show eects setting in use for each channel.
F. POWER INDICATOR: For Acoustic Junior and Acoustic SFX II, indicator illuminates green when amplier is on.
For Acoustic Junior Go model only, indicator illuminates green to indicate sucient battery charge; illuminates yellow
to indicate low battery charge; and illuminates red to indicate insucient charge for operation or a faulty battery. When
Acoustic Junior Go is connected to AC power, indicator ashes during battery charging and illuminates solid green when
charging is complete; illuminates at lower intensity when power switch is set to “o” and charging is in progress.
G: PAIR: Bluetooth pairing button; see “Bluetooth” section.
H: STEREO SFX (ACOUSTIC SFX II MODEL ONLY): Determines extent of Stereo Field Expansion (SFX) eect, which cre-
ates a 360-degree stereo image using the onboard eects and side-mounted speaker. Note that for SFX to be heard, an
eect must be selected using the FX SELECT control (D), with FX LEVEL (C) set above minimum. Note: Delay eect will pan
in stereo through PHONES output (N) and BALANCED LINE OUTPUTS (P) only if this control knob is set above minimum.
I. PHASE: To help reduce feedback, press to reverse channel polarity to speaker (including headphones and USB/line
outputs).*
J. LOW, MID AND HIGH: Adjusts bass, midrange and treble tone respectively.*
K. LOOPER BUTTONS (REC/DUB, PLAY/STOP, UNDO): Recording/overdubbing, playback/stop and undo function.
See “Looper” section.
* Indicates identical channel two feature on opposite side of control panel.
NOTE: See “Footswitch” section for other features not found on control panel, including remote eects on/o, tap-tempo
control for delay times and built-in tuner.
CONTROL PANEL
2
ENGLISH