V2.0
TM
FENIEX. 2016 INSTRUCTION MANUAL
WEB. www.feniex.com
7
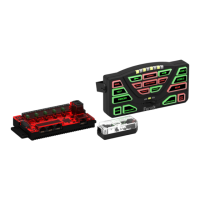
Mounting installation
1.) Secure the Swivel Ball to the base of the
controller using the #10 screw.
2.) Attach the swivel ball to the swivel
bracket base using the #10 screw.
3.) Using the #10 screw, secure the two
clamps loosely together.
4.) Place the clamps and screw around the
2 swivel balls. Tighten the clamp screw,
thereby attaching the swivel bracket base
to the mini controller.
5.) Secure the Swivel Bracket to the rear of
the controller (as shown in the diagram).
Option 1 Mounting: Swivel Bracket
6.) Place the unit against the intended
mounting surface.
7.) Mark the areas where the mounting
holes will be drilled. If the mounting surface
is part of the vehicle, make sure no vital
components could be damaged by the
drilling process.
8.) Drill two mounting holes on the
mounting surface, making sure no vital
components of the surface are damaged.
9.) Using customer provided screws,
secure the Mini 4200 to the mounting
surface.

 Loading...