6
EN
Replacing cables or plugs
Immediately throw away old cables or plugs when
they have been replaced by new ones. It is
dangerous to insert the plug of a loose cable in
the wall outlet.
5HPRYHWKHEDWWHU\EORFNZKHQWKHSRZHUWRRO
is not being used and prior to maintenance.
7KHWRROLVVXLWDEOHIRUXVHDVDVFUHZGULYHU
DQGGULOO$Q\RWKHUDSSOLFDWLRQLVVSHFL¿FDOO\
excluded.
3. MOUNTING ACCESSORIES
Prior to mounting an accessory always
remove the battery.
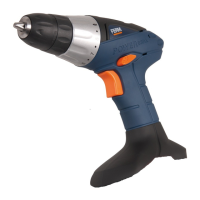
Fitting and removing drill cutters
Fig. B
In addition to screwdriver bits with a hexagonal
shaft, this tool can also accommodate drill bits
with a hexagonal shaft.
/RRVHQWKHGULOOFKXFNE\URWDWLQJWKHKDQG
grip (9).
,QVHUWWKHVKDIWRIWKHGULOOFXWWHULQWRWKHFKXFN
7LJKWHQWKHGULOOFKXFNVRWKDWWKHGULOOFXWWHULV
¿UPO\FODPSHG
5RWDWHWKHGULOOFKXFNLQWKHRSSRVLWHGLUHFWLRQ
when you wish to change the cutter.
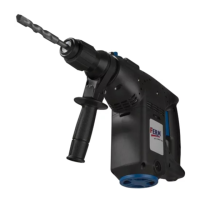
&RQQHFWLQJDQGUHPRYLQJWKHEDWWHU\
Fig. C
(QVXUHWKDWWKHH[WHULRURIWKHEDWWHU\
block or tool is clean and dry before
connecting the charger.
(QVXUHWKDWWKHGLUHFWLRQUHYHUVLQJVZLWFK
Fig. A) is in the central position in order to
prevent the appliance from being switched on
unexpectedly.
,QVHUWWKHEDWWHU\LQWRWKHEDVHRIWKH
appliance, as shown on the illustration. Push
the battery until it latches in.
3UHVVWKHORFNLQJEXWWRQVRQERWKVLGHV
before removing the battery, and disengage
the battery from the base of the appliance.
4. OPERATION
Always follow the safety notes and the
relevant safety code.
+ROGWKHDSSOLDQFH¿UPO\DQGSUHVVWKHGULOO
steadily onto the work piece. Do not overload the
appliance. Only use drill bits with no visible wear.
Worn bits will have a bad effect on the functioning
of the appliance.
Adjusting the torque
Fig. D
The appliance has 16 different torque settings
with which to set the power for driving and
removing screws.
6HWWKHWRUTXHDGMXVWPHQWULQJWRWKH
desired position. The available torque settings
are indicated on the adjustment ring by the
numbers 1 to 8 and by dots between the
¿JXUHVWRGH¿QHLQWHUPHGLDWHVHWWLQJVLQ
total).
<RXVKRXOGSUHIHUDEO\FKRRVHDVHWWLQJDVORZ
as possible when using the screwdriver. Select
a higher setting if the motor slips.
Driving and removing screws
6HWWKHGLUHFWLRQUHYHUVLQJVZLWFKWR
position ‘R’ in order to drive screws.
6HWWKHGLUHFWLRQUHYHUVLQJVZLWFKWRSRVLWLRQµ/
in order to remove screws.
Drilling
5RWDWHWKHWRUTXHDGMXVWPHQWULQJWRWKH
drilling position.
Ensure that the direction reversing
switch (6) is always set to ‘R’ during
drilling.
Switching the device on and off
Fig. A
'HSUHVVWKHRQRIIVZLWFK,WUHJXODWHVWKH
speed of the appliance by transmitting power
to the switch.
5HOHDVHWKHRQRIIVZLWFKWRKDOWWKHGULOO
chuck immediately which will no longer run on.
0RYHWKHGLUHFWLRQUHYHUVLQJVZLWFKWRWKH
centre in order to lock the appliance in its
disabled state.
 Loading...