ENGLISH
• Par de apriete 0,3Nm (progresivo y
simultáneo).
• Tightening torque 0.3Nm (gradual and
simultaneous).
• Couple de serrage 0,3 Nm (progressive et
simultané).
• Drehmoment 0,3 Nm (progressives und
gleichzeitiges).
Cod. 970102 V08_17
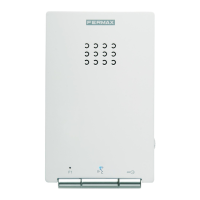
SET AMPLIF. VIDEO DUOX BUZON PULS. / MAILBOX DUOX VIDEO AMP. SET PUSHBUTTON / SET AMP. VID. DUOX BOÎTE LETTRE POUSSOIR / BRIEFKASTEN VID. DUOX LAUTSPR. SET TASTE
ESPAÑOL
AJUSTES
ENFOQUE DE LA CÁMARA / TIEMPO ACTIVACIÓN DEL ABREPUERTAS
Para ajustar la imagen de la cámara o ajustar el tiempo de activación del abrepuertas, ver Confi guración
asistida por voz en placas de pulsadores cod. 97765 en www.fermax.com.
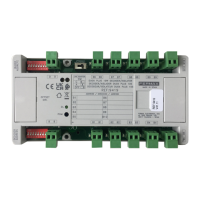
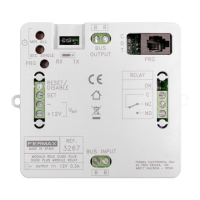
Conectores Placa:
B,B: Bus DUOX: alimentación teléfonos/
monitores, datos, audio y video.
C, NO, NC: contactos relé, 2A@30Vdc
(conexión abrepuertas).
+12: salida12 Vdc-250mA (máximo 500mA
durante 100 seg.)
BS, -: pulsador zaguán.
S, -: entrada sensor de puerta.
+, GND: no disponible. Futuras versiones.
P1, P2: conexión pulsadores.
JP1: Leds cámara
LEDS ON. encendidos cuando la
camara está activada.
LEDS OFF. apagados siempre
Selección del idioma
1
del mensaje “puerta abierta”
Ajustes audio
del Monitor, la placa y puerta abierta.
Conexión micrófono
Versión amplifi cador
Botón
SW1
castellano
inglés francés alemán catalán valenciano balear
portugués
euskera
gallego
1
Selección del idioma del mensaje “puerta abierta”
holandés/
fl amenco
fi nés sueco
turcogriego polaco checo eslovaco chino
persa/
farsi
árabe noruego
danés islandés ruso hindi húngaroitaliano hebreo croata
30...62
Campana
DESACTIVADOcampana
CARACTERÍSTICAS TÉCNICAS
Alimentación 18 Vdc
Consumo en reposo 165mA
Consumo audio activo 275 / 480(max) mA
Potencia audio sentido vivienda-calle 1 W
Potencia audio sentido calle-vivienda 0,15 W
Temperatura de funcionamiento [-25º , +55ºC] / [-13º, 131ºF]
Volumen regulable en ambos sentidos
VALORES AMPLIFICADOR
Tiempo activación abrepuertas 01...99 seg. (por defecto: 03)
Tiempo activación botón salida 00...99 seg. (por defecto: 06) / (desactivado: 00)
Tipo de placa sub-bloque/bloque/entrada general. (por defecto: bloque)
Número de placa 0...9 (por defecto: 00)
Placa MÁSTER no activa
CONFIGURACIÓN COMO PLACA MÁSTER
Pulsar el botón SW1 3 veces consecutivas rápidas. Transcurridos 2 segundos, se oirá un tono de
confi rmación, y se activará la placa máster. Una vez terminada la programación de los monitores, se
recomienda desactivar la placa MÁSTER, pulsando el botón SW1 3 veces consecutivas.
Nota: Este documento muestra los conceptos más básicos para la rápida puesta en marcha, para más información descargar los
manuales en www.fermax.com
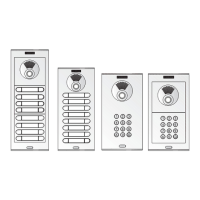
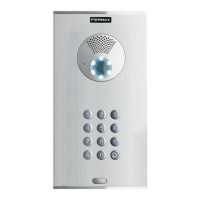
- Placas Cityline Video Duox cod. 97898.
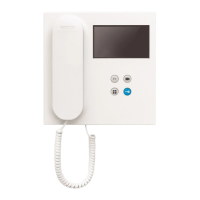
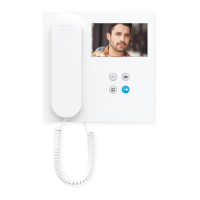
- Monitor Duox Veo cod. 97858.
INSTALACIÓN / INSTALLATION
Diseñado para ser montado sobre un solo orifi cio circular de 75 mm de diámetro en espesores de 1
a 6 mm, sin tornillos visibles.
Designed to be assembled on a single 75 mm diameter hole in thickness’ from 1 to 6 mm, without
visible screws.
Conçu pour être monté sur un seul orifi ce circulaire d’un diamètre de 75 mm pour des épaisseurs
allant de 1 à 6 mm. Pas de vis visibles.
Es ist so entwickelt worden, dass es über einer einzigen runden Öffnung von 75 mm Durchmesser
für Dicken zwischen 1 bis 6 mm, ohne dass die Schrauben sichtbar sind, montiert werden kann.
1. Montaje Frontal Acero sobre Panel / Steel Front Assembly over a Panel / Montage partie
avant acier sur panneau / Montage der Edelstahlfrontblende auf der Türstation
excesivo
excessive
trop élevé
zu stark
2. Orientación horizontal del Frontal de acero /Horizontal orientation of the Steel Front/
Orientation horizontale de la partie avant en acier / Horizontale Ausrichtung der
Edelstahlfrontblende
• Centrar y alinear (guía, aperturas de iluminación) - usar nivel.
• Centre and align (guide, lighting holes) - use level.
• Centrer et aligner (guide, orifi ces pour l’éclairage), se servir d’un niveau.
• Zentrieren und ausrichten (Führung, Lichtöffnungen) - Wasserwaage
verwenden.
3. Montaje juntas Amplifi cador / Assembly of Amplifi er joints / Montage joints amplifi cateur
/Montage der Dichtungen des Verstärkers
Espesor panel (mm) / Panel thickness (mm) 1 - 2,5 mm 2,6 - 4,5 mm 4,6 - 6 mm
Épaisseur panneau (mm) / Dicke der Türstation (mm)
Número juntas / Number of joints 1 2 3
Nombre de joints / Anzahl Dichtungen
4. Retirar fi lm protección de la cinta adhesiva doble cara / Remove protective fi lm of the
two-sided adhesive tape / RRetirer le fi lm de protection du ruban adhésif double face /
Den Schutzfi lm des doppelseitigen Klebebandes entfernen
Nota: Limpiar con alcohol isopropílico la superfi cie interior del panel
donde se ubicará el amplifi cador.
Note: Clean the inner surface of the panel where the amplifi er will be
located with isopropyl alcohol.
Remarque : nettoyer, avec de l’alcool isopropylique, la surface intérieure
du panneau où va se placer l’amplifi cateur.
Hinweis: Die Innenoberfl äche der Türstation, auf der der Verstärker
montiert wird, mit Isopropylalkohol reinigen.
Cotas por si no se utiliza la cinta a doble cara
(en mm).
Distances if a double sided tape is not used
(in mm).
Cotes si l’on ne se sert pas du scotch double
face (en mm).
Werte, falls das doppelseitige Klebeband nicht
verwendet wird (in mm).
• Sirve de guía para
instalar.
• It works as a guide to
install.
• Sert de guide pour
l’installation.
• Dient als Führung zur
Installation.
SETTINGS
CAMERA FOCUS / LOCK RELEASE ACTIVATION TIME
To adjust the camera image or adjsut the lock-release activation time, see Voice assisted confi guration in
button panels cod. 97765.
TECHNICAL FEATURES
CONFIGURING AS MASTER PANEL
Press the SW1 button 3 consecutive times quickly. After 2 seconds, a confi rmation tone is heard,
and the master panel is activated. Once having completed the monitors’ programming, we recommend
deactivate the MASTER panel by pressing the SW1 button 3 consecutive times.
Panel Connectors:
B,B: DUOX Bus: telephone/monitors power,
data, audio and video.
C, NO, NC: Relay contacts 2A@30Vdc (lock-
release connection).
+12: 12 Vdc-250mA output (maximum 500mA
for 100 seconds).
BS, -: entrance hall button.
S, -: door sensor input.
+, GND: not available Future versions.
P1, P2: Button Connection
JP1: Camera leds
LEDS ON. On when the
camera is activated.
LEDS OFF. always off
Selecting the language
1
of the "door open" message
Audio Settings
of the Monitor, panel and open door.
Microphone Connection
Amplifi er Version
SW1
Button
Spanish
English French German Catalonian Valencian Balearic
Portuguese
Basque
Galician
1
'Door open' warning language selection
Dutch/
Flemish
Finnish Swedish
TurkishGreek Polish Czech Slovak Chinese
Persian/
Farsi
Arabic Norwegian
Danish Icelandic Russian Hindi
Hungarian
Italian
Hebrew Croatian
30...62
Bell
DEACTIVATEDbell
Power Supply 18 Vdc
Standby Consumption 165mA
Audio active consumption 275 / 480 (max) mA
Audio Power in Residence - Entry Panel Direction 1 W
Audio Power in Entry Panel - Residence Direction 0.15 W
Operating temperature [-25º , +55ºC] / [-13º, 131ºF]
Volume can be Regulated in Both Directions.
AMPLIFIER VALUES
Lock-release activation time 01...99 sec. (Default: 03)
Exit button activation time 00...99 sec. (Default: 06) / (deactivated: 00)
Panel type sub-block/block/general entrance. (Default: block)
Panel number 0..9 (by default: 00)
MASTER panel: not active.
Notice: This document shows the basic concepts for a quick start-up. For more information download the manuals at www.fermax.
com.
- Cityline Video Duox Panels cod. 97898.
- Monitor Duox Veo cod. 97858.
5. Montaje del módulo amplifi cador en el panel / Assembly of the amplifi er module in the panel/
Montage du module amplifi cateur sur le panneau / Montage des Verstärkermoduls in der Türstation