9
MACHINE INSTALLATION
Proceed as described below:
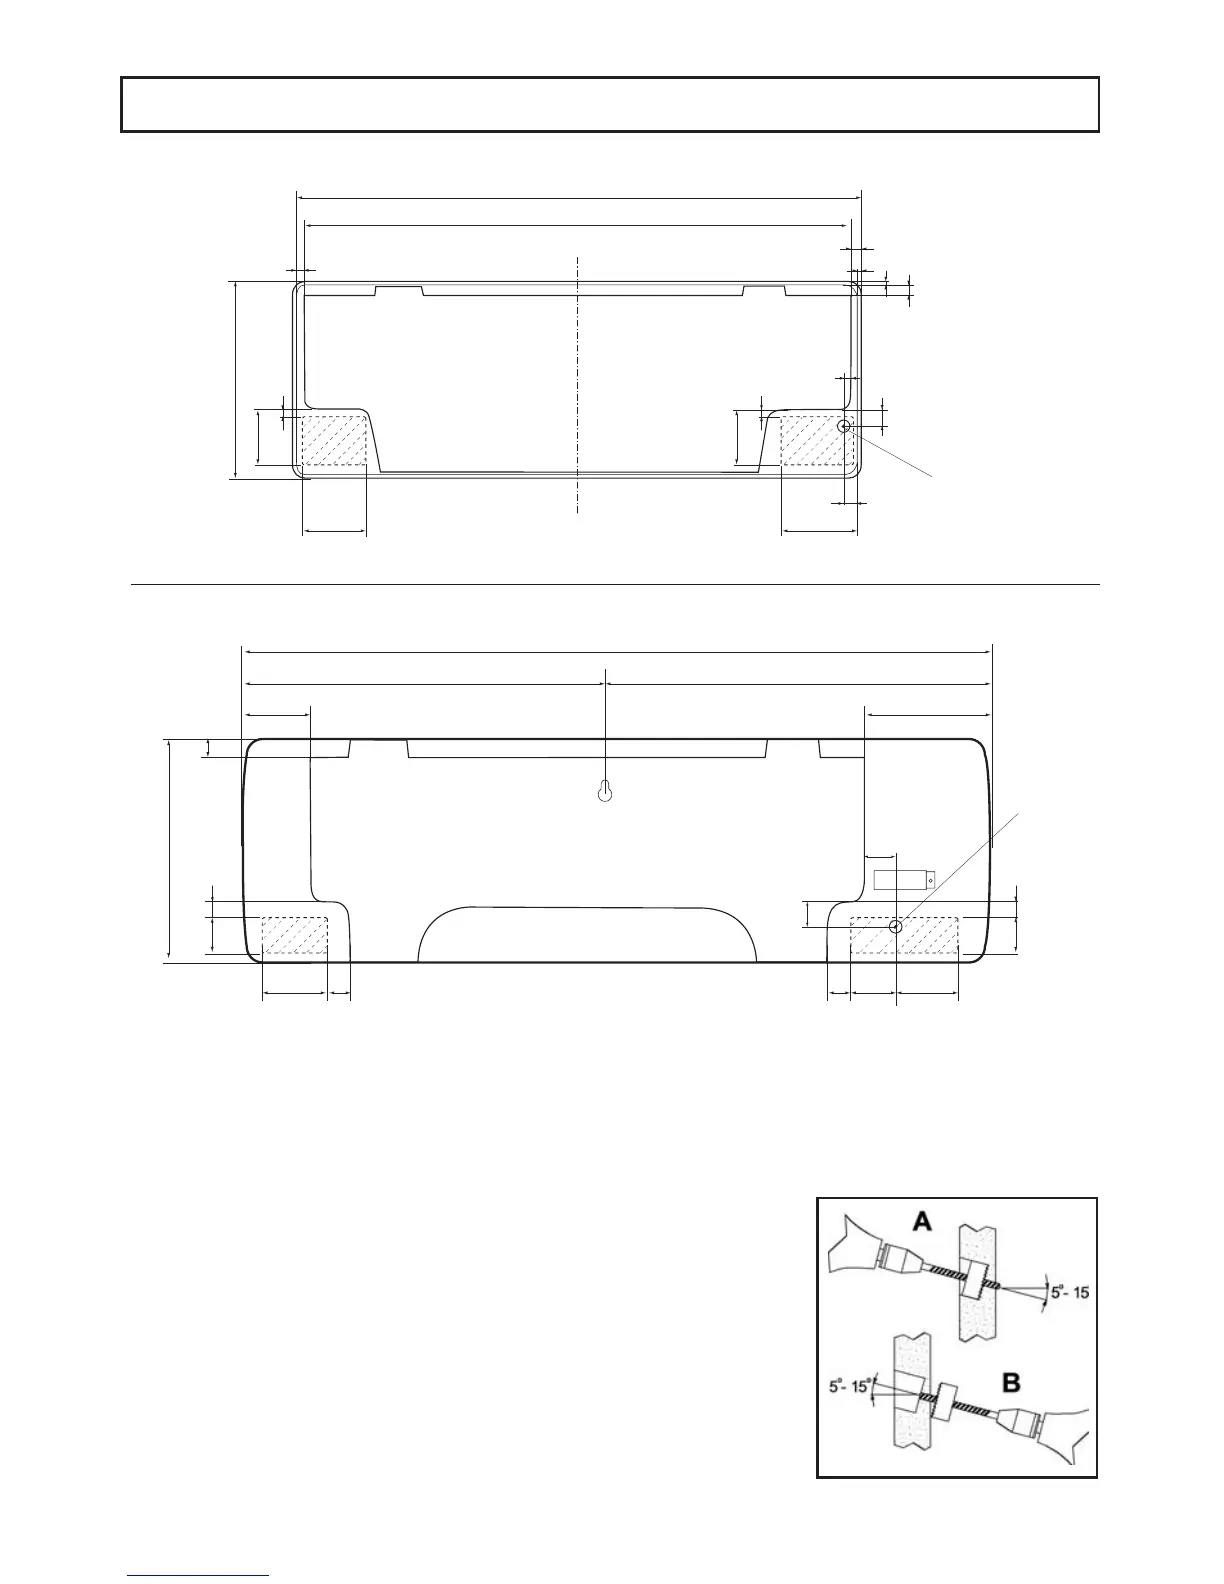
1. Place the plate on the wall at the appropriate height and fix it in place, keeping it
as horizontal as possible (use a level).
2. Mark the positions of the fixing holes.
3. Using a drill and a Ø 8 mm bit, make the holes and insert the expansion plugs.
4. Choose the side on which the connection pipes must exit. It is advisable to use
the rear outlet on the right. Consult the “OTHER POSITIONS FOR INSTALLATION”
section.
5. Make a Ø 70 mm hole in the wall (Fig.2), slightly slanting towards the outside.
Now begin to drill on one side of the walll (A) and terminate from the opposite side
(B) to prevent the wall from crumbling.
6. Using the relative screws, fix the plate in the four holes made previously.
Fig.2
The plastic casing of the unit has pre-cut holes which can be removed if necessary, so as to route the cooling pipes
and cables.
Fig.1
 Loading...