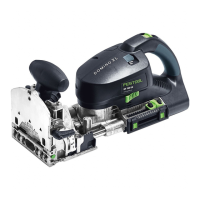
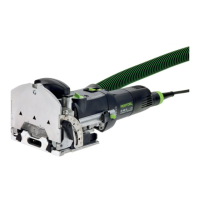
moving portion of the fence. As we saw
earlier, the center scribe line with the cir-
cle cut through it is the horizontal center
of the bit oscillation movement and hence
is the side to side center of any mortise
slot cut with any bit. Long scribe lines are
10mm increments (yellow arrow) while
the shorter lines are 1mm and 5mm in-
crements on this clear plastic guide.
Here is a picture of the guide taken from
above the fence when it is lowered to the
horizontal position parallel with the bit os-
cillation. In use, it is quite visible and I
am constantly impressed by just how
close I can set the Domino mortise slot
with just this visual reference.
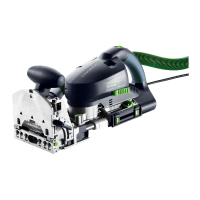
Once you start using the Domino you will
quickly learn to trust the marks and, so
long as you lay out your mortise slots
around centerline measurements, you
can achieve great accuracy and also do
all kinds of offsets using just your layout
mark and these several methods of align-
ing the Domino.
The spring loaded pins are especially fast
and accurate. By hooking one of the pins
over an end or edge of your work piece,
you will place a mortise slot centered ex-
actly 37mm from that edge no matter
what size cutter you use or what slot
width setting you choose.
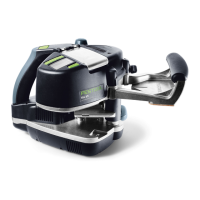
Take the case of an end to edge joint
such as creating a 90 degree joint which
properly lines up the outside
edge of both pieces. Set
the fence height to place
the mortise slot where you
want it on the edge and end
of the work pieces, set the
depth of cut you want and
set the slot width to the nar-
rowest mark (shortest white
icon of the three surround-
ing the green round width
adjustment knob). Hook the
alignment pin over the end
of one piece and make the
mortise cut in that edge.
Next hook the pin over the
edge of the mating piece
and make the cut into that
end. Put the Domino tenon
in place and the edges of the joint will be
perfectly aligned with no layout marking
on your part at all.
It is that easy!
Before we move on to look at all six ways
that two boards can be joined and see
how these various alignment marks and
pins are used to precisely position your
M&T Domino joints, there are three more
positioning aids we need to examine. All
come standard with the Domino Set (574-
283). If you want just the machine itself
with only a 5mm bit, that is item number
574-258.