with the end of the work piece and plunge
to make the cut. The result is shown on
the bottom of the previous page along
with one of the legs that it will mate to.
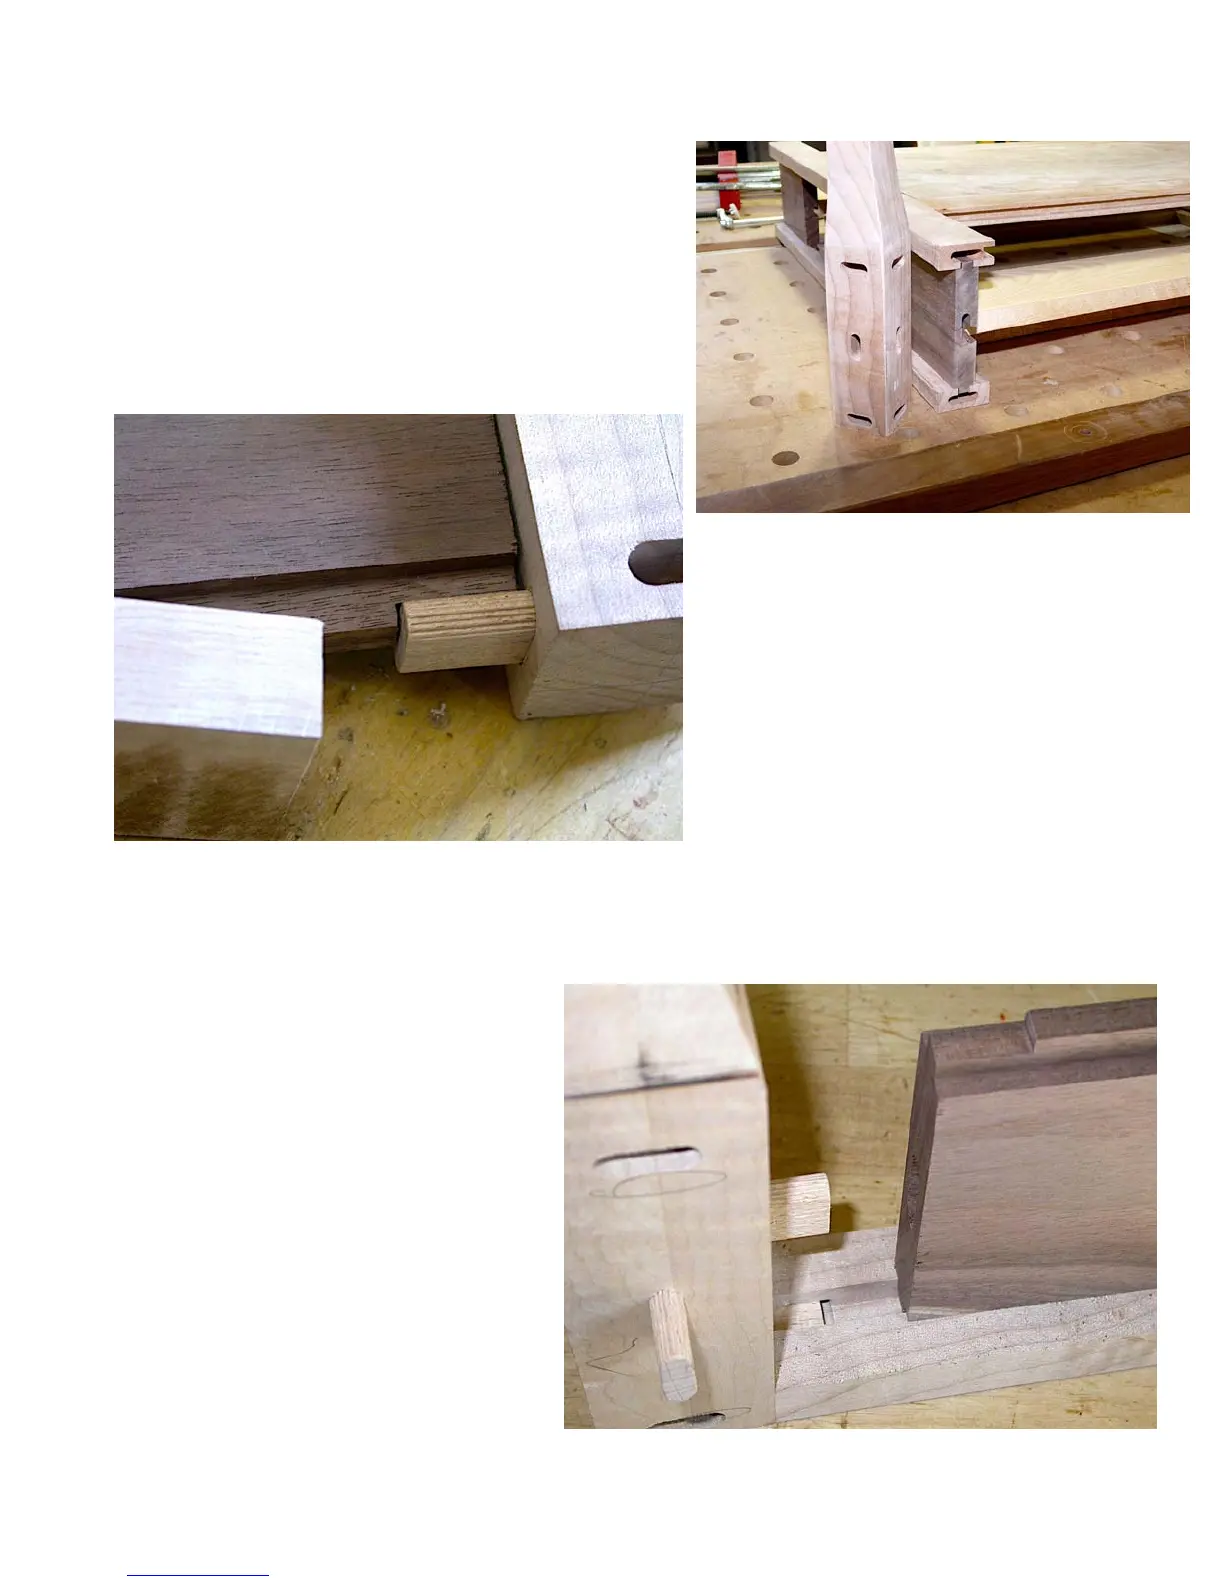
The photos on this page show how the
ends of the 10 x 10mm tongues on the
side skirts are cut back to clear the Dom-
ino tenon since the centerline of the te-
non and the bottom of the dado are both
10mm. (Suppose we should invent a
term and call this a “Dominoed dado”
joint? grin.)
The views here are of the platform
frame member that will index to the
ends of the legs. The photo above is
from the end of the leg view and the
photo below right is taken looking
down on the platform frame with both
the leg and frame members flat on
the reference surface.
Notice that the side skirt 10 x 10mm
tongue is cut back to clear the upper
Domino M&T joint just as was done
to clear the bottom frame-to-leg joint.
In the photo right you can also see
how the vertical M&T joint between
the leg and the side skirt will make
up as the skirt slides in the dado
and onto the leg tenon.
The photo above is after all the
parts have been through final
sanding, ready for finish and actual
assembly.
It all works like a big puzzle and is
much easier to do than to visualize
beforehand or to see in small photos.