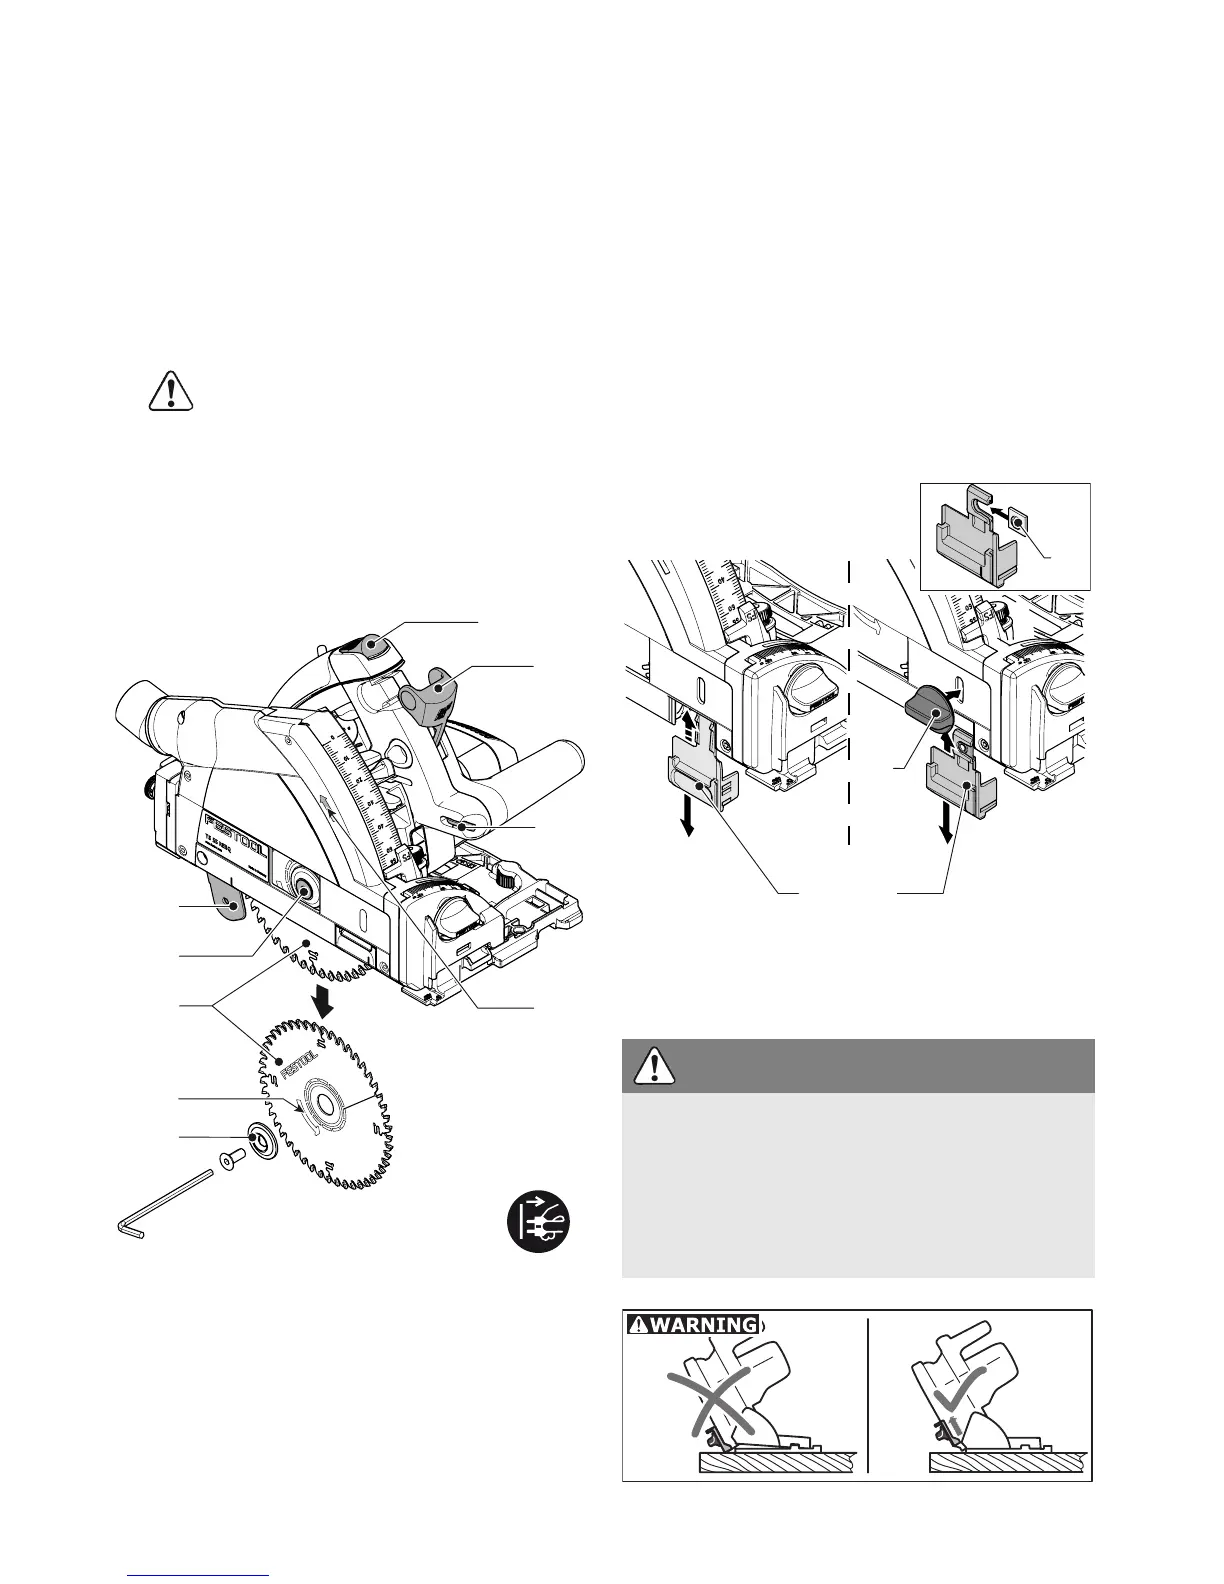
14
X
Before changing the saw blade, set the machine
to the 0° position and select the maximum cut-
ting depth.
X
Fold over the lever
[5-2]
to its end position.
X
Push up the switch-on lock
[5-1]
and push down
the saw unit until it engages.
X
Loosen the screw
[5-5]
using the Allen key
[5-3]
.
X
Remove the saw blade
[5-7]
.
X
Insert a new saw blade.
The rotational direction of the saw blade
[5-8]
and machine
[5-6]
must be the
same!
X
Insert the outer flange
[5-9]
so that the pin en-
gages in the recess on the inner flange.
X
Tighten the screw
[5-5]
firmly.
X
Fold back the lever
[5-2]
.
Fitting the viewing window/ splinterguard
[6]
The
viewing window
(transparent)
[6-1]
provides a
view of the saw blade and optimises dust extrac-
tion.
With 0° cuts, the
splinterguard
(green)
[6-2]
also
improves the quality of the cutting edge of the
sawn-off workpiece on the upper side.
X
Insert the splinterguard
[6-2]
.
X
Screw the rotary knob
[6-3]
through the long
hole in the splinterguard.
L
Make sure that the nut
[6-4]
is seated securely
in the splinterguard.
You must bed in the splinterguard before using it:
X
Set the machine to maximum cutting depth.
X
Set the machine speed to 6.
5-1
5-2
5-3
5-4
5-7
5-6
5-5
5-9
5-8
5
WARNING
Raise of the portable circular saw from the work-
piece, when making mitre cuts with the splinter-
guard or viewing window
Risk of injury
X
Always lift the splinterguard/ view window when
making mtre cuts.