6
Chapter 1 Introduction
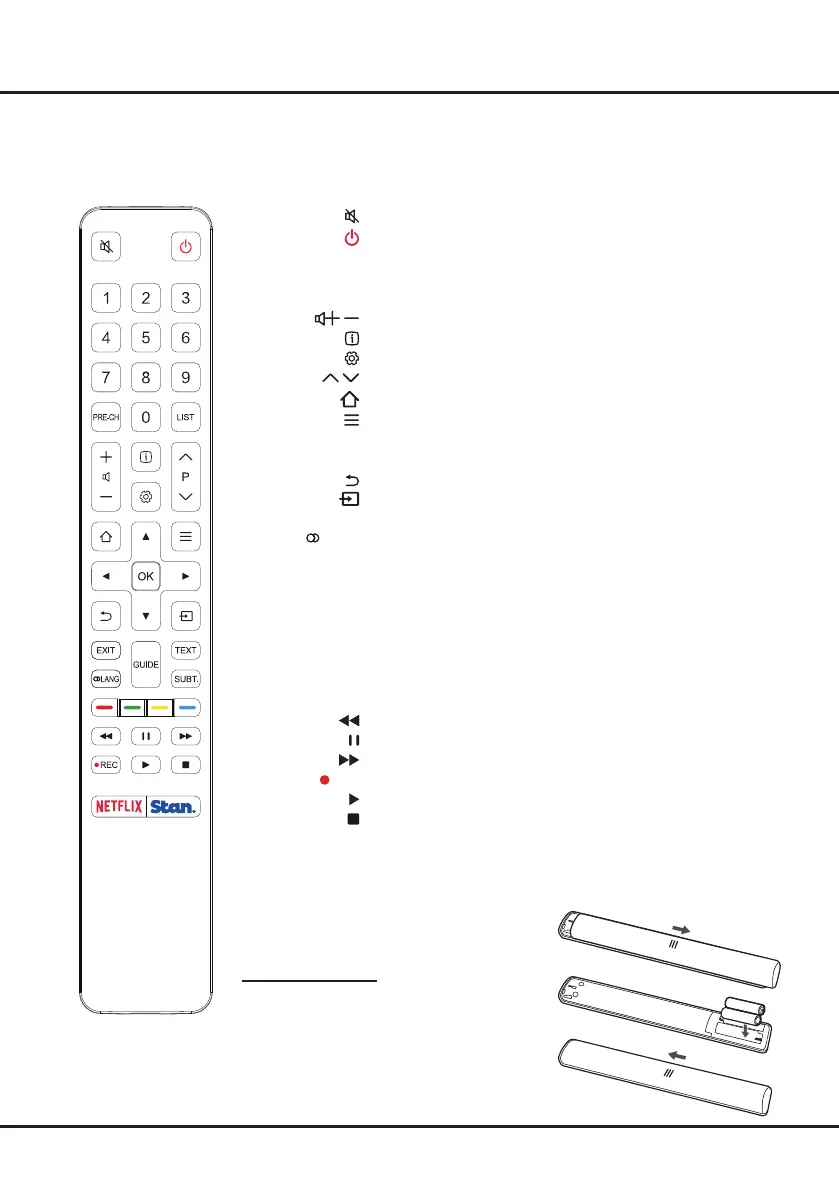
Remote Control Functions
Most of your television's functions are available via the menus that appear on the screen. The remote control supplied
with your set can be used to navigate through the menus and to congure all the general settings.
Note: Figures and illustrations in this operation manual are provided for reference only and may differ from actual
product appearance.
The remote control type may be changed without notice.
To switch the sound off and back on.
Standby / quit standby.
Numeric buttons To enter channel numbers or a digit.
PRE-CH To return to the previous channel in TV mode.
LIST To display the channel list.
/
To control the volume.
To display program information, if available.
To display the Settings menu.
P
/
To change channels.
To access or exit the Smart TV homepage.
To display the Option menu.
▲/▼/◄/► Navigation direction buttons.
OK To conrm an entry or selection.
To return to the previous menu or quit an App.
To select input source.
EXIT To exit the Settings menu.
LANG To select a sound type available for selected analogue TV
program; to select an audio language available for
selected digital TV program.
GUIDE To toggle the Electronic Program Guide on or off (only
available for digital channels).
TEXT To toggle Teletext on or off.
SUBT. To select a subtitle language available for selected digital TV
program.
Colour buttons To select tasks or Teletext pages; to be used for HbbTV
function.
To start fast reverse.
To pause playback.
To start fast forward.
REC To record programs under DTV source.
To start playback.
To stop playback.
NETFLIX To access the NETFLIX application.
Stan To access the Stan application.
Installing Batteries
1. Push to open the back cover as illustrated.
2. Insert two AAA batteries according to the
polarities marked on the battery case.
3. Replace the back cover as illustrated.
 Loading...