7
First Use & Tuning - Installing the Screw
7. After all the PID controllers have finished auto-tuning, turn the
“SPEED” adjustment knob to the lowest setting (all the way CCW)
and press the “START” button. The “START” button will illuminate.
8. Turn the “SPEED” knob up (CW) slowly until the voltmeter reads
about 10 volts. The motor will turn slowly now. This will allow the
square tang of the screw to align with the square socket at the back
of the barrel.
9. Apply a very thin layer of grease to all 5 flat surfaces of the square
tang on the back of the screw. Be careful not to leave excess grease
on the edges of the tang to minimize grease getting on the barrel
walls while inserting the screw. Check that there is a thin layer of
grease on the square tang at every screw change.
10. Insert the screw, square end first, into the end of the barrel. Push the
screw into the barrel until it stops and begins to turn slowly with the
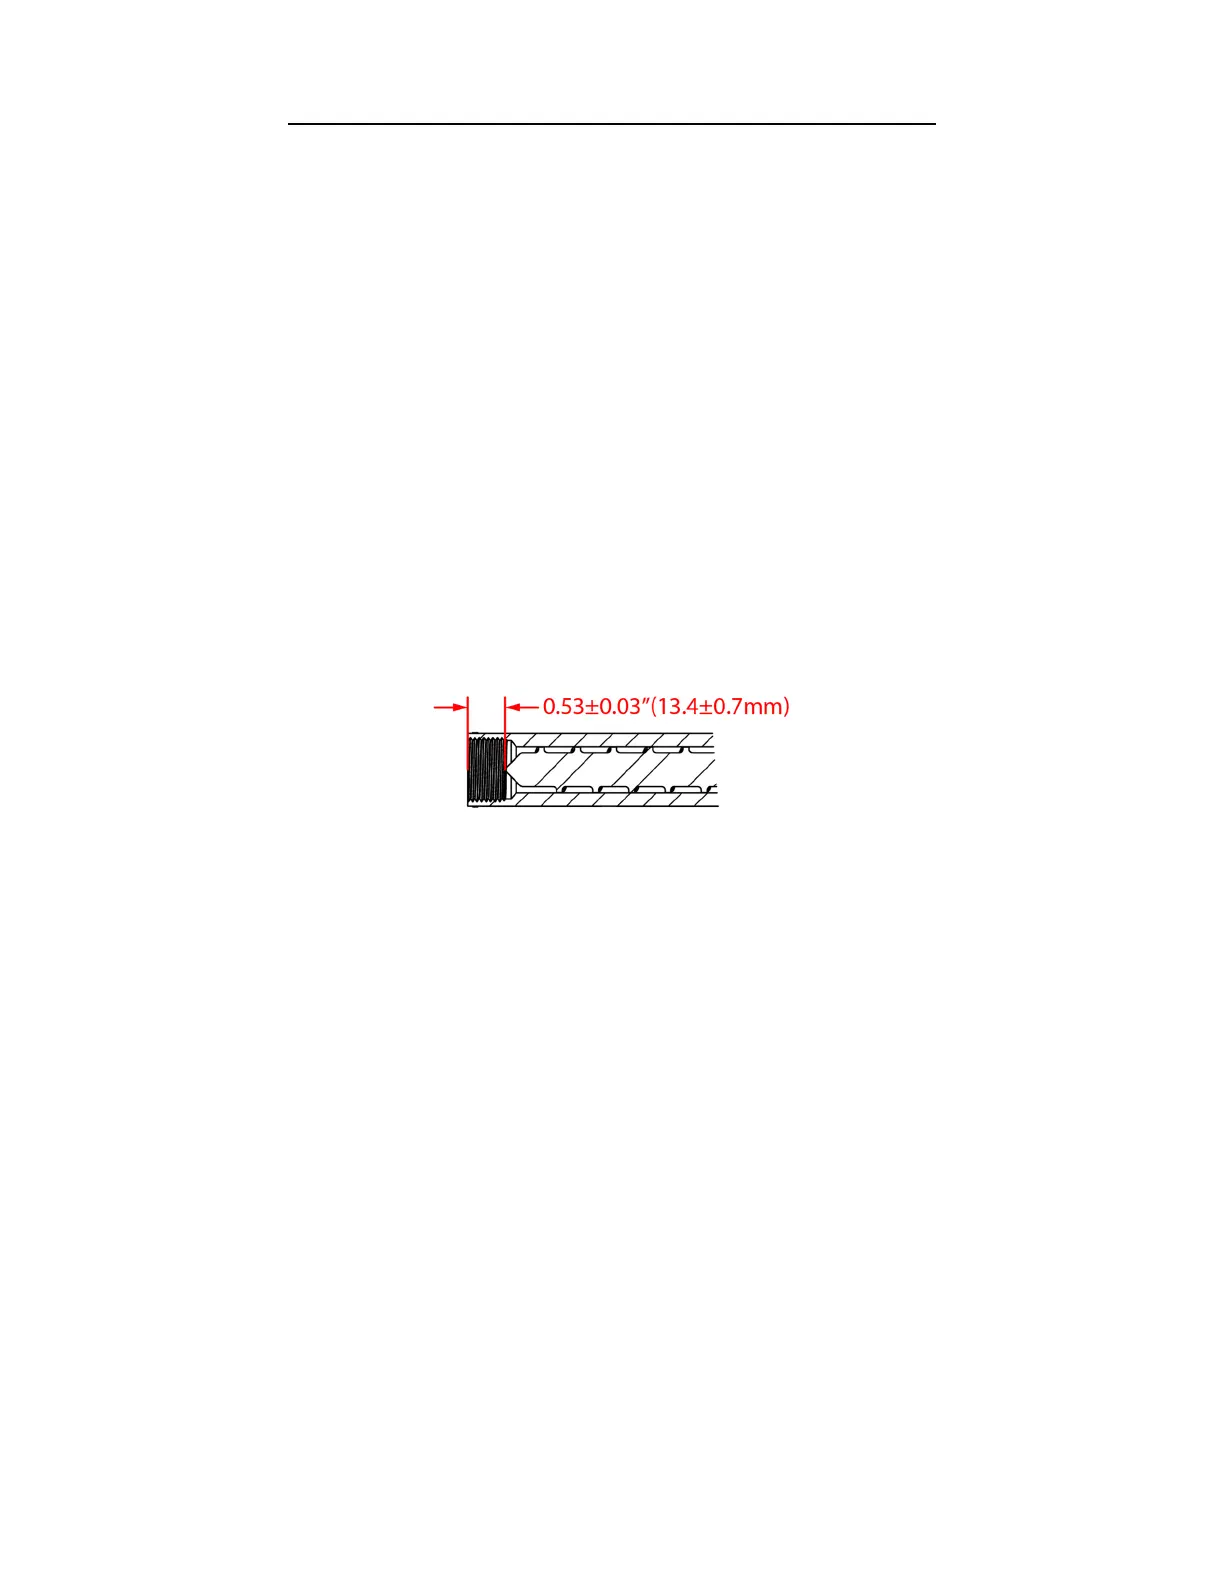
motor. The tip of the screw should be recessed about 1/2” from the
end of the barrel when the screw is fully inserted.
CAUTION! The barrel is HOT! To prevent burns, always use gloves
when working with the screw and nozzles. Use the provided brass pry
tool or another blunt object to push the screw back.
It should take minimal force to insert the screw fully. DO NOT tap the
screw in as this could jam the screw in the barrel. There could be debris
in the barrel or square socket that is stopping the screw. See “Cleaning”
for more information.
Turn off the machine and contact Filabot if any part of the machine
appears damaged.
11. Apply a thin layer of anti-seize lubricant to the nozzle threads and
screw the nozzle into the end of the barrel. The nozzle should be
snug but not tight, approximately 200 in-lbs (230 kg-cm).
 Loading...