6
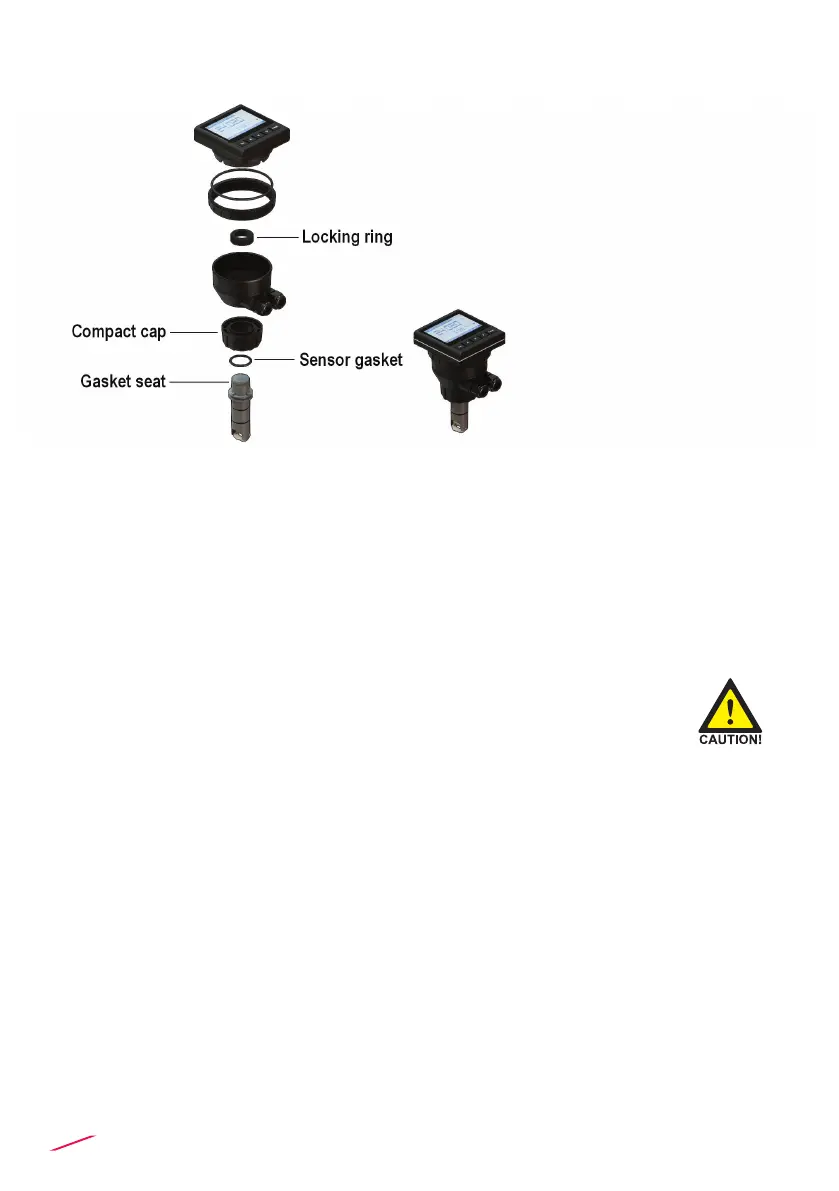
Compact installation
The compact mounting kit (F6.KC1) includes the compact plastic adapter with
gasket for IP65 watertight installation, sensor gasket, the compact cap and the
locking ring.
• Lubricate the sensor gasket with silicone lubricant and mount it on the proper
seat.
• Add the compact cap to the sensor and insert the sensor into the plastic
adapter making sure the alignment tabs are seated in the tting notches.
• Lock the sensor to the adapter: screw completely the locking ring.
• Tighten plastic nut to x monitor on plastic adapter.
WIRING
General recommendation
Always ensure the power supply is switched off before working on the device.
Make wiring connections according to wiring diagrams.
• Terminals accept 26 to 12 AWG (0.08 to 2.5 mm2)
• Strip around 10 mm (0.4”) of insulation from the wire tips and tin bare ends to
avoid fraying.
• Ferrules are suggested when connecting more than one wire to a single
terminal.
• Remove the upper part of the terminals for an easy cabling.
• Insert wire tip or ferrule completely into the terminal and x with the screw
until nger tight.
• Do not route the sensor, DC power, or 4-20mA cables in conduit containing
AC power wiring. Electrical noise may interfere with sensor signal.
• Routing the sensor cable in grounded metal conduit can help prevent
electrical noise and mechanical damage.
• Seal the cable entry points to prevent moisture damage.

 Loading...