B:noisreV
- 6 -
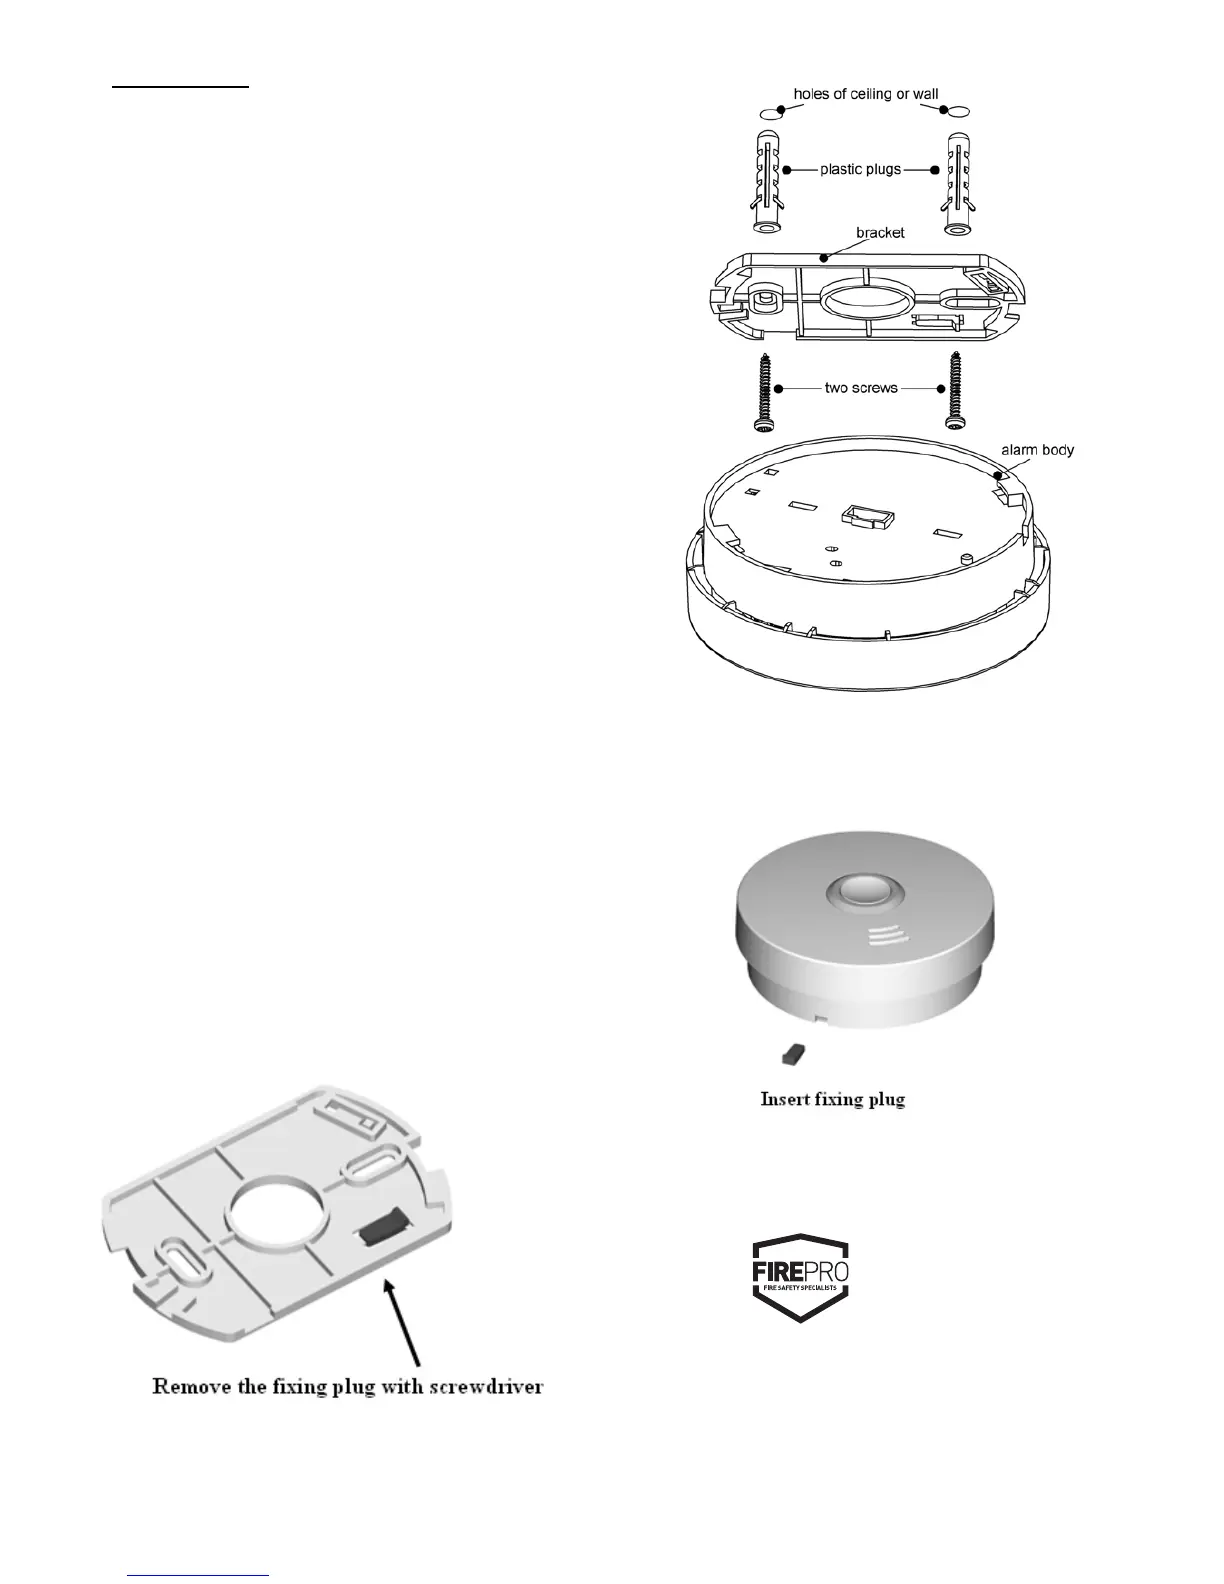
Installation:
Activation
Press test button and hold it for above 3 seconds until
LED lights, and release it within 2 seconds, the unit will
generate a “beep” indicates that it is activated and goes
into work status
CAUTION: MUST activate alarm first, or else there is no
function for this unit.
·Turn the alarm body counterclockwise and take off the
bracket.
· Press the bracket on the installation position, mark
installation hole of the bracket with pencil.
·Bore two installation holes on the sign with electric drill.
Make diameter of holes is 5mm, Strike the two plastic plugs
into holes with hammer.
·Remove fixing plug from the br
acket with screwdriver if
necessary (See Diagram 7).
·Attach the bracket to the plastic plugs and fix tightly the
screws into the plastic plugs (See Diagram 8).
·Fit the alarm on the bracket and turn the alarm body
clockwise, until matching well on the bracket.
·Insert fixing plug to the gap between bracket and bottom
cover for fixing alarm if you want ( See Diagram 9).
·Press the button for test the unit. The alarm sounds 3 beeps –
1.5 seconds pause, repeat it until release the button, if no
sound, it indicates a defective alarm, you can refer
to ”Trouble shooting” for s
olution or return to your retailer
during warranty.
·If you have any questions on installation, you can contact
your retailer.
WARNING:
To prevent injury, this unit must be securely attached to the wall
or ceiling in accordance with the installation instructions.
Diagram 7
Diagram 8
Diagram 9
FirePro
138–140 Bayfield Rd East,
Bayswater North, VIC, 3153. Australia.
P (03) 9720 4333
F (03) 9720 4344
MODEL NUMBER: FP510V
 Loading...