Contact us for assistance: (866) 985-7877 | www.wtliving.com l
ASSEMBLY
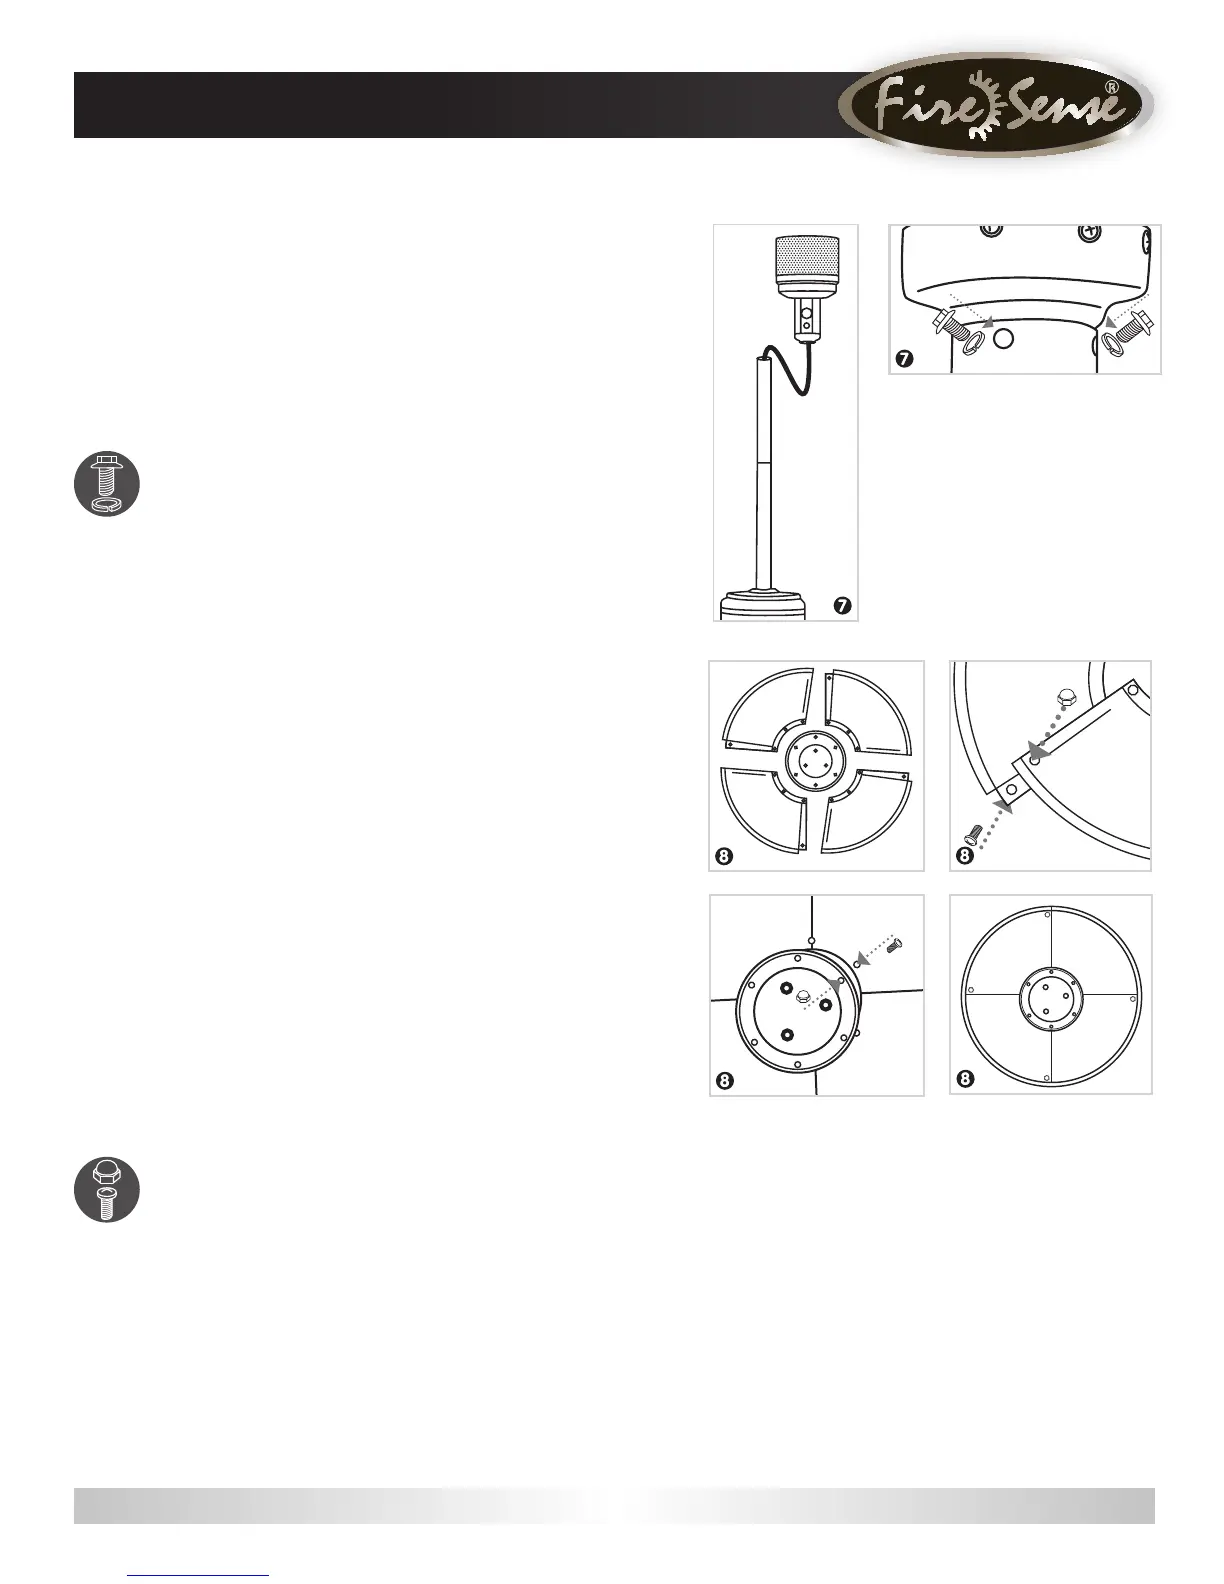
7ñ
Attach Head Assembly
C
to Upper Post
F
. Route
Gas Hose
E
down into Upper/Lower Posts
F
/
G
and
align 4 small holes on the Head Assembly
C
with 4 Small
holes in the Upper Post
F
. [HINT: Control knob should be
above decal on post.] Insert the 4 Small Bolts with Lock
Washers
O
through the aligned 4 holes and tighten securely
with the Wrench
W
.
Hardware Used: 4 x Small Bolt w/Lock Washer
O
8ñ
¸Á>¿,gÛgUÁµ¦¿NOTE: MAKE SURE TO REMOVE THE
BLUE REFLECTOR TAPE ON REFLECTOR PIECES PRIOR TO
ASSEMBLY!
¸¸gLÓ¿/¡[¿t¿gUg¸¸>µÓ¿tµ¿¡µ¡gµ¿>ygÁ¿t¿µgÛgUÁµ¿
¸gUÁ¸\¿¸g¿g>U¿¸UµgÑ¿¡µµ¿Á¿tɵÁgµ¿>¸¸gLÓ¿>_¿
retighten after sections are aligned.
Slide two ,g×gU¿³½*>g
A
together. Insert one Small Screw.
Screw on Cap Nut loosely.
Repeat with the other ,g×gU¿³½*>g
A
.
Slide ,g×gU¿³½g¿g³½>½
B
onto assembled ,g×gU¿³½
Panels
A
. Insert one Small Screw
Q
and screw on Cap Nut
U
loosely. Repeat with two more Small Screws and Cap Nuts
Á¿U¡gÁg¿µgÛgUÁµ¿>¸¸gLÓ¦¿ÉÓ¿ÁyÁg¿>¿¸UµgѸ¿>_¿
cap nuts.
Hardware Used: 12x Small Screw
Q
| 12x Cap Nut
U