10
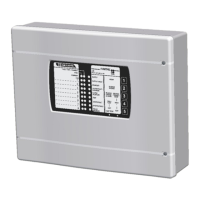
When entering Level 3
Start at ZONE LATCH – Each zone is
individually set as either Latching or Unlatching.
Starting with Zone 1 led flashing (zone 1 is latching)
PRESS Key 2 (Change Setting) – moves flashing
Led to make ‘Zone 1 UNLATCHING’
PRESS Key 1 (Function) – moves setting (flashing
led) to the next zone.
Repeat above process to set remaining zones.
On the last zone, Press Key 1 (Function) moves
setup to setting the Zone Type – 470R or Short CCT.
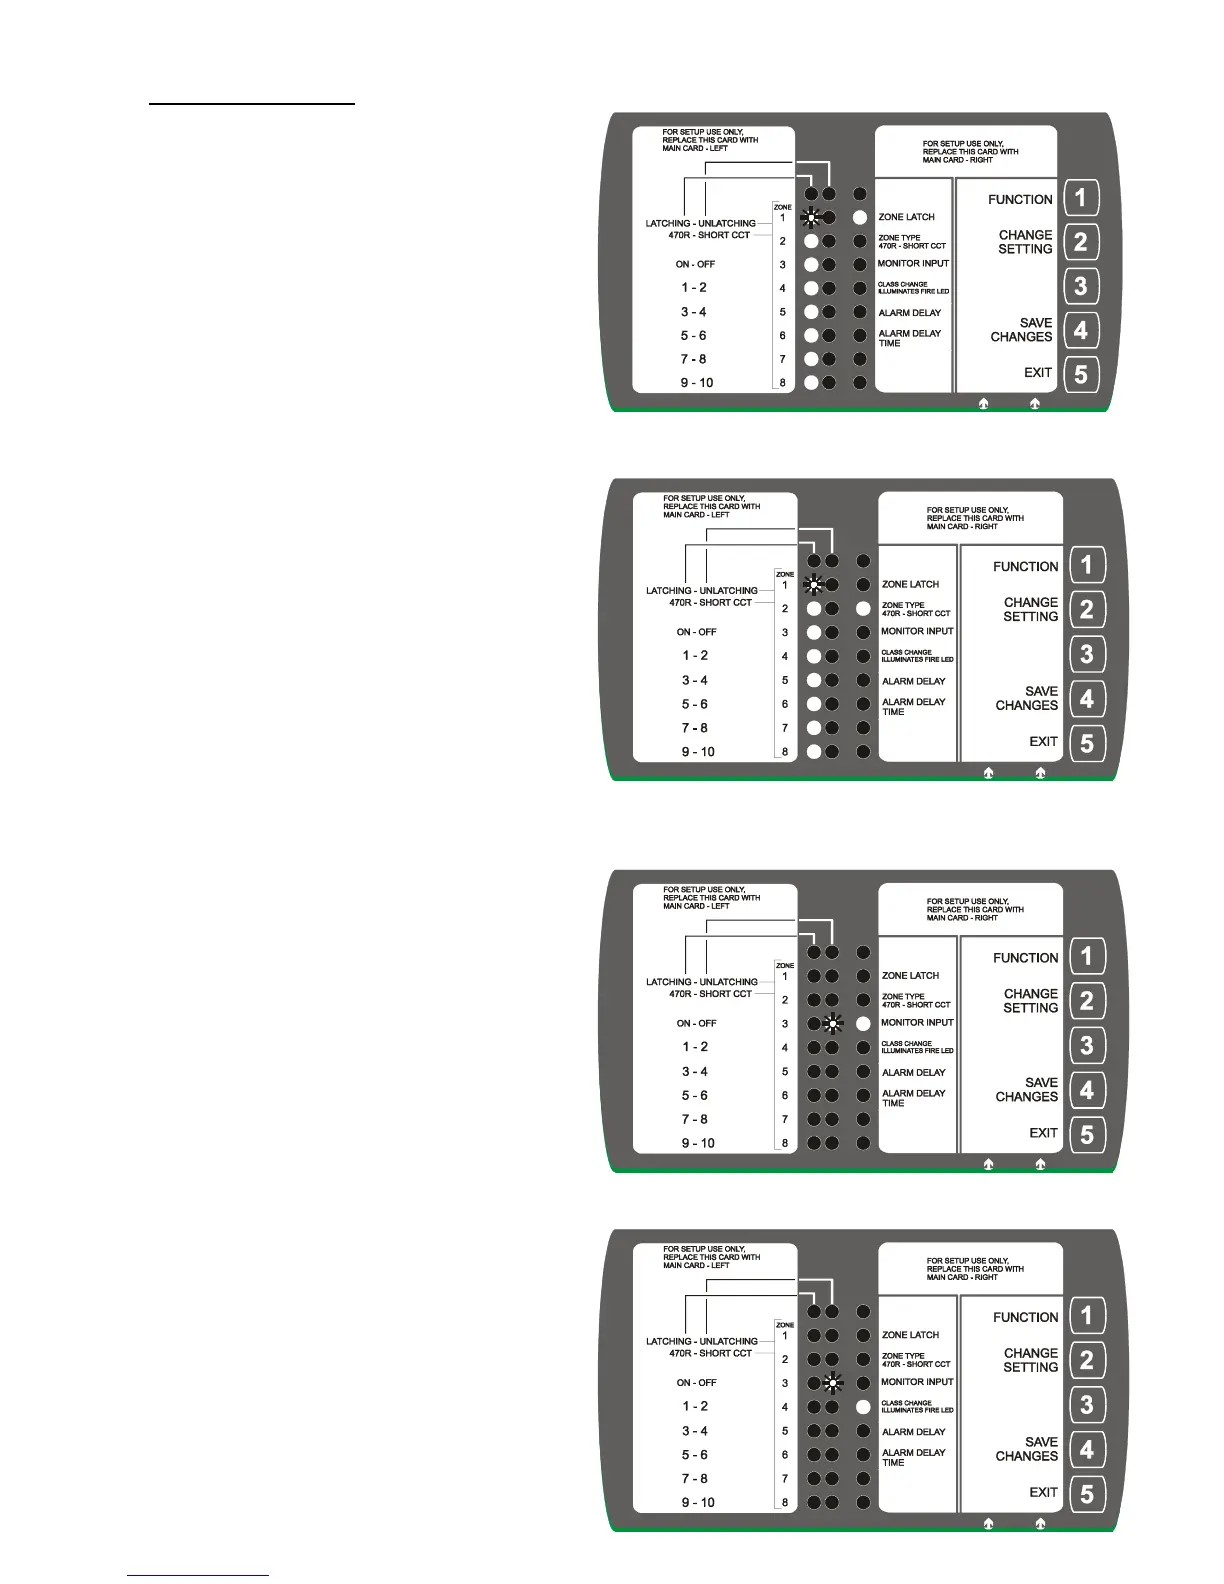
Zone Type – The fire detection type of each zone
is set as either 470R or Short Circuit
(default setting is 470R)
Starts at Zone 1 led flashing (Zone 1 is 470R)
PRESS Key 2 (Change Setting) – moves flashing
led to make ‘Zone 1 Short CCT’
PRESS Key 1 (Function) – moves setting (flashing
led) to the next zone.
Key 2 -change setting to 470R or Short CCT.
Repeat above process to set remaining zones.
On the last zone, press Key 1 (Function) moves setup
to setting Monitor Input.
Setting Monitor Input – This is an input that when
set up requires 24Vdc applied to the terminal. If not
a fault is generated and the ‘common fault’ LED
is illuminated.
Monitor input can either be ON or OFF – if it is off
the input is not monitored and 24Vdc does not have
to be applied to the terminal.
PRESS Key 2 (Change Setting) – moves flashing
led to make Monitor Input either ON or OFF.
PRESS Key 1 (Function) – moves setting (flashing
led) to Class Change.
Setting Class Change – Set up to illuminate the
‘common fire’ led when Class Change is activated.
It can be set to either ON or OFF – if it is set to OFF
The ‘common fire’ led is NOT illuminated when
Class Change is activated.
PRESS Key 2 (Change Setting) – moves flashing
led to make option either ON or OFF.
PRESS Key 1 (Function) – moves setting (flashing
led) to Alarm Delay.