Do you have a question about the First Data RP10 and is the answer not in the manual?
Describes physical connections including telephone, Ethernet, USB, and RS-232 ports.
Details connecting devices like PIN pads or check readers via USB or RS-232 ports.
Instructions for loading a new roll of paper into the terminal's printer.
Guides on connecting the terminal to a power source via adapter and cord.
Covers enabling Wi-Fi, security settings (SSID, password), and checking signal strength.
Explains how to manually or automatically settle the transaction batch on the terminal.
Outlines the steps for completing a customer sale using chip, swipe, or tap payment methods.
Details the procedure for issuing a refund to a cardholder.
This document outlines the setup, basic operations, and maintenance of a First Data terminal, designed to facilitate various payment transactions.
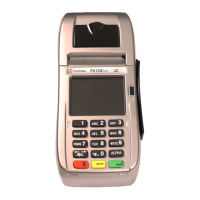
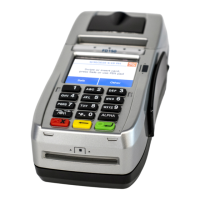
The First Data terminal is a point-of-sale (POS) device primarily used for processing credit and debit card payments. It supports multiple connection types, including Internet (DSL, cable) and dial-up, ensuring flexibility in deployment. The terminal is equipped to handle different card types and transaction methods, including chip cards, magnetic stripe cards, and contactless payments (NFC). It also supports optional peripheral devices like PIN pads and check readers to expand its functionality. The device is designed for merchants to accept payments, manage transactions, and perform batch settlements, making it a comprehensive solution for retail and service environments. Its core function is to securely process financial transactions and provide a reliable interface for customer interactions during the payment process.
To begin using the terminal, it must first be connected to a network and power supply. The terminal features several ports for connectivity:
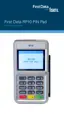
The terminal's functionality can be extended by connecting additional devices. For example, an RP10 PIN pad or a MagTek® MiniMICR Check Reader can be connected via either the USB or RS-232 port. These devices integrate seamlessly with the terminal to provide expanded payment options, such as secure PIN entry for debit transactions or check processing. Specific installation instructions for these peripherals are typically provided with the devices themselves.
The terminal includes an integrated thermal printer for generating transaction receipts. To load paper, the printer cover's latch is opened, and a new roll of thermal paper is inserted. It is crucial to ensure that the leading edge of the paper exits from the bottom edge of the printer to ensure proper feeding. After inserting the paper, the cover is closed, and any excess paper is torn off. This simple process ensures that receipts can be printed for customers, providing a record of their transactions.
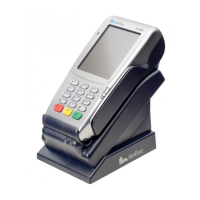
The terminal requires a stable power source to operate. The power supply assembly involves plugging the power cord into the power adapter (A) and then connecting the small end of the power plug to the terminal (B). The plug should be rotated so that the cord points toward the back of the terminal and lies flat underneath it, preventing accidental disconnections. The AC power cord should then be plugged into a surge protector (recommended) or a standard electrical outlet. Once connected, the terminal will power up, and the home screen will display, indicating it is ready for use.
For environments where a wired connection is not feasible, the terminal supports Wi-Fi connectivity. To utilize this feature, a wireless access point, modem, or router supporting 802.11 b/g/n standards and Broadband Internet Service are required. Setting up Wi-Fi involves accessing the "Tool" icon on the home screen, then navigating to "Wi-Fi" and "Security."
When configuring Wi-Fi, it is essential to match the terminal's security mode with the Wi-Fi system's settings (e.g., WPA1-TKIP, WPA1-AES, or WPA2-AES). The SSID (Service Set Identifier), which is the name of the Wi-Fi network, must be entered precisely as it is case-sensitive and up to 32 bytes long. The corresponding password (key) must also be entered correctly to establish a secure connection. A USB keyboard can be connected to the terminal to facilitate easier entry of this information.
To verify the quality of the Wi-Fi connection, users can return to the home screen, touch the "Tool" icon, then "Wi-Fi," and select "View Status" to check the signal strength. This helps ensure a stable and reliable wireless connection for transactions.
Batch settlement is a critical daily operation that clears all transaction information from the terminal. This can be configured for auto-close or managed manually. For auto-close settings, users are advised to contact the help desk. To settle a batch manually:
Processing a sale involves accepting a customer's card payment through one of three methods:
To issue a refund to a cardholder:
While the document does not explicitly detail a "maintenance features" section, several aspects imply routine care and troubleshooting:
For auto-close settings and general inquiries, users are directed to contact the help desk, indicating that some configurations and advanced support are managed externally. This suggests that complex issues or specific settings might require professional assistance rather than user-level maintenance.
The document repeatedly refers users to "businesstrack.com/terminalguides" for more detailed assistance and information. This online resource serves as a primary tool for self-help and troubleshooting, covering a broader range of transactions and potential issues beyond the basic operations outlined in this manual. Accessing these guides is a form of proactive maintenance, allowing users to understand and resolve common problems independently.
Regularly checking Wi-Fi signal strength by navigating to "Tool > Wi-Fi > View Status" can be considered a maintenance task. A weak signal can lead to transaction failures or slow processing, so monitoring this helps ensure consistent performance and allows users to address connectivity issues before they impact operations.
Ensuring the power cord is securely connected and lies flat underneath the terminal, as well as plugging into a surge protector, are preventative measures. These steps help maintain a stable power supply, reducing the risk of power-related interruptions or damage to the device.
The instructions for connecting optional devices like PIN pads and check readers, while part of setup, also imply a maintenance aspect. Proper installation and secure connection of these peripherals are crucial for their functionality and longevity. If a peripheral stops working, re-checking its connection according to the installation instructions would be a first step in troubleshooting.
The process of loading printer paper, while a routine operational task, also has a maintenance component. Ensuring the paper is loaded correctly prevents jams and ensures the printer functions reliably. Using the correct type and size of thermal paper is also implied for optimal printer performance.
In essence, maintenance for this device largely revolves around proper setup, adherence to operational guidelines, utilizing available support resources (help desk, online guides), and proactive monitoring of connectivity and power to ensure continuous and reliable operation.
| Ports | USB |
|---|---|
| Card Reader | Yes |
| Contactless | NFC |
| Touchscreen | Yes |
| Security | PCI PTS |