Page 4 ;&(%$*4.8"4,7%<'*#$"&8#=%/7*,#*%4,77%>?@@@?@AA?BCDC1 Item 63298
EF;6GH IJ6KFGLIM NFLMG6MFMO6FEE6NPQH
EF;6GH IJ6KFGLIM NFLMG6MFMO6FEE6NPQH
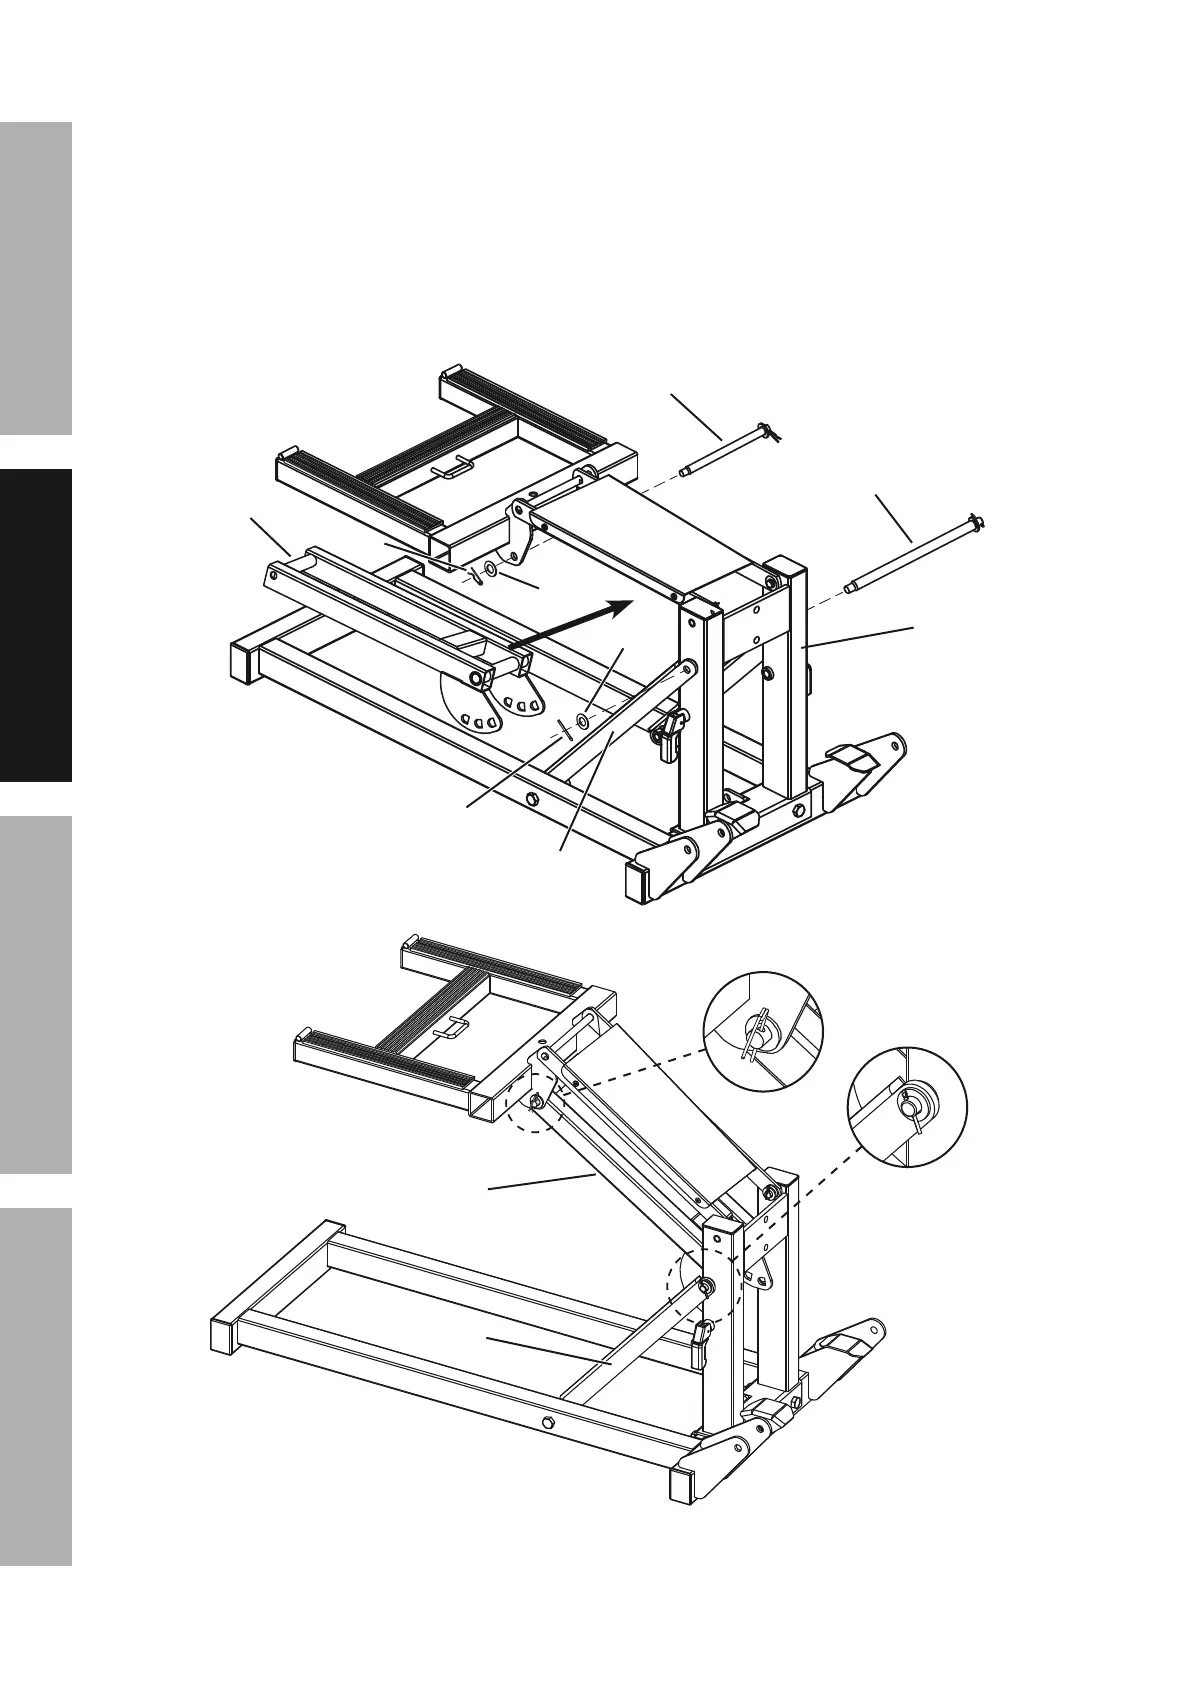
3. Remove the R-Clip (23) and Flat Washer (8) from one end of the Short Lift Arm Rod (25).
Remove the Cotter Pin (12) and Flat Washer (8) from one end of the Long Lift Arm Rod (24).
Place the Lower Lift Arm (21) in position, then insert the Short Lift Arm Rod through the
bracket on the Upper Lift Arm Assembly (26) and the front end of the Lower Lift Arm.
Replace the Washer over the end of the Short Lift Arm Rod and use an R-Clip to secure the Rod in place.
Raise up the previously installed Support Bars. Insert the Long Lift Arm Rod through the Support Bar, the
shaft of the Upper Lift Arm Assembly, the rear end of the Lower Lift Arm, and the other Support Bar.
Replace the Washer over the end of the Long Lift Arm Rod and insert the
Cotter Pin and bend it over to secure the Rod in place.
Q&)*(%Q"2$%Q&)*(%Q"2$%
F(5%W\>XF(5%W\>X
T//*(%Q"2$%F(5%T//*(%Q"2$%F(5%
F##*5+7R%E.,2$F##*5+7R%E.,2$
E.&($%Q"2$%F(5%K&9%W\BXE.&($%Q"2$%F(5%K&9%W\BX
Q&83%Q"2$%F(5%K&9%W\]XQ&83%Q"2$%F(5%K&9%W\]X
E'//&($%E'//&($%
P,(%W>>XP,(%W>>X
O&$$*(%O&$$*(%
J"8%W>\XJ"8%W>\X
K?O7"/%K?O7"/%
W\^XW\^X
[,#.*(%
W@X
[,#.*(%W@X[,#.*(%W@X
Q&)*(%Q"2$%F(5%Q&)*(%Q"2$%F(5%
"8%/7,4*"8%/7,4*
E'//&($%P,(%E'//&($%P,(%
"8%/7,4*"8%/7,4*
E.&($%Q"2$%F(5%K&9%%E.&($%Q"2$%F(5%K&9%%
,$$,4.5*8$,$$,4.5*8$
Q&83%Q"2$%F(5%K&9%Q&83%Q"2$%F(5%K&9%
,$$,4.5*8$,$$,4.5*8$
T//*(%Q"2$%F(5%T//*(%Q"2$%F(5%
F##*5+7RF##*5+7R
E$*/%^-%%F$$,4.%Q&)*(%Q"2$%F(5%$&%T//*(%Q"2$%F(5%F##*5+7R%,89%E'//&($%P,(#