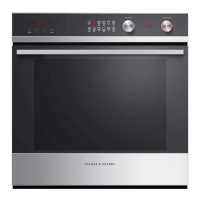
Do you have a question about the Fisher & Paykel OB60SL9DEX1 and is the answer not in the manual?
Instructions for setting a specific cooking time duration. The oven will automatically switch off once this time expires.
Guide on programming the exact time you want the oven to finish cooking and be ready for use.
Steps to select the appropriate cooking function and set the desired temperature for the automatic cooking process.
Details on oven indicators when set, and actions when the stop time is reached, including cancellation.
Instructions on how to check, change, or confirm the set cooking and stop times using the oven controls.
Procedure to stop or cancel the automatic cooking function by turning the main function dial to the 'Off' position.
This document describes the automatic cooking features of a Fisher & Paykel oven, focusing on how to set up timed cooking operations.
The oven offers a versatile automatic cooking feature that allows users to schedule cooking operations with precision. This includes the ability to set a delayed start, a specific cooking duration, and an automatic stop time. This functionality is particularly useful for meal planning, ensuring food is ready at a desired time without constant supervision.
Setting Up Automatic Cooking:
Check Current Time: Before initiating any automatic cooking sequence, it's crucial to verify that the oven's clock displays the correct time of day. This ensures the accuracy of all subsequent timed settings.
Set Cooking Time (Duration):
Set Stop Time:
Select Function and Temperature:
Alternative Automatic Cooking Scenarios:
Simultaneous Timer Use: The oven allows the use of the timer concurrently with automatic cooking, providing additional flexibility for managing cooking tasks.
Restrictions: It is important to note that the meat probe cannot be used in conjunction with automatic cooking functions.
When Automatic Cooking is Set: Once automatic cooking is fully configured, the oven and its lights will remain off, and the halos around the dials will be unlit. However, the oven is now programmed and will automatically turn on at the calculated start time. After a few seconds, the display will revert to showing the current time of day, with the cooking time and stop time indicators lit, confirming that the automatic program is active.
Modifying Settings During Waiting Period: While the oven is waiting to start the automatic cooking cycle, users have the flexibility to modify both the selected function and temperature settings. This allows for adjustments if plans change before the cooking process begins.
When the Stop Time is Reached: Upon reaching the programmed stop time, the oven will automatically turn off, and a long tone will sound to alert the user that the cooking cycle is complete.
Checking Set Cooking Time and Stop Time: To review the currently set cooking time and stop time, users can simply use the scroll buttons.
Changing Cooking or Stop Time: If there's a need to alter the cooking time or stop time after they've been set, the user can:
Viewing Current Time of Day: To quickly check the current time of day, the user can press the cancel button.
Canceling Automatic Cooking: To cancel an active automatic cooking program, the user simply needs to turn the function dial to the "Off" position.
Safe Food Handling: The manual emphasizes the importance of safe food handling practices, particularly when using automatic cooking features. It advises leaving food in the oven for the shortest possible time both before and after cooking or defrosting. This precaution is crucial to prevent contamination by organisms that could cause food poisoning, especially in warmer weather conditions. This highlights a user responsibility aspect that contributes to the overall "maintenance" of food safety.
| Oven size | Large |
|---|---|
| Oven type | - |
| Cleaning type | Catalytic |
| Self-cleaning | Yes |
| Number of ovens | 1 |
| Total oven power | - W |
| Oven net capacity | 77 L |
| Auto programs quantity | 9 |
| Number of shelf positions | 6 |
| Total oven(s) interior capacity | 90 L |
| Lamp type | Halogen |
| Lamps quantity | 4 lamp(s) |
| Noise level | - dB |
| Control type | Touch |
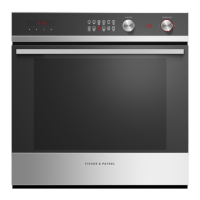
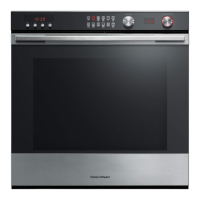
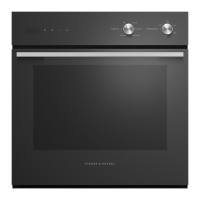
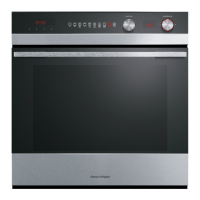
| Product color | Black, Stainless steel |
| Control position | Front |
| Appliance placement | Built-in |
| Clock type | Electronic |
| Timer type | Digital |
| Current | 15.5 A |
| Energy consumption (conventional) | - kWh |
| Depth | 577 mm |
|---|---|
| Width | 597 mm |
| Height | 598 mm |