This document is a user guide for the Fisher & Paykel Professional Range, specifically for RGV2 & RDV2 models, covering both US and CA markets. It provides comprehensive instructions for safe operation, usage, and maintenance of the appliance.
Function Description:
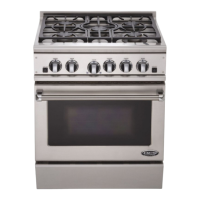
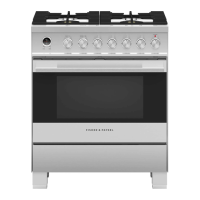
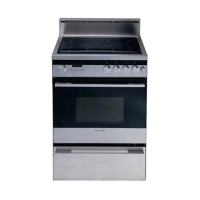
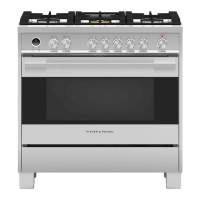
The Fisher & Paykel Professional Range is a versatile cooking appliance designed for both baking, roasting, broiling, and cooktop cooking, including grilling and griddling. It features one or two ovens (depending on the model, with 48" models having a secondary oven) and a cooktop with multiple burners, some of which are high-output for intense heat applications like wok cooking. Certain models also include a grill and/or a griddle. The oven offers various cooking modes such as BAKE, BAKE CONVECTION, TRUE CONVECTION (on some models), BROIL, BROIL CONVECTION (on some models), and PROOF (for dough). The self-cleaning (CLEAN) cycle on RDV2 main ovens simplifies maintenance.
Important Technical Specifications:
- Oven Temperatures:
- BAKE/BAKE CONVECTION/TRUE CONVECTION: Up to 500°F / 260°C.
- BROIL: HI (high) or a desired lower temperature.
- PROOF: Approximately 100°F / 38°C.
- WARM: Lowest temperature setting for keeping food warm.
- Cooktop Burners:
- SIM (simmer) setting: 1,300 BTU/hr for gentle simmering.
- High-output burners: 23,500 BTU/hr for Natural gas (on specific models like RGV2-305/RDV2-305, RGV2-485GD/RDV2-485GD center burner, and RGV2-488/RDV2-488, RGV2-366/RDV2-366 front left/right burners). Other burners offer 18,500 BTU/hr for Natural gas.
- Oven Light Bulb: 40 W, 120 V appliance light bulb.
- Self-Cleaning Cycle: Approximately 5 hours, with an additional cool-down time of up to 30 minutes.
Usage Features:
- Oven Use:
- Shelf Positioning: Shelves are numbered from the bottom (1 being lowest, 5 highest). Instructions are provided for inserting and removing shelves in both main and secondary ovens, including safety stops for secondary oven shelves and integrated slides for main oven shelves. It's crucial to position shelves before preheating.
- Conditioning: Before first use, the oven should be conditioned at 450°F / 232°C for 30 minutes using BAKE and 30 minutes using BROIL (if applicable) to burn off manufacturing residues.
- Baking and Roasting: Preheat the oven for best results. Dark pans absorb heat faster than reflective pans. Avoid frequent opening of the oven door. Shelf position 2 is frequently used for single items.
- Broiling: Always broil with the oven door completely shut to prevent control panel overheating. Preheat for 5-8 minutes for quick browning/searing. Use tongs or a spatula to turn meat.
- Proofing Dough: Secondary ovens are recommended for proofing due to more even temperature. Set to PROOF mode (100°F / 38°C).
- Reheating: Use BAKE or BAKE CONVECTION. Reheat food to piping hot and do not reheat more than once.
- Defrosting: Use BAKE or BAKE CONVECTION at WARM temperature.
- Dehydrating Fruit: Use TRUE CONVECTION or BAKE CONVECTION between WARM and 200°F.
- Cooktop Use:
- Burner Operation: Push and turn the knob counterclockwise to LITE for ignition. Adjust flame between HI (high) and SIM (simmer). Halos around knobs indicate operation (orange for on, white for heating/maintaining temperature).
- Wok Cooking: Use woks only with a wok ring (purchased separately) placed over grates.
- Grill Use:
- Reversible Grate: Features a ridged side for draining fat (hamburgers, steak, sausages) and a flat side for more support and less fat (fish, vegetables, lean chicken).
- Grease Drip-pan: Must be in place and grate sloping towards it.
- Operation: Turn knob to LITE/HI. Preheat for about 15 minutes. Adjust heat between HI and LO. Never use with grill cover in place.
- Griddle Use:
- Seasoning: Requires initial seasoning with vegetable oil (not corn oil) at 350°F / 177°C. Re-season after long periods of non-use.
- Operation: Turn knob to desired temperature. Halo glows white during heating, orange when ready. Never use with griddle cover in place. Keep vents clear.
Maintenance Features:
- General Cleaning:
- Always turn off the appliance and allow parts to cool before cleaning, unless specified otherwise (e.g., hot griddle).
- Use mild detergent, hot water, and microfiber cloths for most surfaces.
- Avoid abrasive cleaners, scourers, sharp metal scrapers, and steam cleaners.
- Do not use aerosol cleaners on a hot range.
- Ensure the anti-tip device is re-engaged if the range is moved for cleaning.
- Oven Parts:
- Door Frame Exterior, Control Panel, Sump Area, Grill/Griddle Covers, Back Trim: Clean with mild detergent and hot water. Stainless steel parts can be polished with a suitable cleaner, rubbing in the direction of polish lines.
- Control Knobs: Can be removed for cleaning. Ensure they are set to OFF before removal and replaced correctly.
- Enamel Oven Interior (Light Soiling): Wipe with damp cloth and mild detergent.
- Enamel Oven Interior (Stubborn Soiling - Non-Self-Cleaning Ovens): Remove all shelves/racks. Cover kickstrip grate and floor with newspaper. Apply ammonia-based or oven cleaner per manufacturer's instructions.
- Oven Door Glass (Interior): For self-cleaning ovens, it cleans during the CLEAN cycle. For non-self-cleaning ovens, use a soft cloth with warm water and dishwashing liquid or ceramic cooktop cleaner for stubborn stains.
- Oven Door Glass (Exterior): Clean with soft cloth, warm water, and dishwashing liquid or glass cleaner.
- Oven Door Gasket: Avoid cleaning. If necessary, gently wipe with a damp sponge and dry. Do not rub or damage.
- Side Racks: Pre-soak stubborn soiling. Clean with mild detergent and hot water or in a dishwasher.
- Oven Shelves (Main Oven): Do not wash in dishwasher or immerse in soapy water as it removes lubricating grease. Scrub with a dampened, soap-filled, non-metal, non-abrasive pad. Apply chrome cleaner if needed.
- Broil Pan and Rack: Pre-soak stubborn soiling. Wash by hand or in a dishwasher.
- Bake and Broil Burners (Gas Ovens) / Broil Element (Electric Ovens): These parts self-clean during normal use. Do not clean manually.
- Oven Light Bulb: Replace with a 40 W, 120 V appliance light bulb. Disconnect power before replacement.
- Cooktop Parts:
- Burner Caps and Brass Flame Spreaders: Allow to cool. Wash in soapy water, rinse, and dry. Clear notches with a stiff nylon brush or paper clip. Ensure parts are dry and correctly positioned before reassembly to prevent irregular flames.
- Ignitors: Keep clean and dry. Clean with a small brush or cotton swab dipped in rubbing alcohol.
- Burner Grates: Allow to cool. Lift off cooktop. Soak stubborn stains in washing detergent and water. Wash in hot water and dishwashing liquid, then rinse and dry. Dishwasher safe.
- Grill Grate: Clean immediately after use while still hot with a brass bristle barbecue brush and warm water. Once cooled, wash in sink with hot soapy water.
- Radiant Tray (under grill grate): Clean only if there are large food particles. Shake gently over newspaper/waste bin. Do not clean with water. Ensure tab with hole is at the front when replacing.
- Griddle: For light soiling, use a spatula or brass brush while hot. Once lukewarm, rub with vegetable oil and wipe. For stubborn soiling, use a griddle stone.
- Black Frame of Grill and Griddle: Clean with mild detergent and hot water. Do not lift frame off cooktop.
- Wok Ring: Soak stubborn stains in washing detergent and water. Wash in hot water and dishwashing liquid. Dishwasher safe.
- CLEAN Cycle (RDV2 Main Ovens):
- Remove all shelves, side racks, bakeware, and utensils.
- Wipe up large spills/grease deposits.
- Ensure lamp covers are in place.
- Clean soiled oven frame/outer door edge manually.
- Close oven door firmly.
- Turn ventilation hood to maximum.
- Turn oven mode and temperature knobs to CLEAN.
- Oven door will lock. Halos will glow red.
- After cycle, allow oven to cool and door to unlock. Wipe up gray ash.
- Do not use oven cleaners in self-cleaning ovens.
- Ensure oven door glass is not cracked/flawed and gasket is intact before starting.
- Move pet birds to another room due to fumes.
- Do not disconnect power during the cycle as the cooling fan is essential.