Instruction Manual
D200099X012
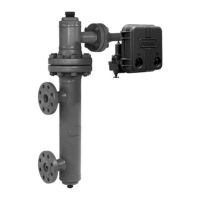
249 Caged Sensors
April 2017
6
CAUTION
When removing a sensor from a cage, the displacer may remain attached to the displacer rod and be lifted out with the
cage head when the cage head is removed. If separating the displacer and displacer rod before removing the cage head,
remove the cotter spring (key 11).
Be careful not to let the displacer slip and drop into the bottom of the cage, as displacer damage could result.
3. Carefully remove the cage head and lift out the displacer.
4. A style 1 or 4 (screwed or flanged) cage must be disconnected at the lower connection and the liquid damper
(key 29) removed. Remove the damper by prying it out of a flanged connection or by unscrewing it from a screwed
connection with a 1/2‐inch hex (Allen) wrench. If necessary, completely remove the style 4 cage from the vessel.
5. For complete drainage and cleaning of a cage with style 2 or 3 (screwed or flanged) connections (figure 5), remove
the pipe plug (keys 17 or 26) from the bottom of the cage. Remove the liquid damper (key 29). If necessary,
completely remove the cage from the vessel.
Figure 5. Cage Connection Styles
A1271-2
STYLE 1: TOP
AND BOTTOM
STYLE 2: TOP
AND LOWER SIDE
STYLE 3: UPPER
AND LOWER SIDE
STYLE 4: UPPER
SIDE AND BOTTOM
SCREWED: S3
FLANGED: F3
SCREWED: S2
FLANGED: F2
SCREWED: S1
FLANGED: F1
SCREWED: S4
FLANGED: F4
6. Use appropriate cleaning techniques, tools, and solutions. After cleaning the cage, install the liquid damper and
reconnect the cage to the vessel. Install the cage head and controller/transmitter. Properly calibrate the
controller/transmitter following the procedures given in the controller/transmitter instruction manual.
Removing the Displacer and Stem
The displacer (key 10) is a sealed container. If the displacer has been penetrated by process pressure or liquid, it may
hold pressure or hazardous liquid for an extended period.
Process residue buildup on the displacer and stem (key 24) may change displacer weight or displacement. A bent stem
or a dented or corroded displacer can impair performance.
If the displacer rests against the travel stop, appears to be overweight, or causes output drift or other output
inaccuracies, it may have been penetrated by process pressure or liquid. Such a displacer may contain pressure