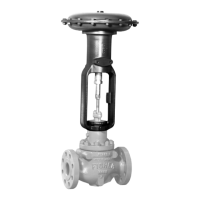
Type 1008
3
Position Indicator Mounting
The Tejax position indicator is available on sizes 30,
40, and 50 Type 1008 handwheel actuators. It must be
mounted in a horizontal position to function correctly.
To set the position indicator:
1. Seat the valve plug.
2. Loosen the four screws holding the dial indicating
unit in place.
3. Turn the dial until both hands are at the ‘‘Shut’’
(Zero) position.
4. Tighten the four screws.
The long pointer indicates fractions of a turn; the small
pointer counts the number of full turns. The position
indicator requires no lubrication.
Maintenance
Actuator parts are subject to normal wear and must be
inspected and replaced when necessary. The frequen-
cy of inspection and replacement depends on the se-
verity of service conditions. Because of the care
Fisher Controls takes in meeting all manufacturing re-
quirements (such as heat treating and dimensional
tolerances), use only replacement parts manufactured
or furnished by Fisher Controls.
WARNING
Avoid personal injury or damage to
property from sudden release of pres-
sure or uncontrolled process fluid. Be-
fore performing any maintenance opera-
tions:
D Isolate the valve from the process,
and relieve process pressure from both
sides of the valve.
D Use lock-out procedures to be sure
the above measures stay in effect while
you work on the equipment.
Key numbers refer to figure 2 for size 30, figure 3 for
sizes 40 and 50, figure 4 for size 80 or figure 5 for size
100.
Lubrication
The interior parts of a Type 1008 handwheel actuator
should be lubricated on a regular schedule with a qual-
ity gear lubricant. The interior parts should also be lu-
bricated whenever handwheel rotation becomes diffi-
cult.
Disassembly
Parts are subject to normal wear and must be in-
spected periodically. The following procedure de-
scribes actuator disassembly for general inspection
and replacement.
For Size 30:
1. Remove the stem connector assembly (key 24).
2. Unscrew the set screw (key 13) from the yoke (key
26) and remove the steel balls (key 33) through the
threaded hole.
Note
Be careful not to lose the ball (key 33)
and spring (key 34) as the handwheel is
removed.
3. Remove the handwheel (key 28) and stem screw
assembly (key 38) from the yoke (key 26).
4. Unscrew the handwheel (key 28) from the stem
screw assembly (key 38).
For Sizes 40 & 50:
1. Remove the stem connector assembly (key 24).
2. Unscrew the hex nut (key 14) and remove the
washer (key 41) and lockwasher (key 42).
Note
Be careful not to lose the ball (key 33)
and spring (key 34) as the handwheel is
removed.
3. Remove the handwheel (key 28) from the stem
screw assembly (key 38).
4. Loosen the set screw (key 13) and unscrew the
bearing retainer (key 44).
5. Remove the stem screw assembly (key 38), thrust
bearings (key 2), and nut (key 43) from the yoke (key
26).
6. Remove the nut from the stem screw assembly
(key 38) to reach the remainder of the parts.
For Size 80:
1. Remove the stem connector assembly (key 24).

 Loading...