25
English
ATTENTION:
The dehumidier must be placed in a
vercal posion for at least 12 hours
before use.
Do not aempt to replace the power cord
or plug, as this is a dangerous operaon.
Have them replaced immediately by a
Flama-authorized technical assistance
service or by similarly qualied technicians
to prevent danger.
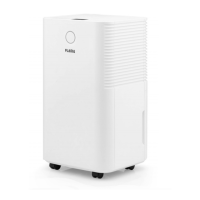
DESCRIPTION
1. Control panel
2. Indicator light
3. Lateral grille
4. Water tank
5. Filter compartment
6. Filter
7. Plug for connuous drainage
8. Handle
9. Wheels
10. Display
11. Power buon (ON/OFF)
12. Mode buon
13. Humidity control buon (HUM)
14. Timer buon (TIMER)
15. Fan speed buon (SPEED)
16. Lock buon (LOCK)
OPERATING INSTRUCTIONS
CONTROL PANEL
POWER buon (11) - turning the
appliance on and o
Ensure that the water tank is in the correct
posion (aer turning on the appliance
for the rst me, if the full tank indicator
lights up, remove the tank and return it to
the correct posion).
Check that the appliance is plugged into
the wall outlet.
Aer connecng to the power source, all
the indicators and the display will light up
for 1 second and then turn o. Following
an alert sound, the power indicator will
light up and the dehumidier will enter
standby mode.
Press the POWER buon and the
dehumidier will begin working, with
an inial humidity of 60%, in standard
automac mode and high fan mode.
Press the POWER buon again and the
dehumidier will stop working.
Disconnect the appliance from the power
supply, unplugging it from the wall outlet.
MODE buon (12)
Press the buon to change the appliance’s
use mode; the corresponding indicator will
light up.
Automac mode
When the ambient humidity ≥ the dened
humidity + 3%, the fan will begin to