13
INSTALLATION OF YOUR FLAVIA® BREWER
Brewer Dimensions
Height - 432mm Width - 252mm Depth - 517mm
A gap of 60mm is required behind the Brewer if it is to be plumbed in.
Electrical Supply
It is important that you have a power supply ready so that we can install your new system quickly
and efficiently.
Plumbed Systems
A plumbed system will need a mains drinking water supply.
i.e. A brass stopcock to BS1010 standard with a 15mm compression outlet or a brass stopcock
with a 3/4 inch BSP male outlet.
Water pressure must be between a maximum of 0.7 MPa (7 bar, 100 psi) and a minimum of 0.1
MPa
(1 bar, 14.5 psi).
Brewer to be connected to cold water supply only.
Your system is supplied with a flexible mains water hose 2 metres in length. This hose should be
used, no old hose-sets should be re-used.
Installing
Please contact customer service or your local FLAVIA® supplier for your brewer to be installed.
•
If you are unsure about any installation requirements, consult an electrician and/or a plumber.
•
Do not use water that has come from a water softener or contains sodium.
•
Install in accordance with local plumbing regulations.
•
Jointing compound should not be used in the water supply to the system, as this will affect the drink flavour,
only use PTFE tape.
•
Do not locate the water supply above the mains power socket.
•
We draw your attention to the requirements of the Water Supply (Water Fittings) Regulations 1999.
You will need to supply a suitable switched electrical supply to meet the requirements for
isolation of electrical equipment.
i.e. A 13 Ampere supply requires 13 Ampere switched socket or a lockable isolator.
Only use a 230V AC single phase power supply.
Use only one system per socket and ensure it is earthed.
Your system comes supplied with a mains lead 2 metres in length. Only this lead should be used,
no old leads should be re-used.
ENG
2
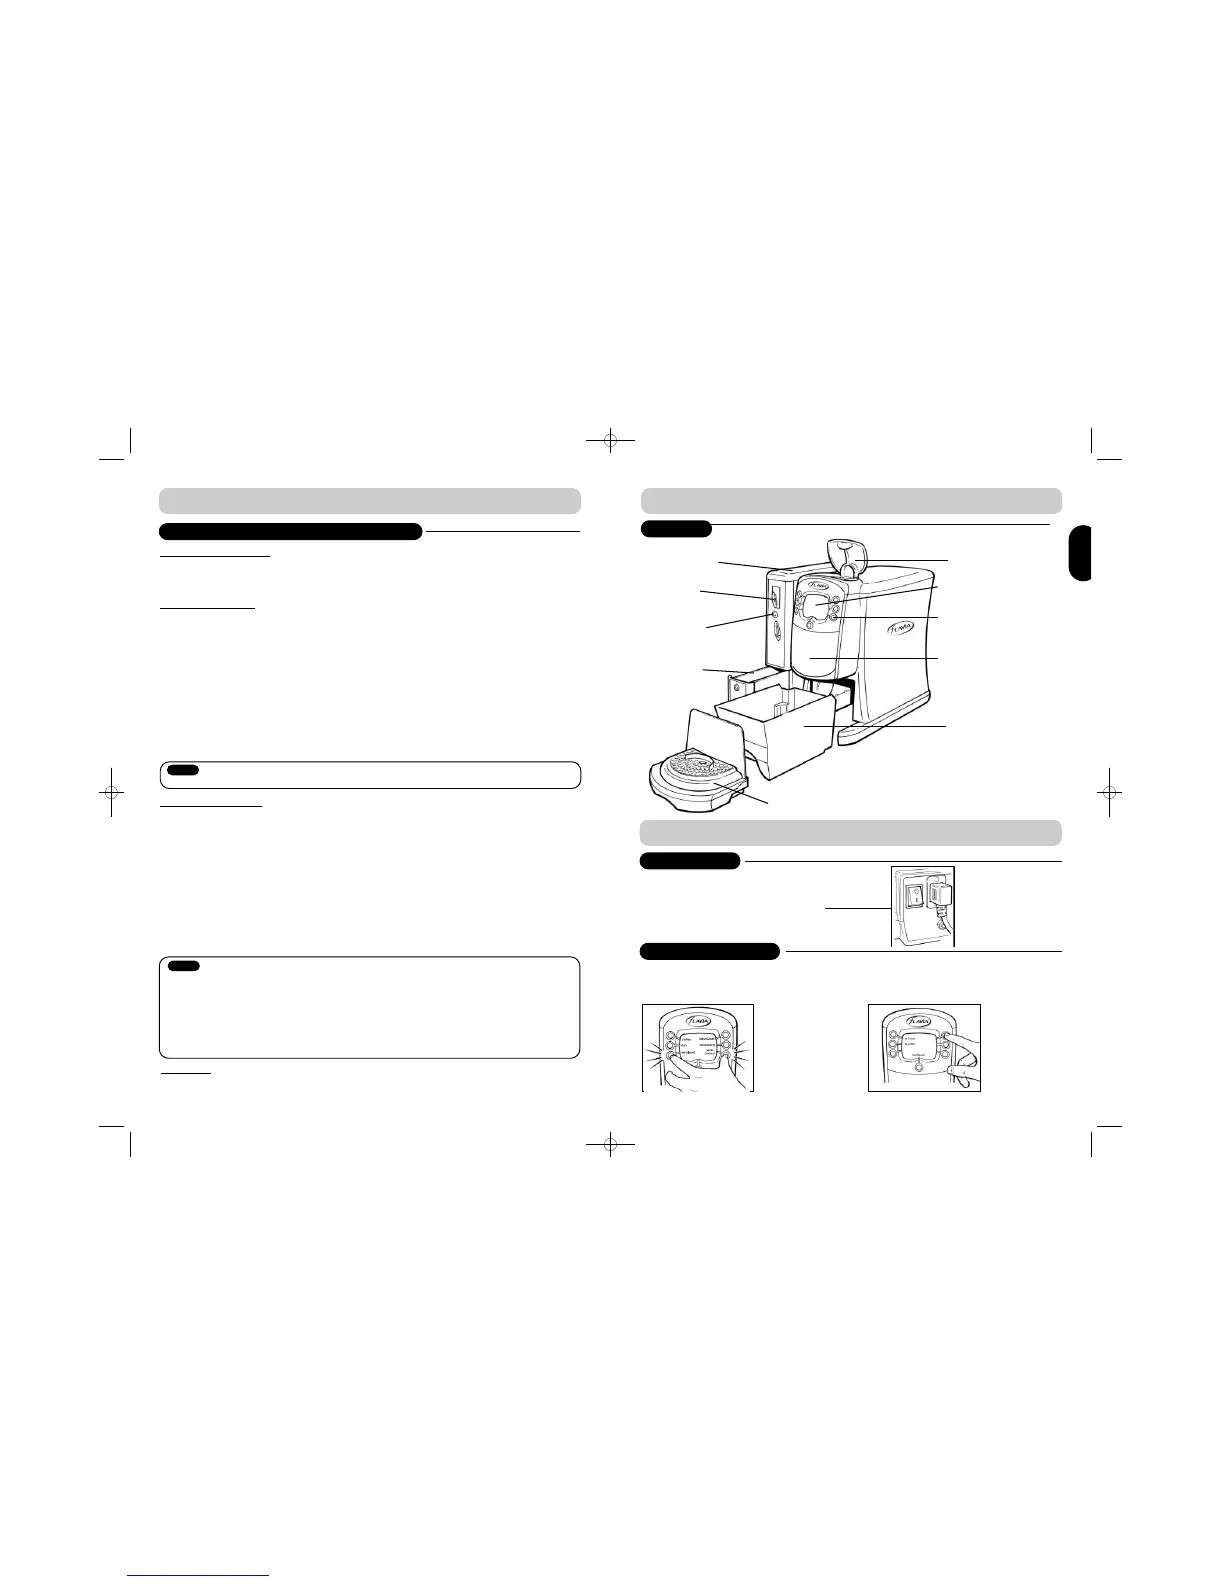
B R E W E R L A Y O U T
1. Enter operator menu (push and hold bottom left and right buttons) (Ref. A)
2. Enter password (default password: press top right button 4 times) (Ref. B)
3. Operator menu (Ref. C)
S E T T I N G U P Y O U R B R E W E R
SWITCHING ON
FILLING WITH WATER
1. Plug your FLAVIA® brewer in
2. Switch on using ON/OFF switch at back
SAFETY AND INSTALLATION GUIDELINES
EXTERIOR
Instructional Panel
Drink Selection
Buttons
Filterpack door
Filler lid
(Unplumbed
Only)
Filterpack Bin /
Filterpack funnel
if on FLAVIA®
Base Cabinet
Coin Refund
button*
Coin Entry Slot*
Pay Module*
Cash box*
Drip tray
*Features dependant upon product configuration
(Ref. A)
(Ref. B)
Notice
Notice