7.
On
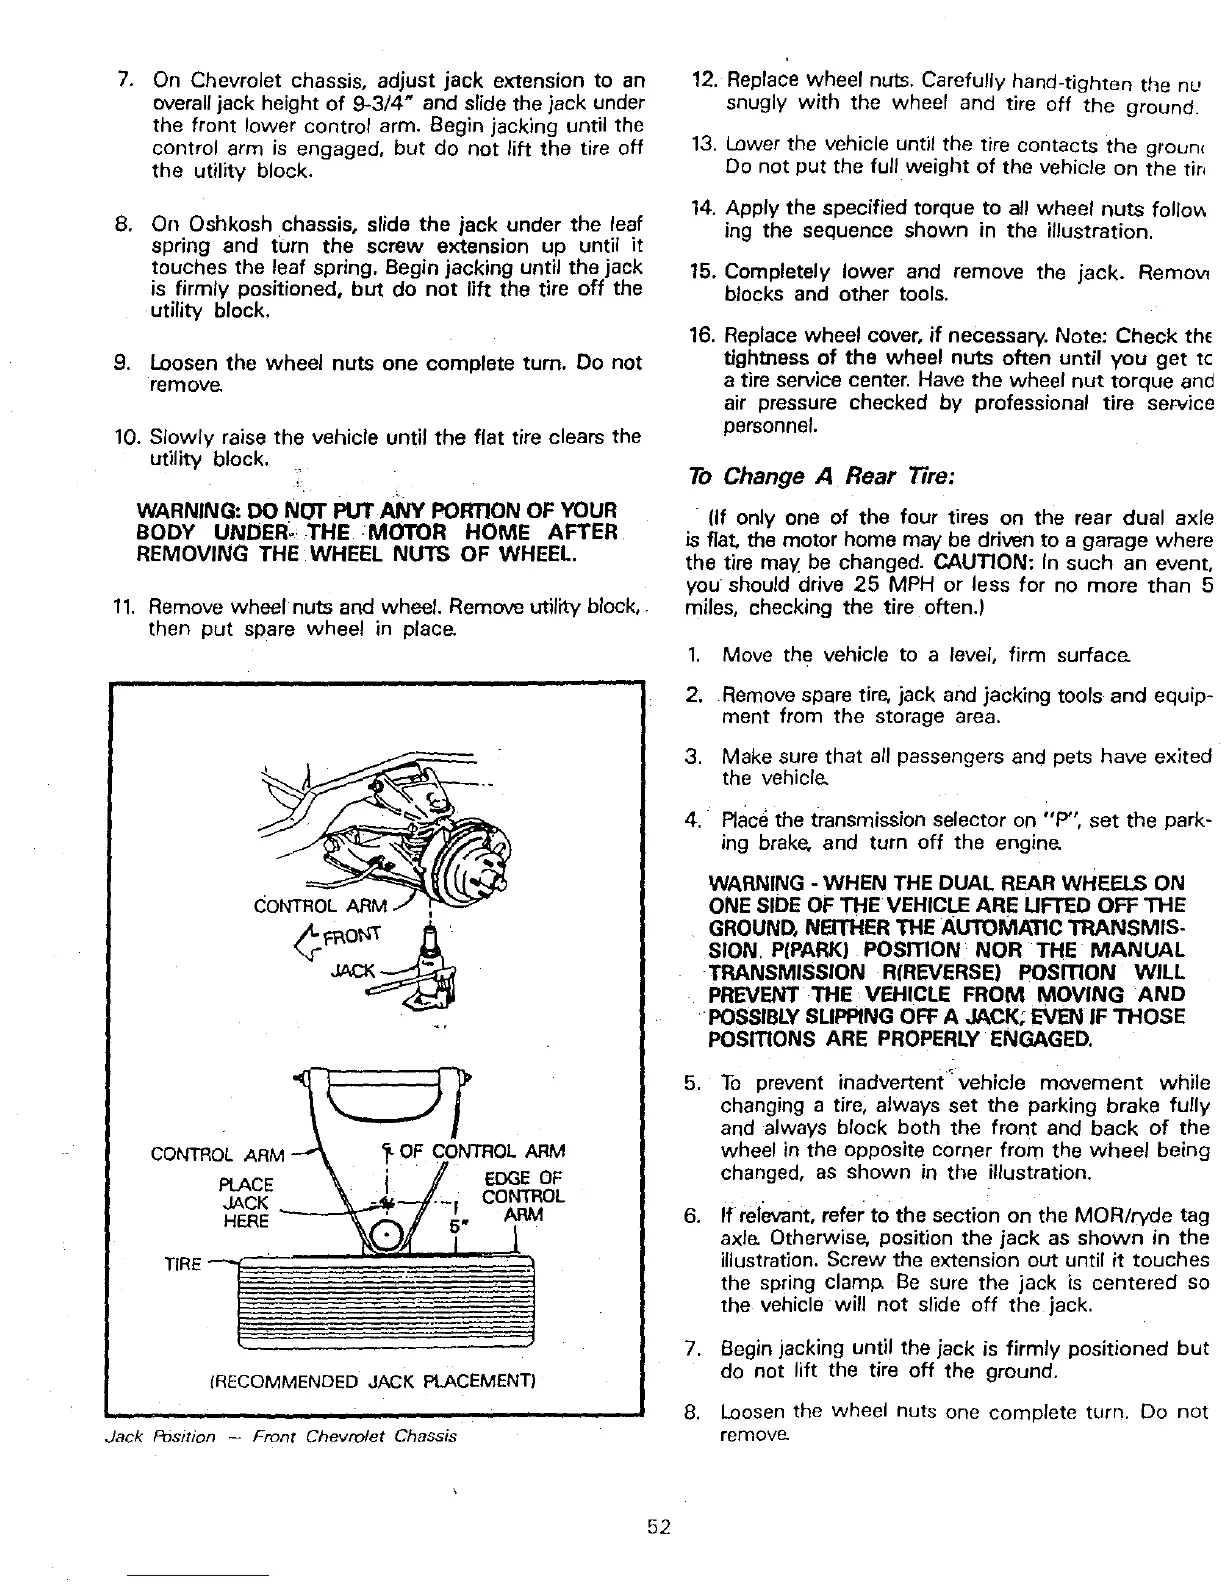
Chevrolet chassis, adjust jack extension to
an
overall jack height
of
9-3/4'
and slide the jack under
the front lower control arm. Begin jacking until the
control arm
is
engaged, but do not lift the tire off
the utility block.
8.
On Oshkosh chassis, slide
the
jack under the leaf
spring and
tum
the screw extension up until
it
touches the leaf spring. Begin jacking until the jack
is
firmly positioned,
but
do
not
lift the tire
off
the
utility block.
9.
Loosen the wheel nuts one complete tum. Do not
remove.
10.
Slowly raise the vehicle until
the
flat tire clears the
utility block.
WARNING: DO
NOT PUT ANY
PORTION
OF
YOUR
BODY
UNDER~
.THE :MOTOR HOME AFTER
REMOVING THE WHEEL NUTS OF WHEEL.
11.
Remove
Wheel
nuts and wheel. Remove utility block, .
then put spare wheel in place.
CONTROL
ARM
PlACE
JACK
_~~~-;.,.
HERE
ARM
TlRE1IIfIiIIj
(RECOMMENDED JACK PlACEMENT)
Jack
POsition -
Front
Chevrolet
Chassis
52
12.
Replace
wheel nuts. Carefully hand-tighten the nl!
snugly
with
the wheel and tire off
the
ground.
13.
Lower
the vehicle until the tire contacts
the
groun,
Do
not put the full weight
of
the vehicle on the tin
14.
Apply the specified torque to
all
wheel
nuts
folio\!>
ing the sequence shown in the illustration.
15.
Completely lower and remove the jack. Remo\/!
blocks and other tools.
16.
Replace
wheel cover,
if
necessary. Note: Check
thE
tightness
of
the
wheel nuts often until
you
get
te
a tire service center.
Have
the wheel
nut
torque
and
air pressure checked by professional tire service
personnel.
To
Change A Rear Tire:
(If only one
of
the four tires on the rear dual axle
is
flat. the motor home may
be
driven to a garage where
the tire may
be
changed. CAUTION:
In
such an event,
you should drive
25
MPH or less for
no
more than 5
miles, checking the tire often.'
1.
Move the vehicle to a level, firm surface.
2.
Remove
spare
tire,
jack
and
jacking tools and equip-
ment from the storage area.
3. Make sure that
all
passengers and pets have exited
the vehicle.
4.
Place
the transmission selector on "P", set the park-
ing
brake,
and
tum
off
the engine.
WARNING
- WHEN
THE
DUAL
REAR
WHEElS
ON
ONE
SIDE
OF
THE
VEHICLE
ARE UFTED OFF THE
GROUND,
NEITHER
THE
AutOMATIC
TRANSMIS-
SION.
P(PARK)
POSmON NOR
THE
MANUAL
TRANSMISSION
R(REVERSE)
POSmON WILL
PREVENT
THE
VEHICLE
FROM MOVING
AND
POSSIBLY
SUPPING
OFF
A JACK;
EVEN
IF THOSE
POSmONS
ARE
PROPERLY
ENGAGED.
5.
To
prevent inadvertent" vehicle movement while
changing a tire, always set
the
parking brake fully
and always block both the front and back
of
the
wheel in the opposite corner from the wheel being
changed,
as
shown in the illustration.
6.
If
relevant, refer to the section on the MOR/ryde tag
axle.
Otherwise, position the jack
as
shown
in the
illustration. Screw the extension out until
it
touches
the spring clamp.
Be
sure
the jack
is
centered so
the vehicle will not slide
off
the jack.
7.
Begin jacking until the jack
is
firmly positioned
but
do not lift the tire
off
the ground.
8.
Loosen
the wheel nuts one complete turn. Do not
remove.
 Loading...
