GE MH 18.0-EC
20
period. Identify additional safety measures
to protect the operator from the effects
of vibration such as: maintain the tool and
the accessories, keep the hands warm,
organisation of work patterns.
CAUTION!
Wear ear protection at a sound pressure
above 85 dB(A).
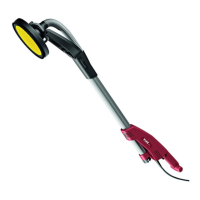
Overview (Figure A)
1 Sanding head
with closed brush ring
2 Gimbal bearings
3 Dial for preselecting the speed
4 Locking button
5 Switch
6 Filter cover
7 Slot for battery
8 32 mm connection
9 Flex Li-ion battery
10 Release button for battery
11 State of charge indicator
12 Suction hose
13 Bail handle (optional)
14 Orbital sander head
15 Sanding head
with open brush ring for sanding edges
16 Delta sander head
17 Fastening screws
18 Orbital Velcro plate
19 Brush ring
20 Screw
21 Retaining washer
22 Velcro pad
23 Backing pad
24 Replaceable protective corners
25 Delta Velcro plate
Instructions for use
Before switching on the power tool
Unpack power tool and accessories
and check that no parts are missing
or damaged.
NOTE
The batteries are not fully charged on
delivery. Prior to initial operation, charge
the batteries fully. Refer to the charger
operating manual.
Connecting the extractor (Figure B)
Connect extraction hose to the 32 mm
connector.
NOTE
The connection piece of the GE MH 18.0-
EC is a new development.If electric power
tools are used with conventional connection
pieces together with the extraction hose
of the GE MH 18.0-EC, an adapter from the
FLEX accessories programme can be used.
Attaching/changing the sanding
head
CAUTION!
Remove the battery before carrying out any
work on the power tool.
To attach (Figure C):
Press the two locks on the tool change
head (1.).
Put the tool change head on the sanding
head (2.).
Check that the locking mechanisms have
returned to the home position.
To change (Figure D):
Press the two locks on the tool change
head (1.) and remove sanding head (2.).
NOTE
The delta sander head and orbital sander
head are attached/changed in the same
way.
Inserting/replacing the battery
(Figure E-F)
Press the charged battery into the power
tool until it clicks into place.
To remove, press the release button (1.)
and pull out the battery (2.).
CAUTION!
When the device is not in use, protect the
battery contacts. Loose metal parts may
short-circuit the contacts; explosion and fire
hazard!

 Loading...