12
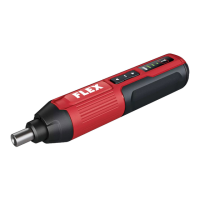
SD 5-300 4.0
Overview (see gure A)
The numbering of the product features refers
to the illustration of the machine on the
graphics page.
1 Magnetic bit holder
2 LED worklight
3 Forward/reverse switch
4 Battery/torque indicator
5 Battery/torque button
6 Charging port with cover
7 Hand strap hole
8 Handle
9 USB charging cable
Operating instructions
Before switching on the power
tool
Unpack the cordless screwdriver and check
that here are no missing or damaged parts.
NOTE
The batteries are not fully charged on delivery.
Prior to initial operation, charge the batteries
fully.
Charging the battery (see gure
B)
WARNING!
Risk of injury! Do not charge the tool for
more than 24 hours.
The optimal charge is achieved after 3 hours.
To check the amount of battery left in the tool,
press and hold the battery/torque button
(5). The battery/torque indicator (4) lights up
accordingly.
Battery/torque
indicator
Battery capacity
1 LED lights up <40%
2 LEDs light up 40%-70%
3 LEDs light up >70%
Connect the USB-A side of USB charging
cable (9) to a suitable 5 V USB battery
charger adaptor (not included).
Lift the rubber cover and connect the other
side of the USB charging cable to the
charging port (6) of the tool.
Connect the USB battery charger adaptor
to a suitable socket outlet. The battery/
torque indicators (4) ash green while the
tool is charging.
Battery/torque
indicator
Battery capacity
3 LEDs circularly flash <40%
2 LEDs circularly flash 40%-70%
1 LED flashes >70%
The battery/torque indicators (4) stay on
green for 100 seconds then goes o when
the tool is fully charged.
After charging, unplug the tool.
Install and remove bit
Insert a bit into the magnetic bit holder
(1). The magnetized holder holds the bit in
place (see gure C).
To installing a bit with hex shank bit
extension C-1, insert it into the magnetic
bit holder (1). The magnetized holder
holds the hex shank bit extension in place
(see gure D).
To remove the bit, pull the bit out of the
magnetic bit holder.
WARNING!
The bit may be very hot after use. Allow
the bit to cool down or wear gloves when
removing a bit.
LED worklight
This tool is equipped with two LED worklights
(2) that illuminate when the forward/reverse
switch (3) is pressed.
To switch on the LED worklights (2), press
on the forward/reverse switch (3). The LED
worklights (2) switch o automatically after
approx. 10 seconds the forward/reverse
switch (3) is released (see gure E).
Selecting a torque
Press the battery/torque button (5) to switch
between torque settings (see gure F).
The battery/torque indicator (4) lights up
accordingly:
Battery/torque indicator Torque
1 LED on Lowest torque
2 LEDs on Medium torque
3 LEDs on Highest torque
 Loading...