Camera
Kite
User
Manual
7
Care & Maintenance
Taking good care of your kite, reel and line will prolong their happy life.
1. Do not use a washing machine or tumble dryer to clean your kite.
2. Do not use aggressive detergents or abrasive materials to clean your kite.
3. Your kite can be hand-washed care in warm soapy water. Do not use hot soapy water. Use a
mild detergent, i.e. washing up liquid, and a soft sponge.
4. Never store your kite wet. Always allow it to dry before packing and storing.
5. Do not drag your kite across the ground when trying to launch or land, especially in stubble
fi elds, on stony beaches or on other abrasive surfaces that could damage your kite.
6. Do not drop your reel.
7. Do not place your reel on any wet, dusty or sandy surface.
8. The moving parts of the reel should only be cleaned with compressed air.
9. A small amount of marine grease can be used to lubricate the moving parts of the reel after it
has been cleaned with compressed air.
10. Do not disassemble your reel.
Suitable for Aerial Photography Only
This kite is made for autoKAP only. The camera and angle cannot be remotely controlled. Ahead
of launching the kite, it is recommended that you set your preferred camera angle and then switch
on time-lapse photography on your action camera or smartphone. Most action cameras have
time-lapse capability. Refer to your action camera user manual for guidance.
Important: Most action cameras are designed with a fi sheye lens (an ultra wide-angle
lens) that produces strong visual distortion intended to create a wide panoramic or
hemispherical image. Unless the image is taken from the Camera Kite with the horizon
centred there will be a fi sheye effect so you will need to edit your images using fi sheye
correction lens software. There are many software options available on the internet. At the
time of printing this manual, we recommend an image manipulation program which can be
downloaded from www.gimp.org
Compatible with:
GoPro, Sony, YI Technology, Garmin, SJCAM and SooCoo Action Cameras.
iPhone Advice
We suggest you download an App called ‘ProCam 5’ from the App Store. Once downloaded follow
these quick setup instructions:
Kite Safety & Maintenance
1. Press ‘SET’ in the bottom righthand corner of the
screen and under the PHOTO tab, scroll down
to ‘Manual focus peaking’ and switch this setting
to ‘Off’.
2. Press the white
1.
button until it displays the
yellow
2.
button. Your smartphone is now set to
time-lapse photography.
3. Press ‘SET’ in the bottom righthand corner of the
screen and under the PHOTO tab, scroll down to
‘Interval’ and select how often you wish for your
smartphone to take photographs. Maximum is
a photograph every second and the minimum is
a photograph every sixty seconds. Every three
seconds is recommended.
4. Your shutter speed is default to 1/17 sec. You can
see these settings towards the bottom of your
screen starting with AE on the left, then 1/17, then
ISO, then AF-L, then WB-L and then E/F/. Please
adjust the shutter speed to 1/640 sec.
5. Press ‘SET’ to fi nish.
6. Ensure you are using the rear camera of your
smartphone for the best photographs. You can
switch between the front and rear camera by
pressing the
3.
button.
7. Press the
4.
button and your time-lapse
photography will commence.
8. Press the
4.
button again to end your time-lapse
photography.
Visit www.procamapp.com for more detailed advice.
1. 2. 3. 4.
ProCam 5 // iPhone
Android Advice
We suggest you download an App called ‘Open Camera’ from the Google Play Store. Once
downloaded follow these quick setup instructions:
1. Press the white
1.
button to open the ‘Camera
Controls’ menu.
2. Press the ‘Burst’ option and scroll down to select
the ‘Unlimited’ option.
3. Press the ‘Burst mode interval’ option and select
how often you wish for your smartphone to take
photographs. Maximum is a photograph every
second and the minimum is a photograph every
2 hours. Every three seconds is recommended.
4. Scroll down to the bottom of the ‘Camera
Controls’ menu screen and enable the option
‘Use Camera2 API’. This will enable you to
use the most advanced options of the App so
you can achieve the best result. The App will
reboot automatically when you have enabled this
option.
5. Press the white
2.
button to open the ‘ISO and
Shutter speed’ menu.
6. Slide the shutter speed bar to 640.
7. Press the white
3.
button to open the ‘Popup’
menu.
8. Press the
4.
button to select the ‘Focus Infi nity’
option.
9. Ensure you are using the rear camera of your
smartphone for the best photographs. You can
switch between the front and rear camera by
pressing the
5.
button.
10. Press the
6.
button and your time-lapse
photography will commence.
11. Press the
6.
button again to end your time-
lapse photography.
Visit www.opencamera.sourceforge.io for more
detailed advice.
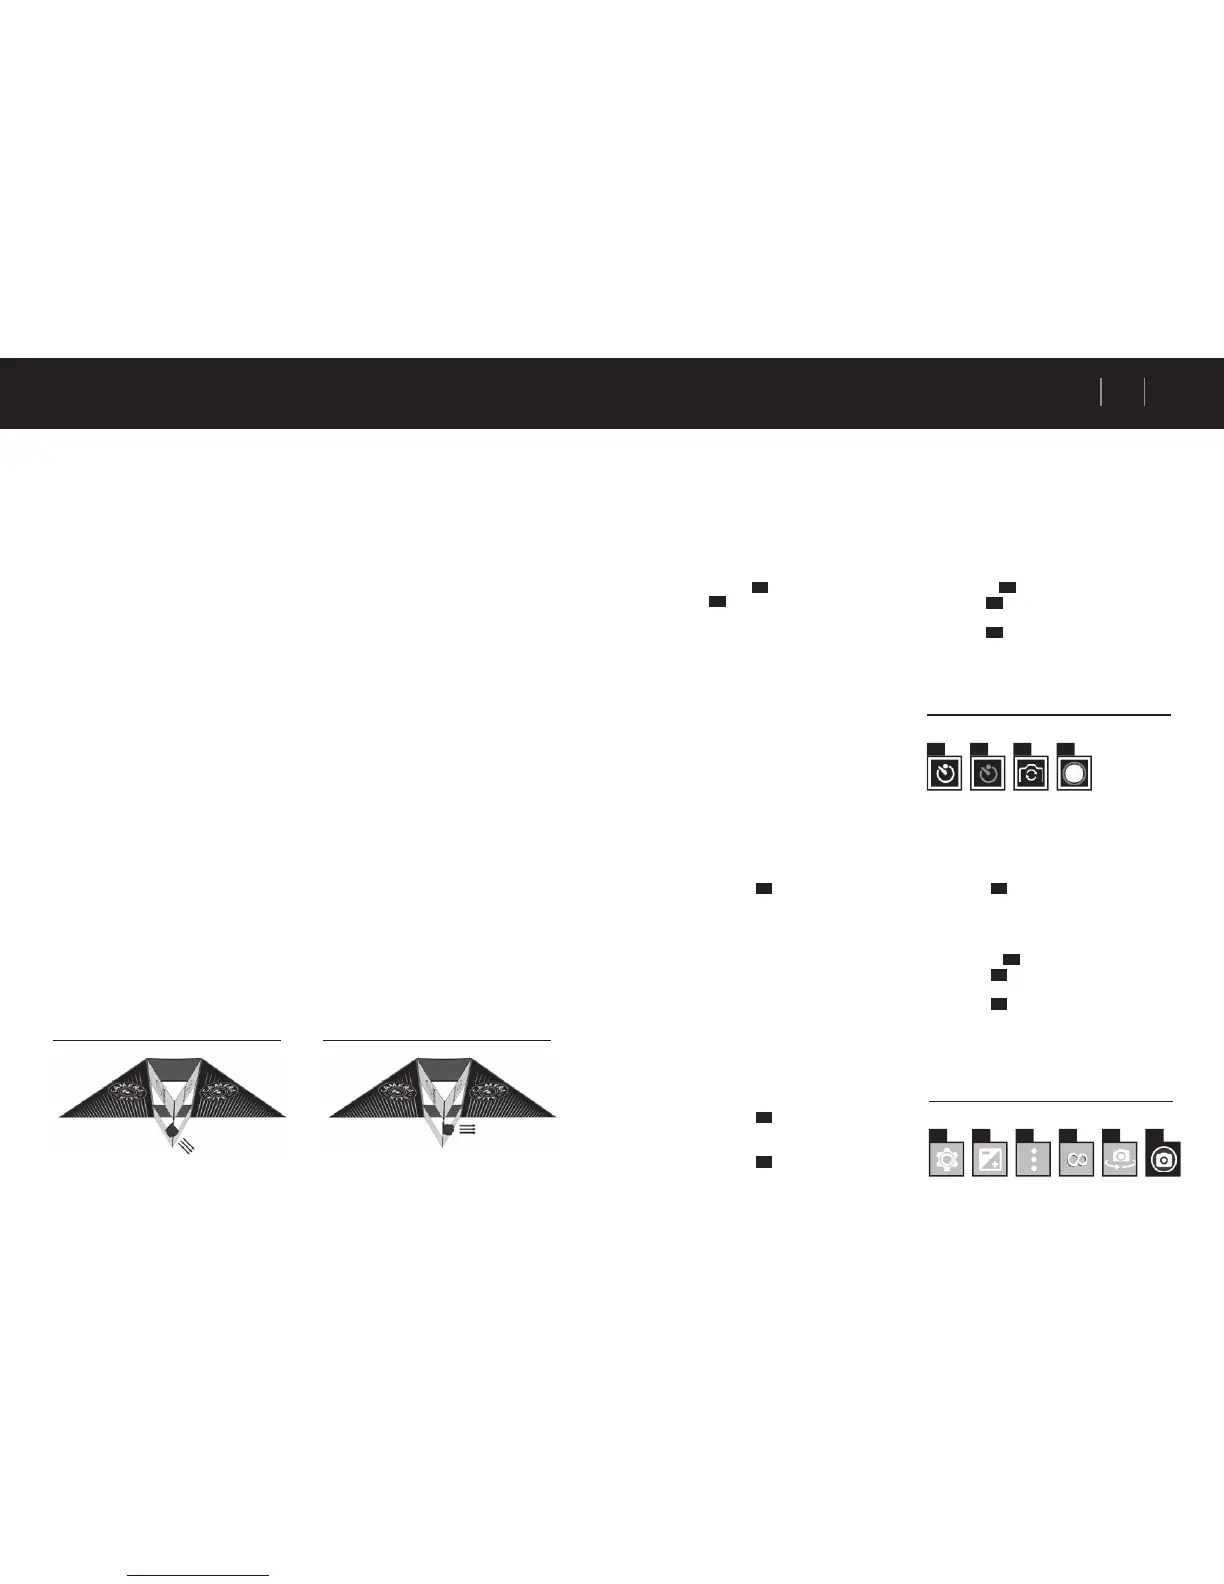
1. 2. 3. 4. 5. 6.
Open Camera // Android
Gound ‘Selfi e’ Camera Angle Landscape Camera Angle