6
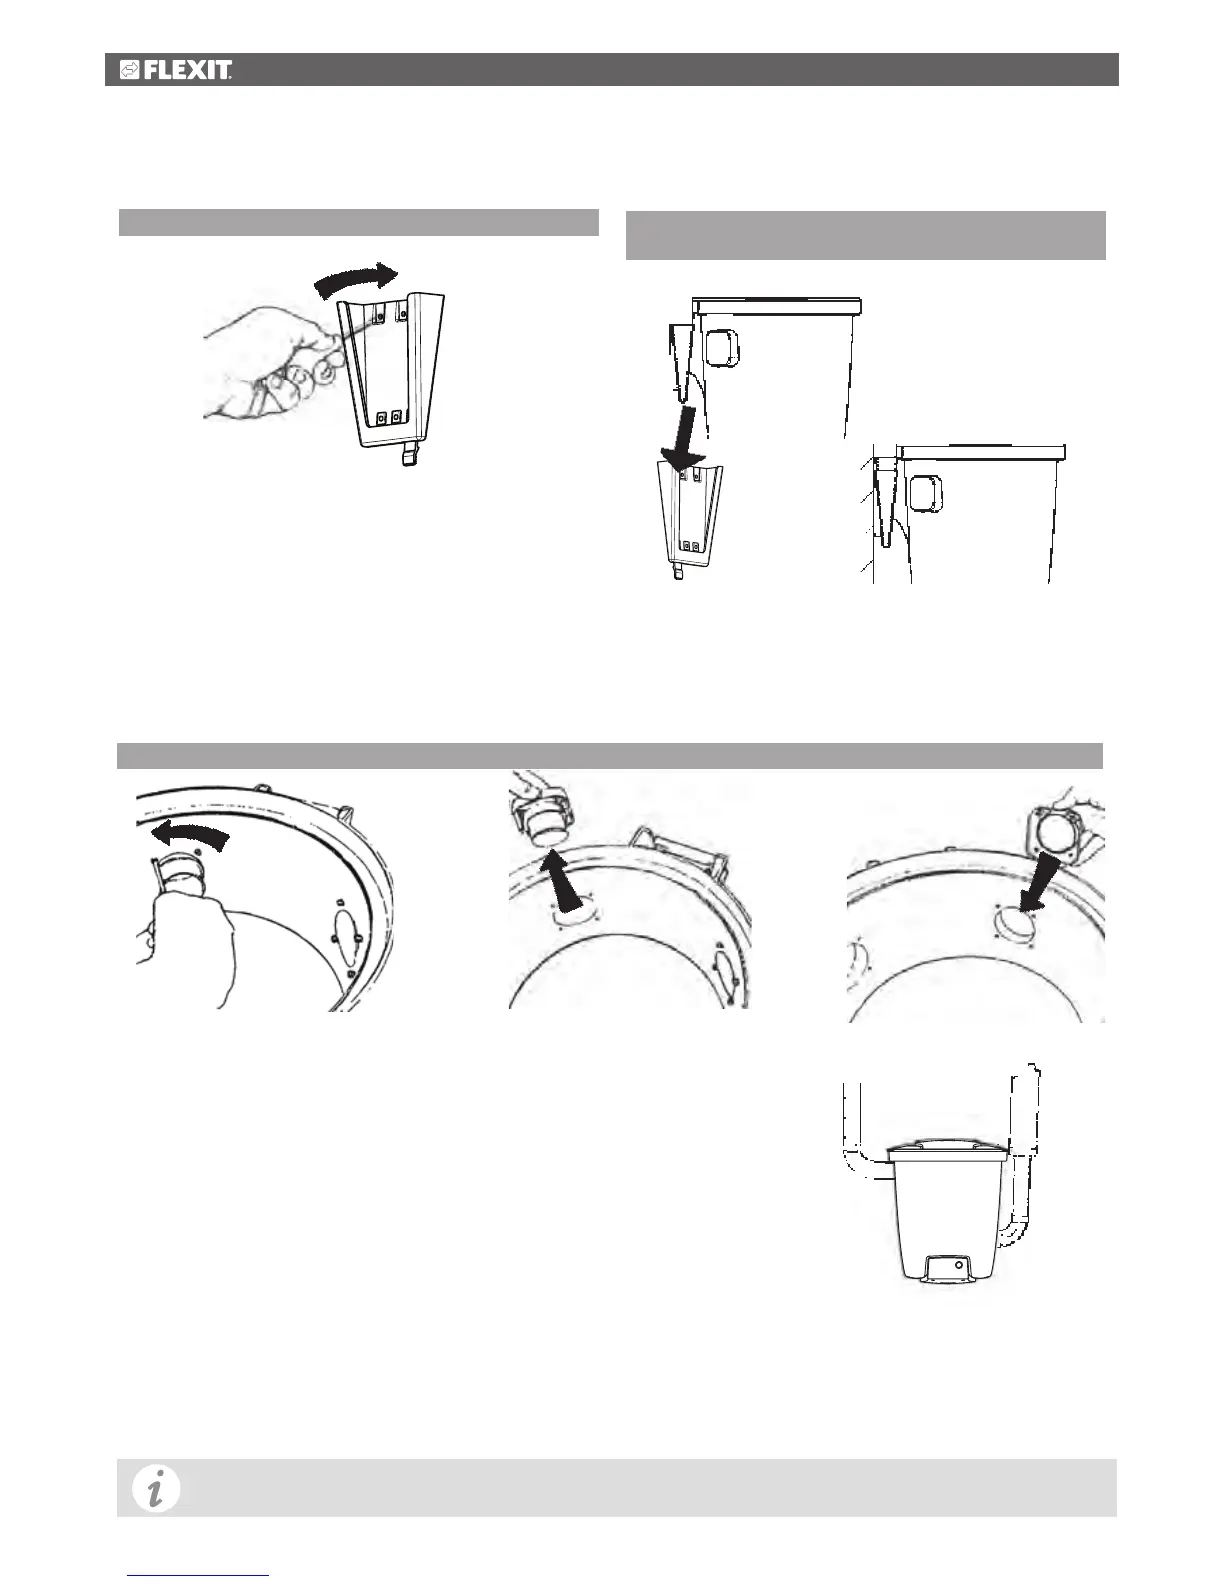
2 Vaccum unit CVR 1000 assembly instructions
Fig. 1
2.2 Locating the vacuum cleaner on the
wall bracket
Position the vacuum unit so that the wall bracket is directly
above the wall bracket, see Fig. 2. Lower the machine down
on to the wall bracket. Make sure the corresponding bracket
on the machine is held firmly in place by the wall bracket.
Fig. 2
Exhaust
Inlet
Fig. 6
Fig. 3
Fig. 4
Fig. 5
The machine is connected with the suction pipe in the uppermost position and the exhaust pipe in the lower position.
This connection should not be glued but can be taped when the unit is serviced at a later date. The suction pipe socket can be
fitted to two different points depending on the direction in which you would like to install
the pipe system.
To relocate the suction pipe socket, you need to do the following:
1. Release the suction pipe socket by unscrewing the four combination Torx screws with a
Torx T20 or an ordinary screwdriver, Fig. 3.
2. Pull the socket out of the machine, see Fig. 4.
3. Loosen the plug blanking off the outlet to which you intend moving the suction pipe
socket. Unscrew the four combination Torx screws. Remove the blanking plug from the
machine.
4. Adapt (move) the suction pipe socket to the new outlet. NB! The socket is marked
”Up”.
Make sure the socket is fitted with ”Up” uppermost. Fasten the socket by fitting and tightening the four screws, Fig. 5.
5. Fit the blanking plug to the outlet previously occupied by the suction pipe socket. Use the four screws to hold it in place. The
exhaust pipe must be firmly attached to the wall to ensure its connection with the socket does not loosen. Remember that
you will need to be able to turn the bent pipe in different directions to ensure a suitable pipe layout. Then connect up the
exhaust pipe and muffler, Fig 6. Fit the central vacuum cleaner so that the exhaust pipe is as short as possible, max. 5 metres.
Take the surroundings into consideration when positioning the exhaust. For this reason, you should always fit a muffler.
For additional information concerning the assembly and installation of the pipe system and low-current lead, if
any, please refer to the separate assembly instructions supplied with the pipe package.
2.1 Fitting the wall bracket
2.3 Connecting the machine
Position the holder so that there is plenty of space above
and below the place where the vacuum unit is to be located.
Make sure there is a minimum of 500 mm free space above
the container. Mark the positions for the four screw holes
with a pen or similar. Then select appropriate screws and,
if necessary, wall plugs for the type of wall surface to which
the bracket is to be attached. Drill the four holes for the
wall bracket. The diameter of the screw holes in the holder
is 5 mm. Fit the wall bracket with the large opening pointing
upwards, see Fig. 1. Tighten the screws so that the holder is
held firmly in place (screws provided).