If the cassette has seven sprockets, press switch “A” once to change the
flashing “21” to “--”, and then press switch B once. This will indicate that
there is no 8th sprocket, and the operation for entering the number of
sprocket teeth will be complete.
If the cassette has 8 sprockets, enter the number of teeth for this position
and follow the same procedure as above to enter “--” in the 9th position
otherwise enter the number of teeth for the 9th sprocket. If the cassette
has 10 sprockets, enter the number of teeth for the 10th sprocket.
Checking the number of teeth entered
Once the setting of number of sprocket teeth is completed, the display will
return to the initial input display. Re check all values by repeatedly
pressing switch “B” to confirm each number of teeth. Press switch “B” once
each time and check whether the entered number of teeth are matching
with the sprocket position on
the display.
If all values entered are correct,
press switch “B” for 2 seconds
or more to continue the next
entry procedure.
Press switch “B” for 2 seconds or more
to continue the next entry procedure.
111
•••••• for Traditional rear
derailleur
222
•••••• for Rapid Rise Rear
derailleur (reverse
spring type)
(
5
)
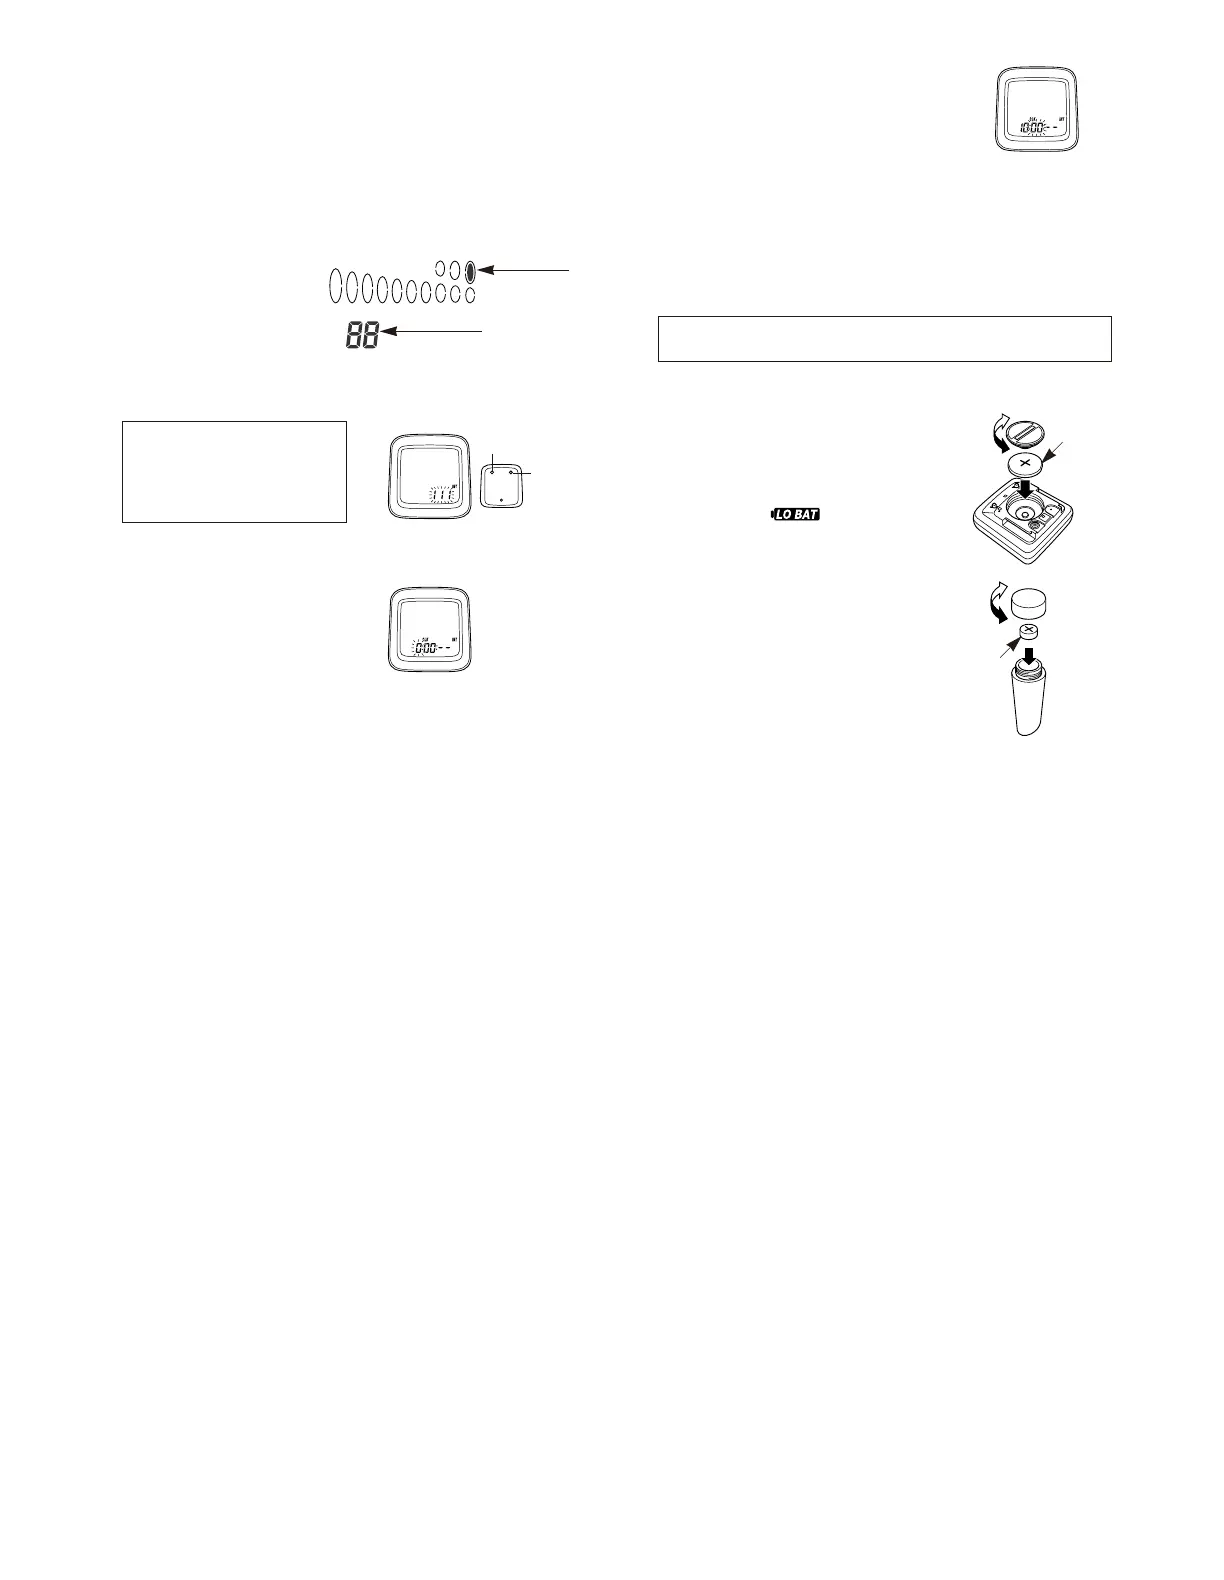
Entering the type of rear derailleur
The display will change to that shown in fig 15. The display will change
from “111” to “222” each time switch “A” is pressed.
This Value
Indicated
Section
The hours will advance when switch “A” is
pressed. If switch “A” is pressed continuously,
the hours will advance rapidly. Press switch “B”
once to set the hour.
The minutes section will then start flashing as
shown in Fig 17.
Set the minutes in the same procedure as for
setting the hours. The clock will then start.
Note; To reset clock
[]
Example
If the time is 10:46:23
••••• 10:47: - -
If the time is 13:59:16
••••• 14:00: - -
Get a display where CLK appears on the sub - display. Press switch
“B” for 5 seconds or more to change the time setting.
(
6
)
Setting the time
(
24 hour format
)
The display will change to that
shown in fig 16.
Set the time to one minute later than
the current time.
To continue entering data for a different bicycle number, change the sub-
display to a display other than the CLK display, and then press switch “B”
for 5 seconds or more. The press switch “A” until the bicycle number to be
entered is displayed and then press switch “B” again. Refer to “4. Changing
the setting data” for details on entering new data.
• Meter
(CR-2032 battery)
Insert the battery so that the (+) side
is visible as shown in Fig. 18, and
then tighten the battery cap.
The battery which is installed at the
time of purchase is for monitoring
purposes. If the low battery
indicator appears, replace the battery
as soon as possible.
• Sensor
(LR44 battery)
Insert the battery so that the (+) side
is visible as shown in Fig. 19, and
then tighten the battery cap.
Note;
If the speed does not display
correctly even though the LO BAT
low battery indicator does not
appear, replace the sensor battery.
Replacing the battery
Fig.18
Fig.19
Close
Close
Open
Open
CR-2032
LR44
Fig.15
Fig.16
Fig.17
Switch “A”:
Select
Switch “B”:
Accept
 Loading...