Monaural Only Jack Installation
If you are using a monaural only or stereo only system, you will not install stereo/mono switches and switch plates.
To attach headphone and microphone jacks to the aircraft panel when you are installing the intercom as a mon-
aural only system:
1. Choose a location for each pair of headphone and microphone jacks (one pair each for the pilot and co-pilot
and one pair each for up to four passengers).
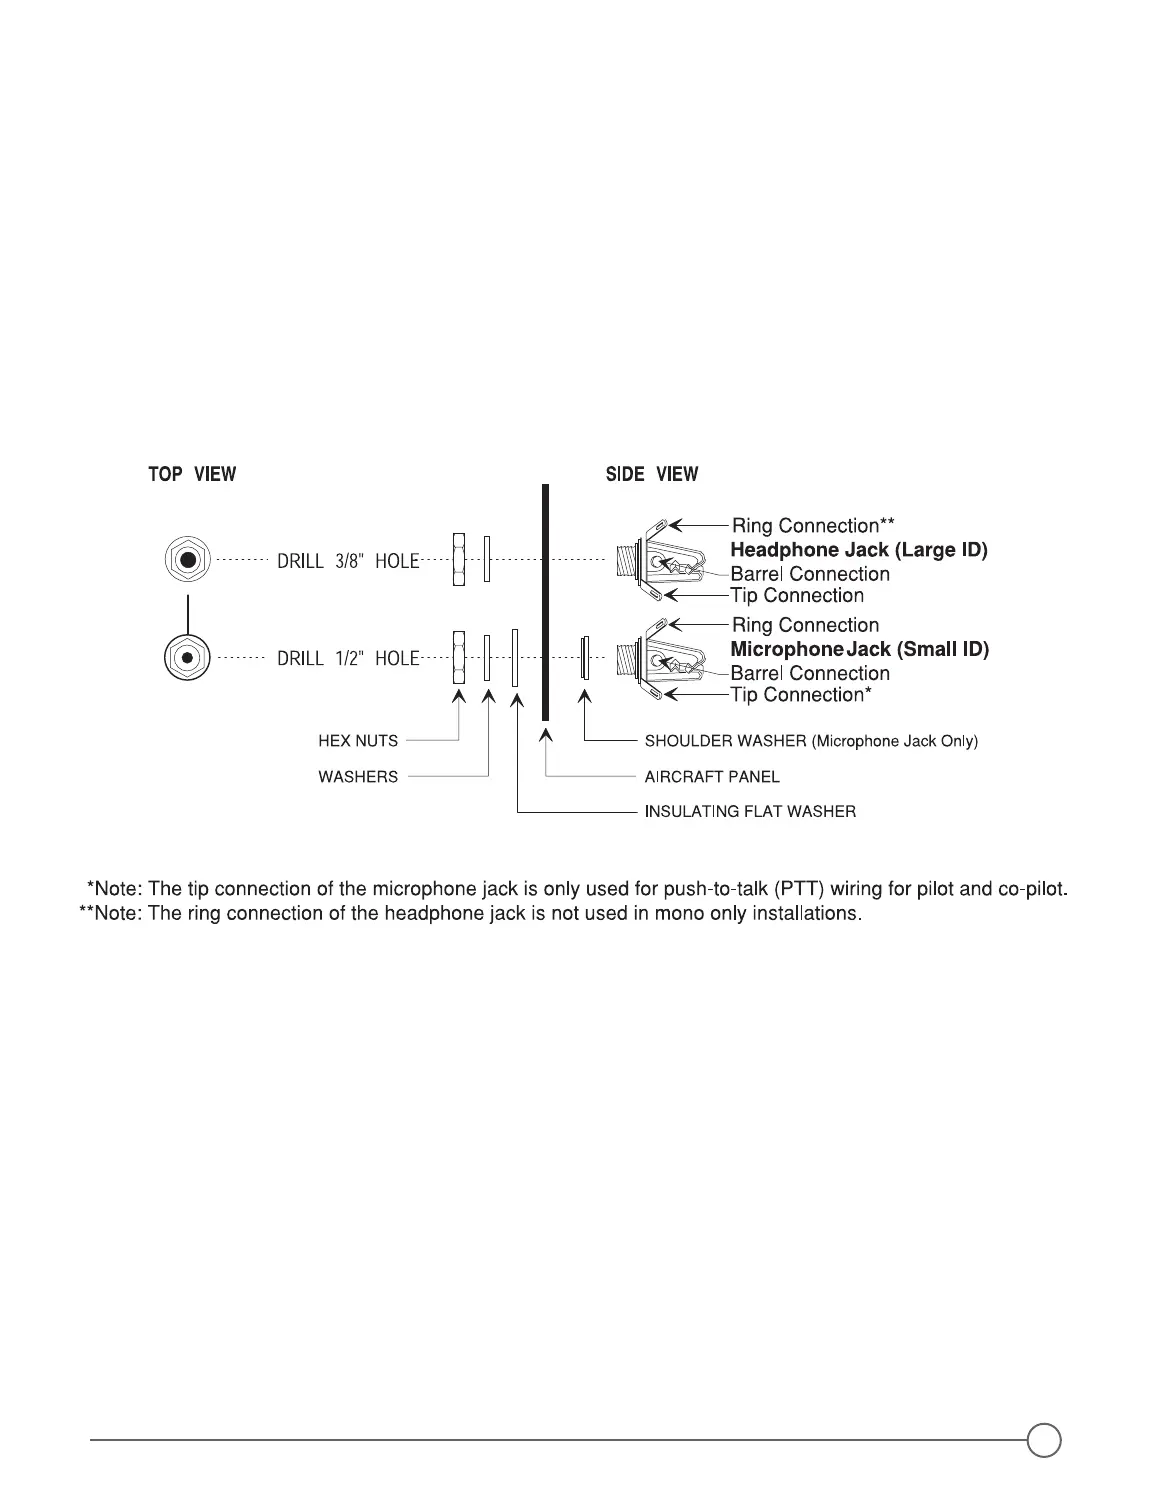
2. Drill one 3/8 inch hole for each headphone jack (Figure 7 below).
3. Drill one 1/2 inch hole in the aircraft panel for each microphone jack and shoulder washer, preferably next to
the headphone jacks.
4. Connect headphone and microphone jacks with 20-22 gauge wire (preferably 22 gauge), as shown in the
(Figure 7 below and page 6, Figure 8).
Figure 7 - Jack Mounting Diagram-Mono Only or Stereo Only
Stereo Only Jack Installation
To attach headphone and microphone jacks to the aircraft panel when you are installing the intercom as a
stereo only system:
1. Choose a location for each pair of headphone and microphone jacks (one pair each for the pilot and co-pilot
and one pair each for up to four passengers).
2. Drill one 3/8 inch hole for each headphone jack (Figure 7 above).
3. Drill one 1/2 inch hole in the aircraft panel for each microphone jack and shoulder washer, preferably next to
the headphone jacks.
4. Connect headphone and microphone jacks with 20-22 gauge wire (preferably 22 gauge), as shown in the
Stereo Connection Schematic (Figure 7 above and page 4, Figure 6).
5