3 EN-US English
DRAFT
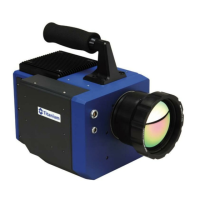
3.6.2 View from the rear
See Figure 2.1 View from the rear, FLIR A400/A700, page 2.
1. Power/error indicator LED (blue/red).
2. Ethernet communication indicator LED (green).
3. Ethernet/PoE connector, X-coded.
4. Power-I/O connector, A-coded.
5. Antenna.
6. RS232/485 connector, A-coded.
7. Factory reset button.
For factory reset modes, refer to the User’s manual of the FLIR A400/A700
series.
3.6.3 View from the front
See Figure 2.2 View from the front, FLIR A400/A700, page 2.
8. Infrared sensor.
9. Visual camera.
10. LED lamps.
3.7 FLIR A400f/A700f
When delivered, the camera is already mounted into an environmental housing.
The housing with camera requires PoE class 4 (25 W) to operate as intended.
Connect the unit to power and network:
1. Connect a Power over Ethernet cable (PoE class 4, 25 W) to the connector
gland on the bottom of the housing device. Use the strain-relief clamp that is
delivered with the camera.
2. Connect the other end of the PoE cable to a PoE switch.
3. Follow the steps in section 3.6.1 Quick start guide, starting at step number 3.
3.8 FLIR A400pt/A700pt
When delivered, the camera is already mounted into a pan & tilt (P/T). Master se-
lection mode is set to Camera Master which means that the camera controls the
P/T.
Connect the unit to power and network:
1. Unscrew the two bolts in the hatch of the base unit by using a 4 mm hex key.
#T810482; r./; mul 7

 Loading...