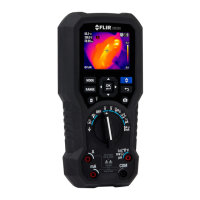
FLIR DM285 - QUICK START Document Identifier: DM285-QS-en-US_AC
THERMAL IMAGER with IGM
TM
(Infrared Guided Measurements)
a. Set the function switch to any position. Short press the IGM
TM
button to switch the thermal imager ON/OFF.
b. Point the lens (back of meter) toward the target surface. Lighter shades indicate warmer temperatures and darker
shades indicate cooler temperatures.
c. View the surface temperature measurement (upper left). Use the Thermal Settings menu to control laser pointer,
crosshairs, color palette, and emissivity. Set temperature units
o
C
o
F in the General Settings menu.
d. All DMM functions are operational In the Thermal imaging mode; the electrical symbols appear on the left.
e. The Distance to Spot ratio for the imager is 30:1 (measurement spot is 30 times smaller than the meter-to-spot
distance). The Field of View is 44
o
(top view) x 57
o
(side view).
f. Refer to screen shot for the descriptions below:
1. Surface Temperature (dashes while stabilizing
2. DMM function
3. Crosshairs
4. Thermal image (120 x 160 pixels)
5. Main menu (press OK to open)
6. Lowest temperature reading in frame
7. Thermal scale
8. Highest temperature reading in frame
9. Status icons (see Display Symbols section)
MAIN MENU
Press OK to open Main menu. Scroll to an icon and press OK. Refer to table below:
Select image + DMM or Image only for imager display default
See thermal settings menu section to control color palette, emissivity, Laser
pointer, and crosshairs
View stored data logs and images
See Advanced Settings menu section to control VFD, MAX-MIN-AVG, Peak,
Relative, and Datalogger functions
Refer to General settings menu below
GENERAL SETTINGS MENU
Press OK to open Main menu. Scroll to the Settings icon and press OK. Press OK on any menu item and then refer
to the table below. The user manual, available at website, provides in-depth information on each menu item.
Press OK to toggle SMART and CLASSIC modes
Press OK to open sub-menu. Scroll to setting, press OK and press Return to exit
Press OK to toggle temperature units
Press OK to open the selector. Use arrows to set datalogger sample rate (1~99
seconds) and press OK
Press OK to open sub-menu. Use arrows to scroll through setting fields and to
select the date and time. Press OK to confirm
Use the OK button to toggle AUTO and DATA Hold mode as the default
Press OK to toggle ON/OFF. When on, the display resolution decreases to inhibit
quickly changing digits for easier viewing
Press OK to toggle ON/OFF. Refer to the User Manual for complete details

 Loading...