EN-USEN-US English
Quick start guide Camera parts
Follow this procedure to get started right
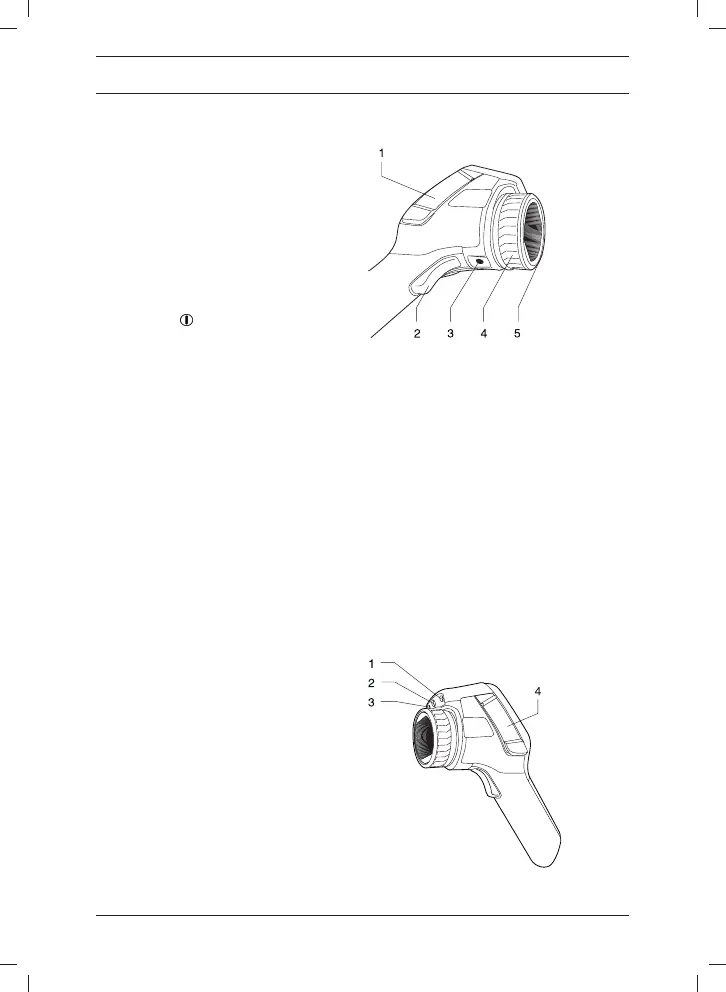
View from the right
away:
1. Put a battery into the battery
compartment.
2. Charge the battery for 4 hours before
starting the camera for the first time,
or until the green battery condition
LED glows continuously.
3. Insert a memory card into the card
slot.
4. Push the button to turn on the
camera.
1. Cover for the right-hand connectors
5. Aim the camera toward the object of
compartment:
interest.
6. Focus the camera by rotating the
• USB-A
focus ring.
• USB mini-B
7. Pull the trigger to save an image
• Power
directly.
Note: There are two models of the
8. Move the image to a computer by
covers—one made of hard plastic
doing one of the following:
and one made of soft rubber. This
• Remove the memory card and
image and the following images show
insert it into a card reader
the model made of hard plastic.
connected to a computer.
2. Trigger to preview/save images
• Connect a computer to the camera
3. Tripod mount. Requires an adapter
using a USB mini-B cable.
(extra accessory)
4. Focus ring
9. Move the image from the card or
5. Infrared lens
camera, using a drag-and-drop
operation.
View from the left
Note: You can also move images to the
computer using the FLIR Tools software,
which comes with your camera.
1. Laser pointer
© 2011, FLIR Systems, Inc. All rights reserved worldwide.
27
Publ. no. T559524, rev. 014
 Loading...


