………………………………………………………………………………………………………………………………………………
Detect 1 in. target @ 63.7ft.
IFOV =1.3 mRad (Theoretical with 320x240 Detector and standard 24˚x18˚ lens)
© 2016 The Snell Group / 322 N. Main St. / Suite 8 / Barre, VT 05641 / 800.636.9820 / www.thesnellgroup.com
GF 309
GF 306
IFOV =.8 mRad (Theoretical with 320x240 Detector and standard 14.5˚x10.8˚ lens)
Detect 1 in. target @ 106ft.
V 2016.6
QuickStart FLIR GF309 [Cooled, 3.8-4.05 μm (Flame)]
GF 306 [Cooled, 10.7 μm (SF6)]
6. AUTO ADJUST (Level and Span): The camera needs to be either in Camera or Video Mode
• Push the Auto/Manual (A/M) button to select Auto. The imager will now continuously adjust Level (brightness) and
Span (contrast).
7. MANUAL ADJUST (Level and Span): The camera needs to be either in Camera or Video Mode
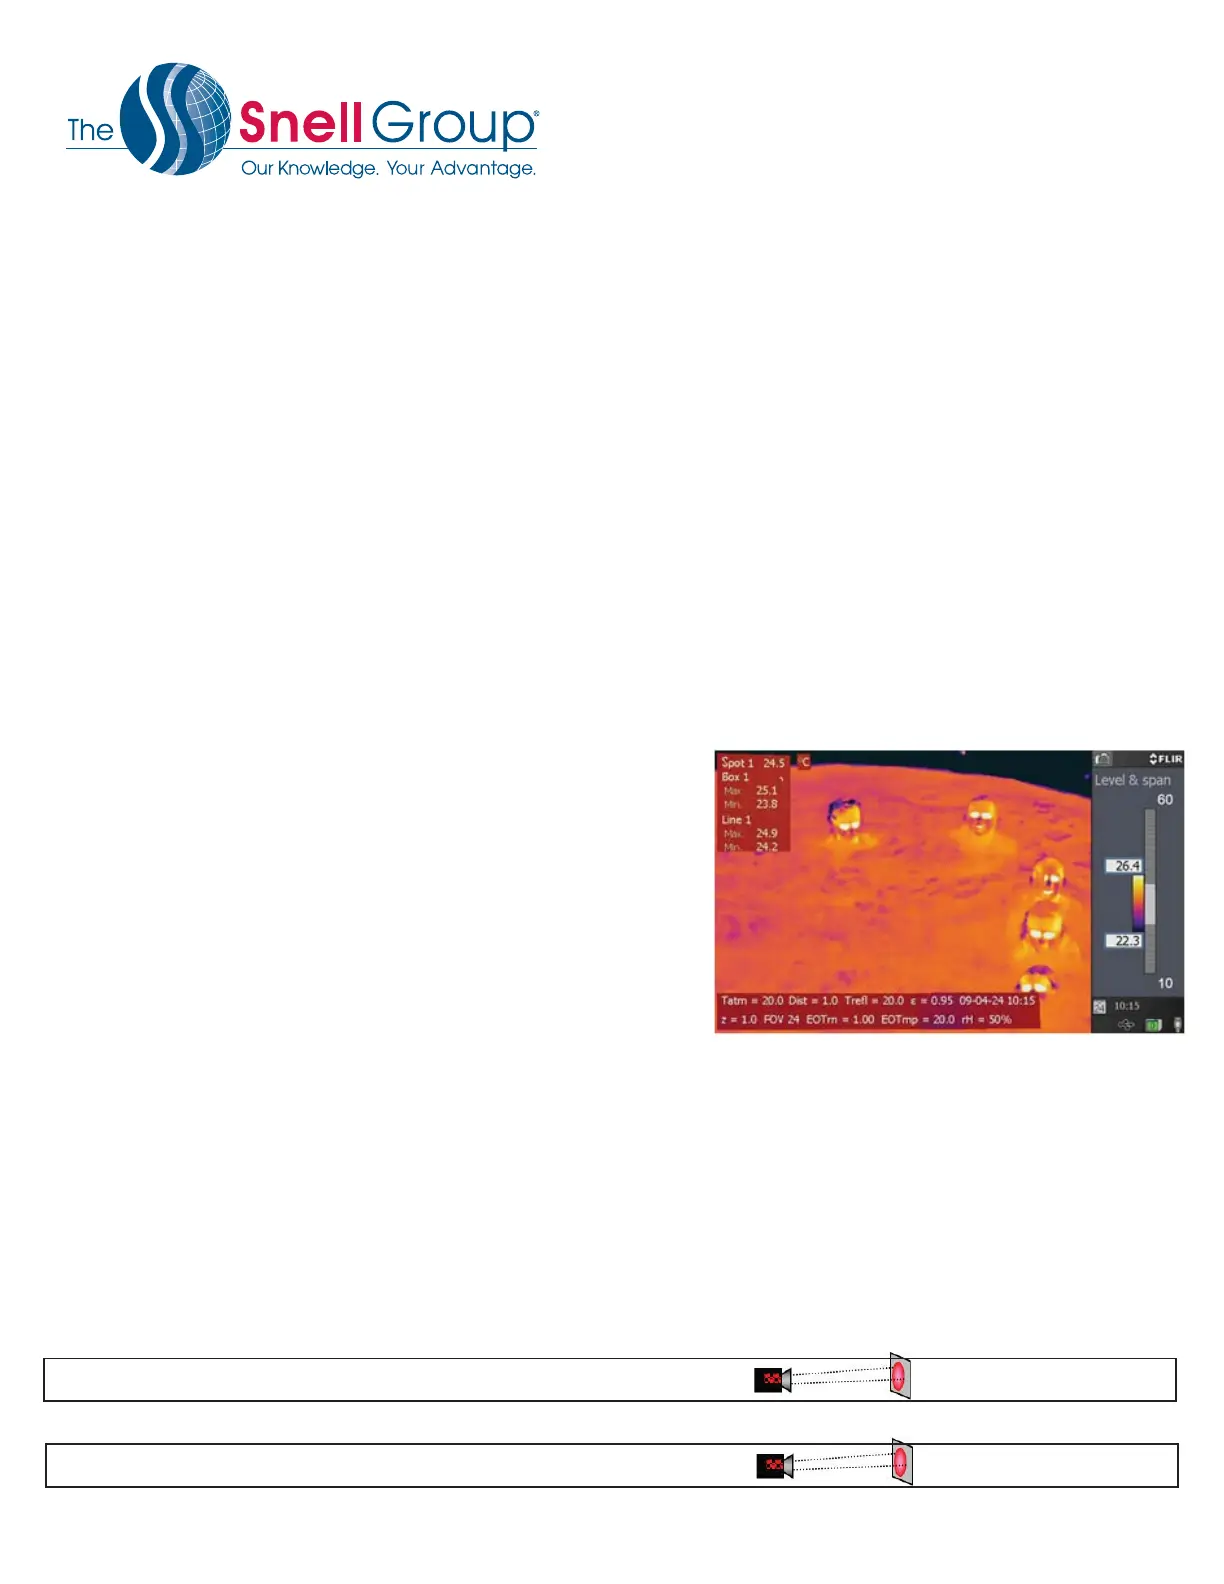
• Push the Auto/Manual (A/M) button to select Manual. The Span scale temperatures will be highlighted (Fig 3)
• To manually adjust Span move the Joystick left or right
• To manually adjust Level move the Joystick up or down
8. PAUSE IMAGE (Preview, Freeze): (in Camera Mode) To pause and preview an image before saving it press and
release the Preview/Save button.
• You can now preview, edit measurements, adjust the image, add a digital photo, delete or save the image
9. SAVE IMAGE: (in Camera Mode) To save an image without pausing, press and hold the Preview/Save button for
more than 1 second. (NOTE: it is always best to Pause and preview your image before saving)
10. RECALL IMAGE: Turn the Mode Wheel to Archive mode.
• When the archived image is shown move the joystick left/right to view the next image.
• To view an all the images move the joystick up.
• Then use the joystick up/down/left/right to select an image.
11. PALETTE: In Camera or Video Mode Press the Menu/Back button.
• Move the joystick up/down to enable the list of palettes.
• Move the joystick up/down to select a new palette, and then push
the joystick in.
• Push the Menu/Back button
12. RANGE: Press the Temperature Range button on the left side of
the camera.
• Use the joystick to select an appropriate temperature range.
• Press the Temperature Range button to conrm and leave the
setup menu.
13. EMISSIVITY, BACKGROUND (REFLECTIVE APPARENT TEMP), RELATIVE HUMIDITY, DISTANCE OR
ATMOSPHERIC TEMP: The camera needs to be either in Camera or Video Mode.
• Press the Menu/Back button.
• Move the Joystick left/right to the Edit Tab.
• Move the joystick up/down to select Object Parameters; then Push the Joystick to display a dialog box.
• Move the joystick up/down to select the parameter you want to change; then push the joystick.
• Move the joystick up/down to change the value; then push the joystick.
• Press the menu/Back button to conrm change and leave the setup mode.
Fig 3
 Loading...