FLIRMR176‐GETTINGSTARTEDDocumentIdentifier:MR176‐QS‐mul_AA
MR176‐GETTINGSTARTED‐EN
USERGUIDELOCATION:PleasereadthedetailedUserGuide,located intheMR176internalmemory,forcomplete
detailsonallMR176featuresandfunctions.ConnectthemetertoaPCusingthesuppli ed USBcableandopenthe
folderentitled‘DOC’toaccesstheUserGuide.TheUserGuideisalso
availableonthewebsitewww.flir.com.
RegisterforExtendedWarrantyandProductUpdatesatwww.flir.com/testwarranty
QuickSteps
Chargethebatterybyconnecti ngthesuppliedUSBcabletoaPC
beforefirstuse.
Press
topowerON(pressandholdtopowerOFF).
TheMR176firstpowersupintheIGMCustommode.UsetheMain
Menutochangemodes(pressSelectfortheMainMenu).
ViewIRThermalImage,Moisture,AirTemperature,Relative
Humidity(RH%),DewPoint,andMixingRatio
onthedisplay.
PresstheLaserbuttontoactivatethelaseranddisplaycrosshairs.
Placetheinternalpinlessmoisturesensoragainstatestsurface
(applylightpressure)totakerelativemoisturemeasurements.
Presstheimagecapturebuttontofreezetheviewandstorea
screen‐shot.Pressimage
captureagaintoconfirm,orbackto
cancel.UseImageReviewmode(fromMainMenu)toview/delete
storedimages.TransferimagestoPCusingsuppliedUSBcable.
RefertotheinformativeUserGuidefordetailedinstructionson
ExternalProbeuse,MaterialGroups,Relative(SetReference)
mode,HighAlarm,Psychrometrics,
andmore.
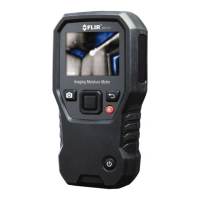
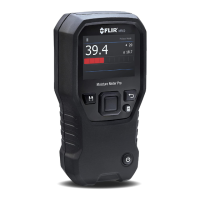
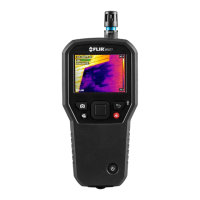
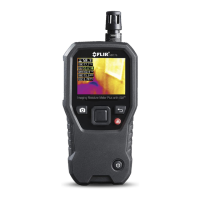
ForFig.1atright,seethedescriptionsbelow:
1. TemperatureandRelativeHumiditySen sor(MR01)
2. ColorGraphicalDisplay
3. ScreenCapturebutton:Presstohold/record/storeIRimages
4. Navigationbuttons(ring)forup/down‐left/rightscrolling
5. Selectbutton(center):PressforMainMenu
6. Backbutton:
Presstoreturnfromamenuscreen
7. LaserPointerandCrosshairsbutton
8. Powerbutton:ShortpressON,longpressOFF.
9. USB,ExternalProbejack,andBatterychargingLED
10. Laserpointerlens(back)
11. Thermalimaginglens(back)
12. InternalPinlessMoisturesensor(back)
13. MicroUSB
Port(bottom)
14. ExternalProbeJack(bottom)
15. BatteryChargingLEDstatuslamp(bottom)
1
2
3
4
5
6
7
8
9
10
11
12
Fig.1Description