13
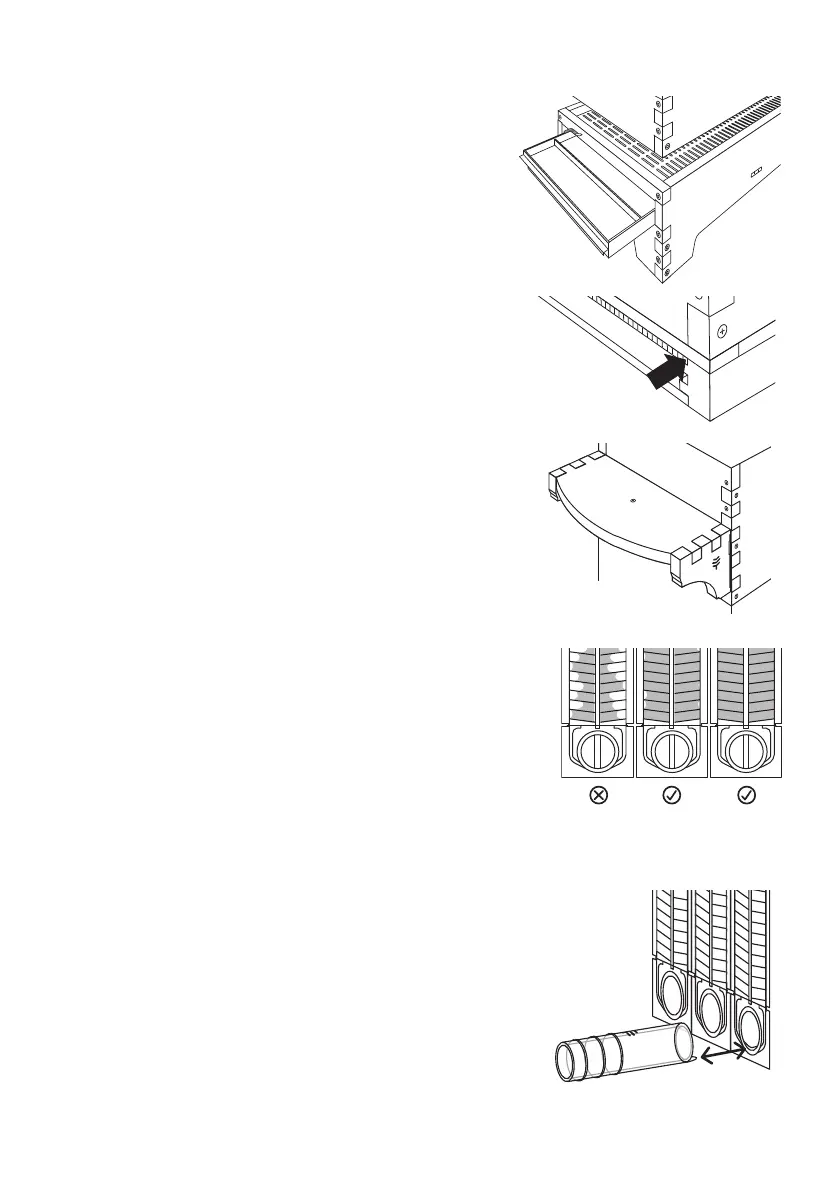
3a. Clean out your base tray prior to
harvesting (Flow Hive 2)
Remove pest treatments and hive debris.
3b. Make sure the baseboard corflute is in
the top slot (Flow Hive Classic)
The top slot pushes the corflute up against the
mesh so that any dribbles of honey which may
occur stay within reach of the bees. They will
lick up the honey and re-use it. If you have a
solid bottom board, ignore this step.
4. Attach your harvesting shelf brackets
(optional) or find a suitable stand for
your honey jars.
Check each bracket is secure and fit the Flow
Super rear window cover to create a shelf.
Alternatively, find a suitable table to hold your
honey collecting jars which allows enough space
and stability.
5. Check each Flow Frame you are
harvesting is ready and capped
Look in the end-frame view. If the cells are mostly
full and capped with wax, it’s a good indication
that it’s ready for harvest. The best way to get to
know how your colony uses the frames is to open
the super (with smoker and protective gear) and
inspect the Flow Frames before your first few
harvests.
6. Remove the covers and caps
Sometimes the caps on Flow Frames can be tight
fitting. You can use the end of the Flow Key to
lever them o.
7. Be sure your tubes are inserted
correctly
The little tab on the end of the tube goes into the
Flow Frame and blocks the honey leak-back gap.
Ensure it is firmly inserted into the hole.