EasyManua.ls Logo

FlowCon SM.3.0 User Manual

FlowCon SM.3.0
8 pages
To Next Page IconTo Next Page
Page #1 background imageLoading...
Page #1 background image
INSTALLATION AND OPERATION INSTRUCTION
FlowCon SM 50-150mm DYNAMIC SELF BALANCING
CONTROL VALVE
1A95105 - 08/2016
FlowCon International assumes no responsibility
for mistakes, if any, in any printed material.
Denmark Dubai USA Singapore www.owcon.com
- 1 -
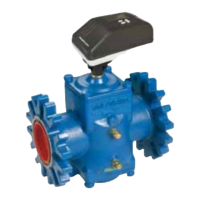
FlowCon SM 50-150mm, 2”-6”
Figure 1
Install the FlowCon SM valve either in the
supply or return pipe work for the unit. It is
recommended that a strainer be installed
prior to the valve body to prevent damage or
blockage due to debris. INSTALL THE VALVE
HOUSING WITH THE FLOW DIRECTIONAL
ARROW POINTING IN THE CORRECT
DIRECTION.
The valve body is available for double flange
connections, i.e figure 1.
O-rings are supplied with the valve body and
are used to seal the connections. Pls. make
sure these are in place in the o-ring grooves
in the inlet and outlet of the valve body, when
installing the housing.
It is
recommended to grease the o-rings with
a silicone grease before installation.
IMPORTANT: Never use mineral oil or petrol
based grease or oil on the o-rings.
Valve bodies are as standard supplied with
pressure/temperature fittings (p/t plugs).
Before finger mounting the p/t plugs in the
body tappings, please seal the threads of the
p/t plugs (DO NOT OVER TIGHTEN).
Fitting and orientation
of the actuator
Pls. install the valve so that the actuator
is located upwards and not lower than the
horizontal line to prevent condensation into
the electronics (pls. see figure 2 next page).
Question and Answer IconNeed help?

Do you have a question about the FlowCon SM.3.0 and is the answer not in the manual?

FlowCon SM.3.0 Specifications

General IconGeneral
BrandFlowCon
ModelSM.3.0
CategoryControl Unit
LanguageEnglish

Summary

Installation and Operation Instruction

Fitting and Orientation of the Actuator

Ensures correct actuator placement to prevent condensation into electronics.

Actuator Wiring and Programming

Wiring Components and Signal Application

Details on applying resistors for signal conversion and wiring for 2-10V or 4-20mA signals.

Failsafe Function Settings

Configuration of Failsafe Open or Failsafe Closed modes using DIP switch #2.

PWM Time Base Resolution Setting

Setting the resolution for PWM signals using DIP switch #3.

Normally Open or Normally Closed Function

Setting the valve operation mode (NO/NC) using DIP switch #1.

Actuator Zero and Span Adjustment

Procedure for adjusting the actuator's zero and span values.

Manual Over-Ride Operation

General Operation Guidelines

Advice on water quality, strainer use, and system filling.

Circuit Board Diode Over-Torque Warning

Explanation of the over-torque warning signal and troubleshooting steps.

Warranty Obligation

Consequences of not adhering to installation and operation instructions.

Maximum Flow Rate Limitation DIP Switch Settings

SM3 Settings (2"-3" Valves)

Table detailing DIP switch settings for maximum flow rates on SM3 valves.

SM4 Settings (3"-4" Valves)

Table detailing DIP switch settings for maximum flow rates on SM4 valves.

SM5 Settings (5"-6" Valves)

Table detailing DIP switch settings for maximum flow rates on SM5 valves.