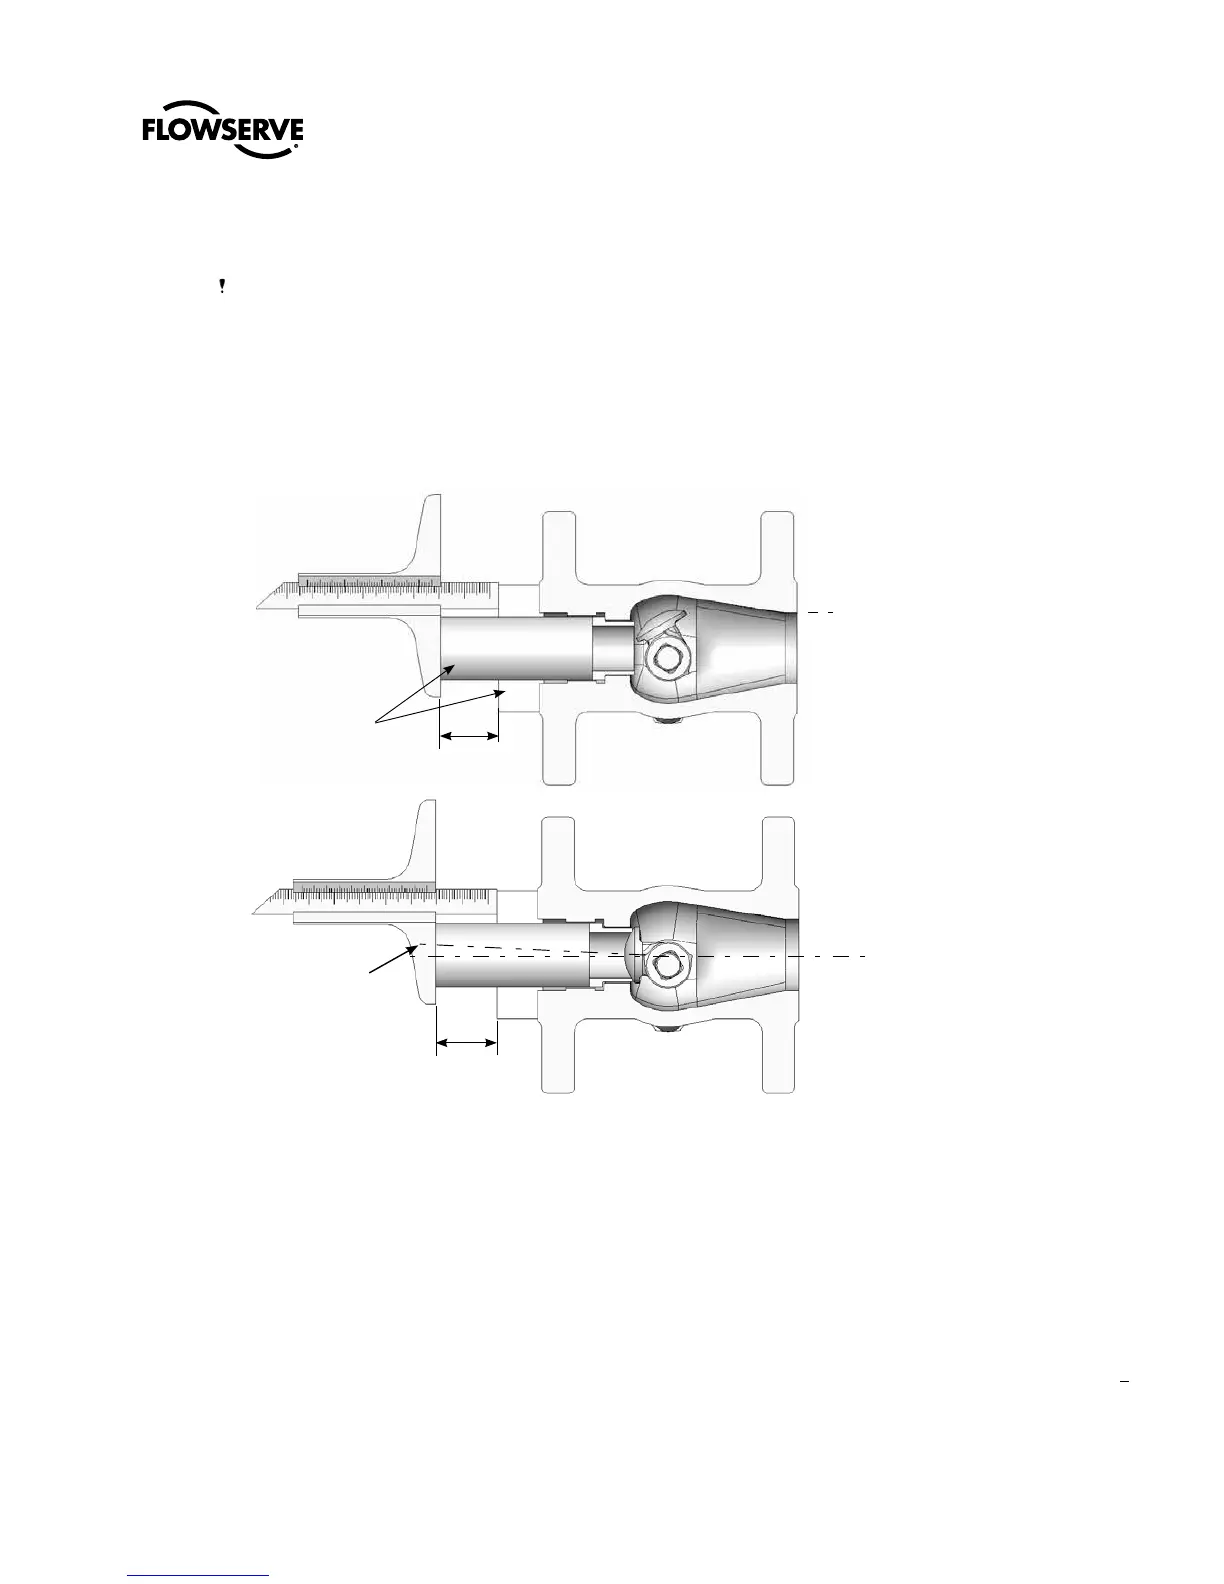
9.8 Close the plug into the seat and then measure dimension “B”
as shown in figure 4b.
NOTE: For optimum sealing do not over-rotate the plug into
the seat. A very slight under-rotation is recommended. (See
figure 5)
9.9 The difference between dimension “A” and “B” represents the
total thickness of the adjustment shims to be added between
the seat and the valve body. See table IV to select the necessary
shim(s). Regardless of the valve size, at least one shim must
be present.
A
Parts supplied with the toolkit
for removing the seat retainer
Figure 4a: definition of dimension
“A” with plug open
Figure 4: shimming the seat
Upon contact with the seat, the
horizontal axis of the plug must never
be rotated past the horizontal axis of
the valve body. The plug should rotate
into the seat as close to the horizontal
axis as possible.
To increase this lag, reduce the
thickness of the shims, and vice-versa.
B
Figure 4b: definition of dimension
“B” with plug closed
9.10 Remove the seat and add the appropriate number of shims.
9.11 Apply lubricant to the threads of the seat retainer. Replace the
seat retainer and tighten manually until it makes contact with
the seat, then loosen it by 1/8 of a turn. Open and close the
valve several times while tightening the seat retainer manually
to position the seat correctly. Finally, close the valve and tighten
the seat retainer according to the values in table III.
9