Process Calibrators
Verification
55
2. Push to turn the Calibrator on.
3. The display should read 0 PSI for the 30G and 0.00 PSI for the 100G with the
deadweight tester opened up to ambient air. If not, push until display reads 0.00
PSI or 0.000 PSI.
Note
The 719 vent should be closed and the pressure/vacuum switch should be in
the Pressure position for pressure measurements.
When verifying vacuum measurement, make sure the pressure/vacuum
switch is in the Vacuum position. Clockwise is for pressure and counter-
clockwise is for vacuum.
4. Setup the deadweight tester for the sequence of PSI inputs from Table 67 for the 719
being tested (30G or 100G). Ensure the pressure has stabilized at each input before
verifying the display reading. Then proceed to the next value.
5. When complete, vent all pressure and disconnect the calibrator from the deadweight
tester.
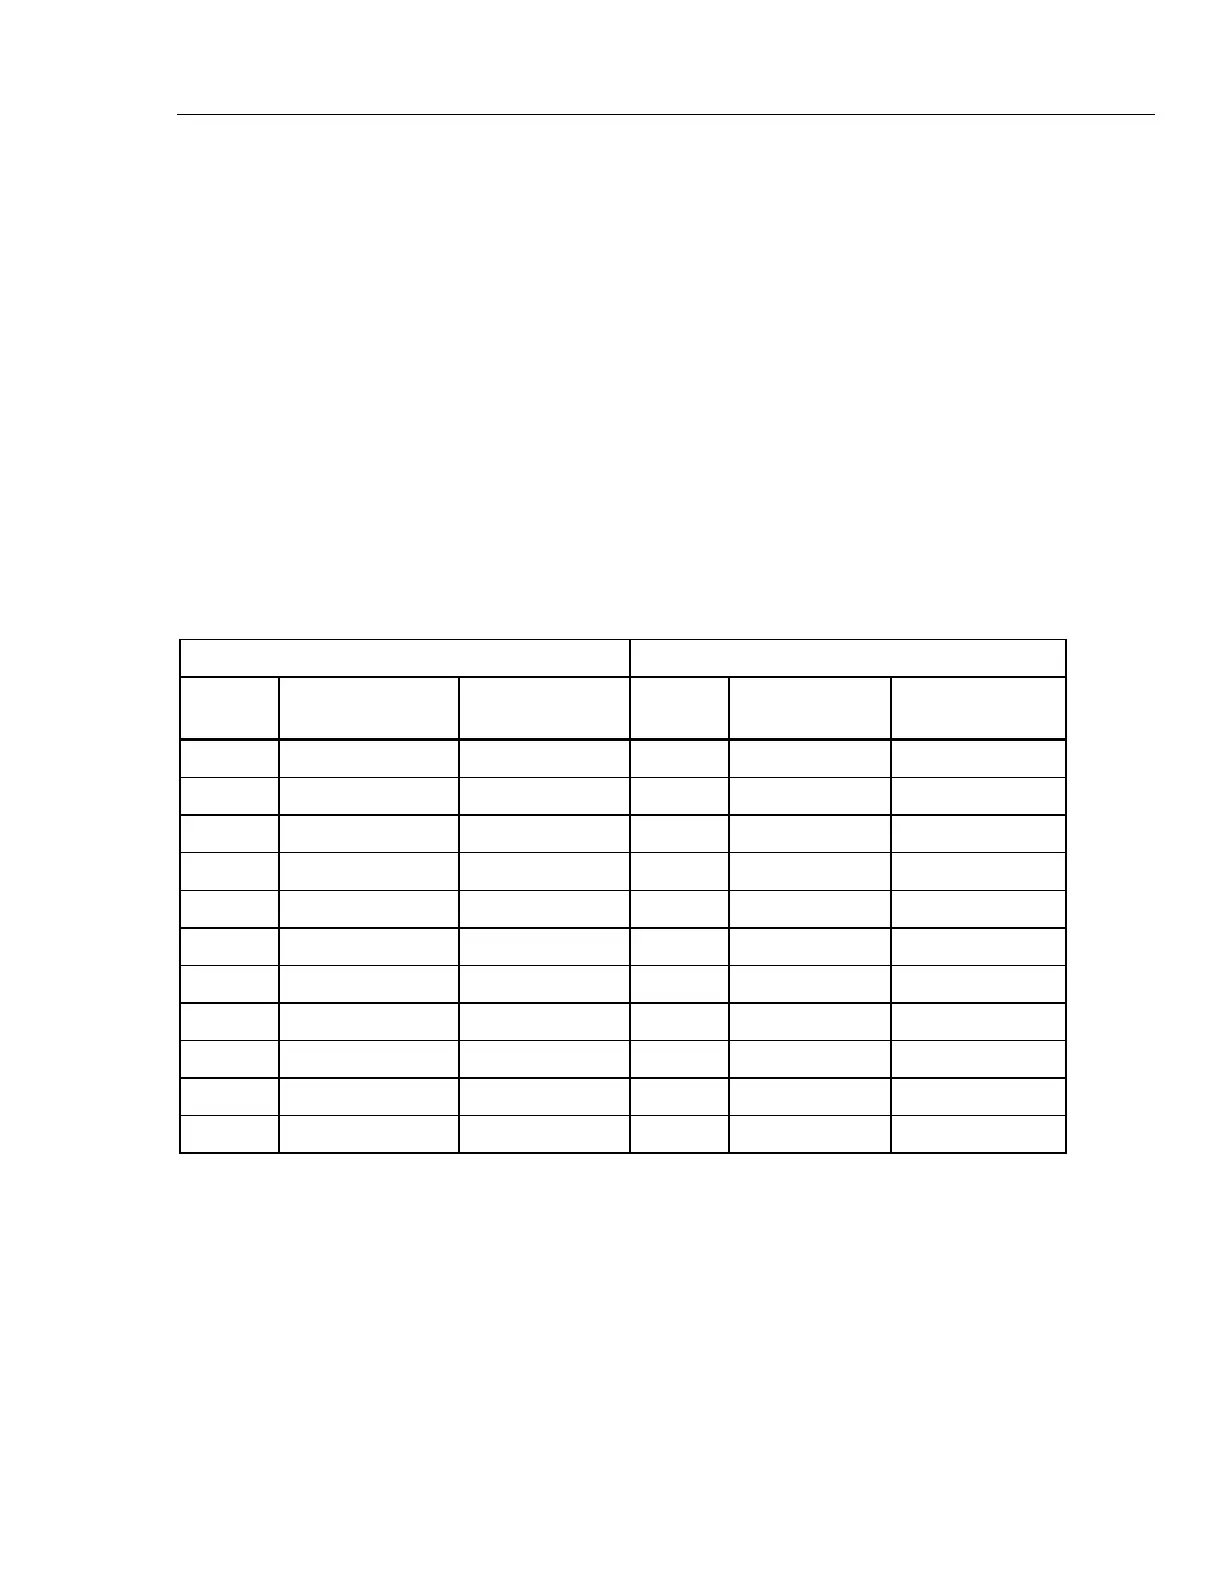
Table 67. 719 Pressure Verification
719 30G 719 100G
Input
Pressure
Display Reading
(6-Month Spec)
Display Reading
(1-Year Spec)
Input
Pressure
Display Reading
(6-Month Spec)
Display Reading
(1-Year Spec)
0 PSI Push Push 0 PSI Push Push
6 PSI 5.992 to 6.008 5.989 to 6.011 20 PSI 19.97 to 20.03 19.96 to 20.04
12 PSI 11.992 to 12.008 11.989 to 12.011 40 PSI 39.97 to 40.03 39.96 to 40.04
18 PSI 17.992 to 18.008 17.989 to 18.011 60 PSI 59.97 to 60.03 59.96 to 60.04
24 PSI 23.992 to 24.008 23.989 to 24.011 80 PSI 79.97 to 80.03 79.96 to 80.04
30 PSI 29.992 to 30.008 29.989 to 30.011 100 PSI 99.97 to 100.03 99.96 to 100.04
24 PSI 23.992 to 24.008 23.989 to 24.011 80 PSI 79.97 to 80.03 79.96 to 80.04
18 PSI 17.992 to 18.008 17.989 to 18.011 60 PSI 59.97 to 60.03 59.96 to 60.04
12 PSI 11.992 to 12.008 11.989 to 12.011 40 PSI 39.97 to 40.03 39.96 to 40.04
6 PSI 5.992 to 6.008 5.989 to 6.011 20 PSI 19.97 to 20.03 19.96 to 20.04
-12 PSI -12.008 to -11.992 -12.011 to -11.989 -12 PSI -12.03 to -11.97 -12.04 to -11.96
1.888.610.7664 sales@GlobalTestSupply.com
Fluke-Direct.com
 Loading...